
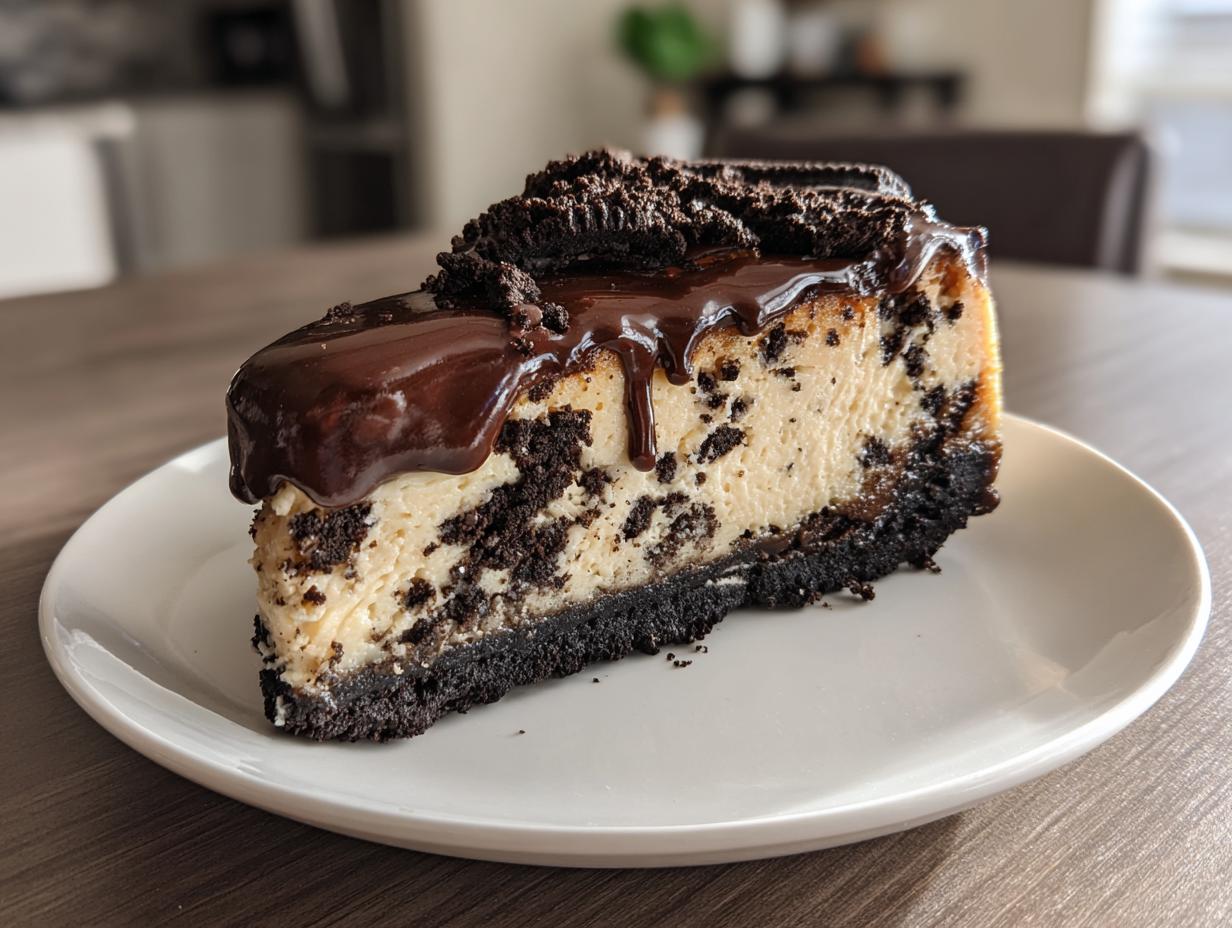
If you’re anything like me, sometimes you just need a showstopper. I mean, a dessert so rich, so creamy, so utterly decadent that it completely takes over the room, right? That’s exactly what we’re chasing with this oreo cheesecake recipe!
Forget those flimsy, overly sweet imitations. This is the real deal—the ultimate, restaurant-quality baked version, complete with that signature dense texture and deep chocolate flavor that makes you close your eyes on the first bite. Growing up, nothing said celebration like a classic dessert, and while I love experimenting, there’s nothing quite like nailing a timeless treasure like this one.
I promise this oreo cheesecake will become the one you use for every birthday and holiday. You’ll want to check out some other delicious dessert recipes later, but first, let’s get this king of cheesecakes made.
- Why This Baked oreo cheesecake Recipe is Your New Favorite
- Gathering Ingredients for Your oreo cheesecake
- Step-by-Step Instructions for Baked oreo cheesecake
- Making the Chocolate Ganache Topping for your oreo cheesecake
- Tips for the Best Homemade oreo cheesecake Experience
- Serving Suggestions for this Rich Cheesecake Recipe
- Storage and Make Ahead Tips for oreo cheesecake
- Frequently Asked Questions about oreo cheesecake
- Sharing Your oreo cheesecake Creation
Why This Baked oreo cheesecake Recipe is Your New Favorite
I know, I know—there are loads of no-bake options out there, and they’re certainly easy. But trust me when I say that nothing beats the rich, slightly tangy density you get from a perfectly baked oreo cheesecake. This method is designed to give you that sliceable, restaurant-style perfection every single time.
- It delivers that essential, luxurious ‘melt-in-your-mouth’ factor.
- We use a water bath method to guarantee it stays crack-free!
- The classic baked texture holds up perfectly to the heavy chocolate ganache topping. You can see another amazing chocolate recipe here: Chocolate Cheesecake Recipe.
Achieving the Perfect Creamy Cheesecake Texture
The secret to that unbelievably perfect cheesecake texture isn’t complicated; it’s just about temperature and patience! Seriously, don’t even think about cracking that egg or tossing the cream cheese in the mixer if they’re straight from the fridge. They absolutely must be room temperature—I usually leave mine out on the counter for about two hours before I even think about starting.
Also, when you add the eggs, mix them in one at a time, and barely mix after they are incorporated. We want those ingredients *just* combined, not whipped stiff! Overmixing introduces too much air, and that air expands while baking, leading to cracks when it cools down. Keep it gentle, and you get pure, creamy silk.
Gathering Ingredients for Your oreo cheesecake
Okay, let’s talk about what you need to create this ultimate oreo cheesecake. Because we’re leaning into the baked route, the ingredient requirements are pretty specific, especially when it comes to texture. You’ll see everything broken down into three main parts: the crust, the filling, and that beautiful ganache on top.
The biggest thing I can stress is making sure your cream cheese and eggs are softened or at room temperature, like I mentioned before. That makes a huge difference in getting a smooth base! If you’re eyeing up this recipe but dreading the oven, you can definitely adapt it—check out the notes below for the quick swap!
For more inspiration on creative bakes, maybe check out my sweet potato cheesecake recipe later on, but for now, gather these essentials:
Ingredient Notes and Substitutions for oreo cheesecake
Listen, baking is forgiving, but cheesecake? Not so much on substitutions! You really need to use the full-fat cream cheese here. Don’t try the 1/3 less fat stuff—it just won’t give you that rich body we’re after for a rich cheesecake recipe like this.
Also, when it comes to the cookies, make sure you crush them finely for the crust, but keep the pieces chunkier for the filling so you get that nice bite throughout. If you decided you wanted to pivot to a No Bake Oreo Cheesecake since you don’t want to turn on the oven, here’s the quick cheat: skip the eggs completely and use 1 cup of cold heavy whipping cream, whipped until stiff peaks form. Fold that in gently right at the end instead of the eggs. Easy peasy!
Step-by-Step Instructions for Baked oreo cheesecake
Alright, let’s get down to business! Making a baked oreo cheesecake sounds intimidating, but I break it down into simple, logical steps, and the key to avoiding cracks is actually the water bath and the cooling process. We take our time here because anything worth doing—especially dessert—is worth doing right!
When it comes out of the oven, we’re *not* letting it sit on the counter to cool rapidly; that’s how cracks show up! We’re actually turning the heat off and leaving it nestled in that hot water bath inside the turned-off oven for a full hour. It sounds weird, but this slow transition makes all the difference for that New York Cheesecake style texture.
See how we manage the cooling process? It’s crucial! For more in-depth guidance on keeping things smooth, take a peek at my tips for a creamy, no-crack cheesecake later on.
Preparing the Oreo Crust and Water Bath Setup
First things first, get that 325°F oven preheating. Now, take your 9-inch springform pan—this is important—wrap the entire outside *tightly* with heavy-duty aluminum foil. You want a good seal because water trying to sneak in is our enemy! Once sealed, mix your Oreo crumbs and melted butter until it looks like wet sand, then press it firmly into the bottom. Pop this crust into the oven for just 10 minutes to set up nicely.
While that’s baking, grab a larger roasting pan. Once the crust is done, place the foil-wrapped springform pan inside the roasting pan. Then, add your hot water to the roasting pan until it comes about halfway up the sides of the cheesecake pan. That’s our protective bath!
Mixing the Filling and Baking the Ultimate oreo cheesecake
Move onto that filling now! Beat the cream cheese, sugar, vanilla, and salt until it’s perfectly smooth. Remember what I said about mixing? Keep it gentle! Add the eggs in one at a time, mixing *just* until they disappear—seriously, stop the mixer the second you can’t see streaks of yellow anymore. Finally, gently fold in those extra crushed Oreos for texture.
Pour that beautiful batter over your set crust, slide the whole setup into the oven, and bake for about 60 to 75 minutes. You’re looking for edges that are firm, but the very center should still have the tiniest slight jiggle. That jiggle means moisture, and moisture means creamy!
Making the Chocolate Ganache Topping for your oreo cheesecake
You’ve done the hard part—the baking and the chilling! Now we get to the fun, decadent oreo dessert finish: the chocolate ganache. This topping takes maybe five minutes to whip up, but it makes your oreo cheesecake look like it came straight from a fancy bakery case.
It’s surprisingly simple! You just heat up the heavy cream until it’s whispering about simmering, pour that hot cream right over your chopped semi-sweet chocolate, and let it sit there for five whole minutes. Don’t stir it yet! After five minutes, whisk it up until it’s totally smooth and glossy. Seriously, if you need another creamy idea later, check out my white chocolate mousse tart recipe.
Once that ganache cools down just a smidge, pour it right over your beautifully chilled cheesecake and gently spread it to the edges. It sets up just gorgeous!
Tips for the Best Homemade oreo cheesecake Experience
We’ve made it through the baking, and now we enter the sacred chilling time! I hate this part, but you absolutely cannot rush it if you want that authentic, Cheesecake Factory Style Cheesecake density. Aim for a minimum of six hours, but honestly, overnight is my golden rule. That minimum chill time is non-negotiable for clean slices.
When it comes to unmolding, be super careful! Before you even try to release that springform, run a thin, sharp knife dipped in hot water all the way around the edge of the cheesecake, between the cake and the pan side. Let it cool slightly, then carefully release that outer ring.
If you want to see a completely different but equally delicious dessert, check out my chocolate chip cheesecake recipe next time! But for this one, patience during chilling is the final secret ingredient.
Serving Suggestions for this Rich Cheesecake Recipe
Because this rich cheesecake recipe hits so hard on flavor, you don’t need a lot of fuss on the side, but presentation matters, especially if you’re serving it for party dessert ideas!
Always serve this straight from the fridge—chilled is best so that ganache has a beautiful snap to it. If you want an extra layer of luxury, a dollop of freshly whipped cream on the side is perfect. It cuts through the richness just beautifully.
For something a little unexpected, a few fresh raspberries or a light drizzle of raspberry sauce pairs wonderfully with the dark chocolate. Honestly, though, it stands perfectly proud all by itself! Before you go, maybe save my recipe for pudding cookies for your next cookie craving!
Storage and Make Ahead Tips for oreo cheesecake
This is truly a fantastic make ahead dessert because, honestly, it tastes even better the next day! You absolutely must chill this oreo cheesecake for at least six hours, but overnight is where it really hits its stride. Once it’s chilled, you can keep leftovers tightly covered in the fridge for up to four days.
If you need to freeze it—maybe you made it for a holiday gathering way ahead of time—that works too! Chill it completely first, cover the whole thing in a couple of layers of plastic wrap, and then slide it into a larger zip-top bag. It freezes beautifully for about a month. When you’re ready to eat it, just let it thaw slowly in the fridge overnight. It holds up so well!
If you want to check out my favorite no-bake option for easy entertaining later, you might want to save my recipe for the butterfinger pie!
Frequently Asked Questions about oreo cheesecake
I totally get it—when you’re making something this decadent, you want to make sure you’ve got every detail down pat! Here are some of the questions I hear most often about getting the best oreo cheesecake.
Can I make this a No Bake Oreo Cheesecake?
You absolutely can! If you’re in a hurry or it’s just too hot to turn on the oven, jump over to my notes section in the recipe details. I give you the quick swap: skip the eggs entirely and fold in one cup of stiffly whipped heavy cream at the end. Just remember, if you go that route, you’re looking at a longer chill time—at least eight hours—to get that structure, making it a wonderful no bake Oreo cheesecake!
How do I stop my cheesecake from cracking?
This is the million-dollar question! My two biggest secrets, which you saw in the main instructions, are using room-temperature ingredients and employing the cooling trick. Seriously, the slow cool is key. Baking with a water bath means steady heat, and then leaving it in the turned-off oven for an hour creates a gradual temperature drop. If you want to dive deeper into preventing surface disasters, I have a whole section dedicated to that on my cheesecake page!
Can I use different cookies than Oreos?
You can certainly swap out your cookies, but you’re changing the inherent flavor of the dessert, so be ready for that! If you want an easy switch, chocolate wafers or even thin chocolate chip cookies can work for the crust and filling. For a fun next project, you might love my easy no-bake Oreo pie recipe which plays with texture differently. However, if you want that classic chocolate cookie crunch, sticking to Oreos is the way to go for an Ultimate Oreo Cheesecake!
How can I make this taste more like Cheesecake Factory Style Cheesecake?
People rave about that thick, luscious texture, right? To get that real Cheesecake Factory style cheesecake vibe, make sure you are using full-fat brick cream cheese—no light versions! Also, resist adding extra liquid to the batter. The secret is keeping the batter thick; that forces a denser texture when baked. If you want to compare notes on their style, I link to a great breakdown here.
Sharing Your oreo cheesecake Creation
I’ve poured my heart into making sure this oreo cheesecake turns out perfectly for you! Now, I really want to know how it went in your kitchen. Did the water bath work its magic? Did you resist the urge to cut into it before it chilled completely? Don’t keep those delicious results to yourself!
Please take a moment to leave me a rating and tell me all about it in the comments below! Even better, snap a picture of your creamy, chocolate-topped masterpiece and tag me on social media. I absolutely love seeing your successes—it keeps me inspired to share more tried-and-true favorites like these ultimate vanilla cupcakes next time!
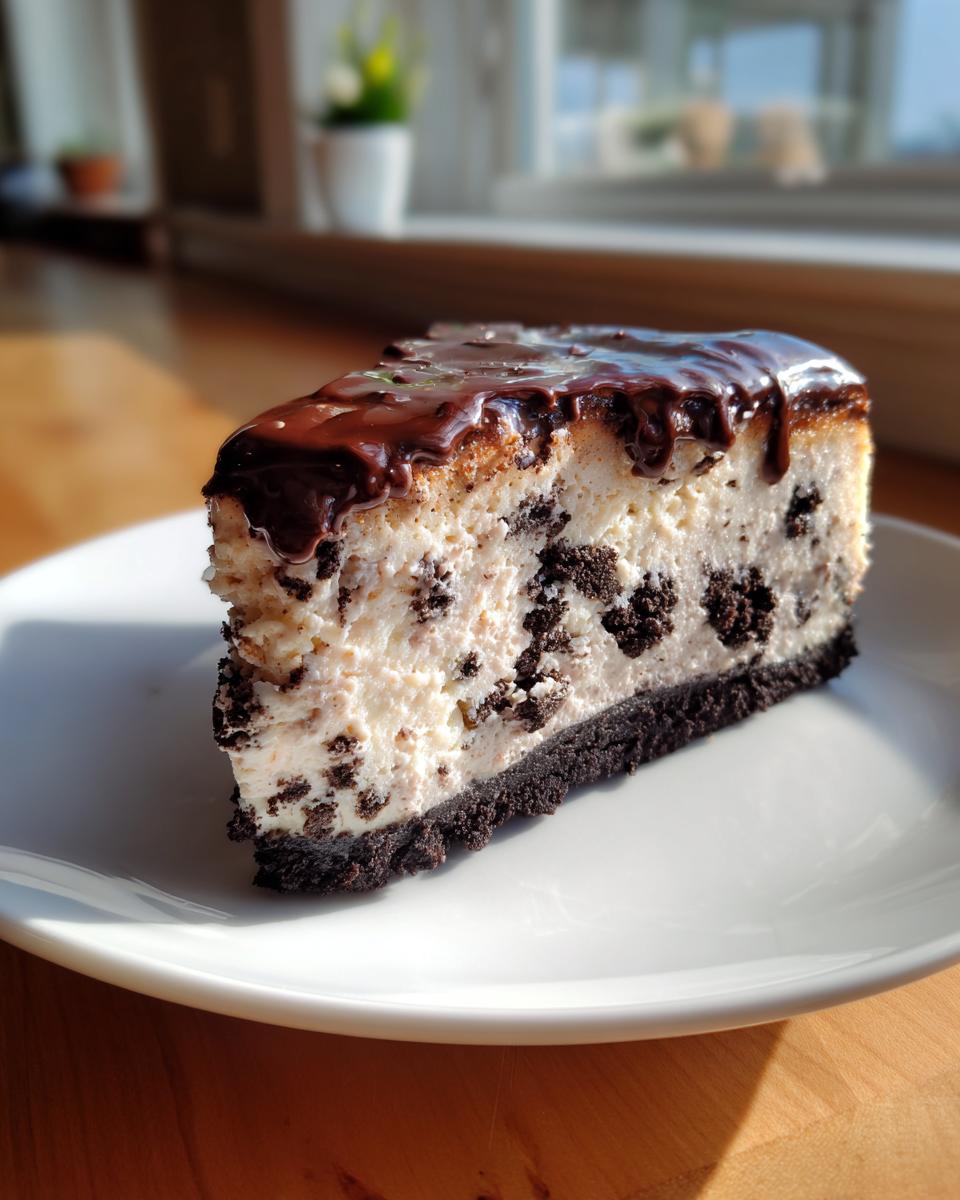
PrintUltimate Baked Oreo Cheesecake with Chocolate Ganache
Create a rich, creamy, and decadent baked Oreo cheesecake that rivals restaurant versions. This recipe features a buttery Oreo crust, a velvety filling studded with chocolate cookies, and a simple chocolate ganache topping.
- Prep Time: 25 min
- Cook Time: 75 min
- Total Time: 9 hours 40 min
- Yield: 12 servings 1x
- Category: Dessert
- Method: Baking
- Cuisine: American
- Diet: Vegetarian
Ingredients
- 1 3/4 cups Oreo cookie crumbs (about 25 cookies)
- 1/4 cup unsalted butter, melted
- 3 (8 ounce) packages cream cheese, softened
- 1 1/2 cups granulated sugar
- 1 teaspoon vanilla extract
- 1/4 teaspoon salt
- 4 large eggs, room temperature
- 1 cup crushed Oreo cookies (for filling)
- 1/2 cup heavy cream (for ganache)
- 4 ounces semi-sweet chocolate, chopped (for ganache)
- 1/2 cup Oreo cookie pieces (for topping)
Instructions
- Preheat your oven to 325°F (160°C). Wrap the outside of a 9-inch springform pan tightly with heavy-duty aluminum foil to prepare for a water bath.
- Prepare the crust: Mix the Oreo cookie crumbs and melted butter in a bowl until combined. Press the mixture firmly into the bottom of the prepared springform pan. Bake the crust for 10 minutes. Remove from the oven and let it cool slightly.
- Prepare the filling: In a large bowl, beat the softened cream cheese, granulated sugar, vanilla extract, and salt with an electric mixer until smooth. Scrape down the sides of the bowl.
- Beat in the eggs one at a time, mixing just until each egg is incorporated. Do not overmix. Gently fold in the 1 cup of crushed Oreo cookies.
- Pour the filling over the cooled crust in the springform pan. Place the springform pan into a larger roasting pan. Carefully pour hot water into the roasting pan until the water reaches halfway up the sides of the springform pan. This is the water bath.
- Bake for 60 to 75 minutes, or until the edges are set but the center still has a slight jiggle.
- Turn off the oven, crack the oven door open slightly, and let the cheesecake cool inside the oven for 1 hour. This slow cooling prevents cracking.
- Remove the cheesecake from the water bath and foil. Let it cool completely on a wire rack, then chill in the refrigerator for at least 6 hours, or preferably overnight.
- Prepare the ganache: Place the chopped chocolate in a heatproof bowl. Heat the heavy cream in a small saucepan until it just begins to simmer. Pour the hot cream over the chocolate. Let it sit for 5 minutes, then whisk until smooth.
- Pour the chocolate ganache over the chilled cheesecake and spread evenly. Sprinkle with extra Oreo cookie pieces. Release the springform side and serve your ultimate Oreo cheesecake.
Notes
- Use room temperature ingredients for the cream cheese and eggs to achieve the creamiest texture.
- For a perfect texture, avoid overmixing the batter once the eggs are added.
- If you prefer a no-bake version, substitute the eggs with 1 cup of cold heavy whipping cream whipped to stiff peaks and folded in last. Chill for 8 hours.
Nutrition
- Serving Size: 1 slice
- Calories: 480
- Sugar: 35g
- Sodium: 310mg
- Fat: 32g
- Saturated Fat: 19g
- Unsaturated Fat: 13g
- Trans Fat: 0.5g
- Carbohydrates: 45g
- Fiber: 1g
- Protein: 7g
- Cholesterol: 115mg