
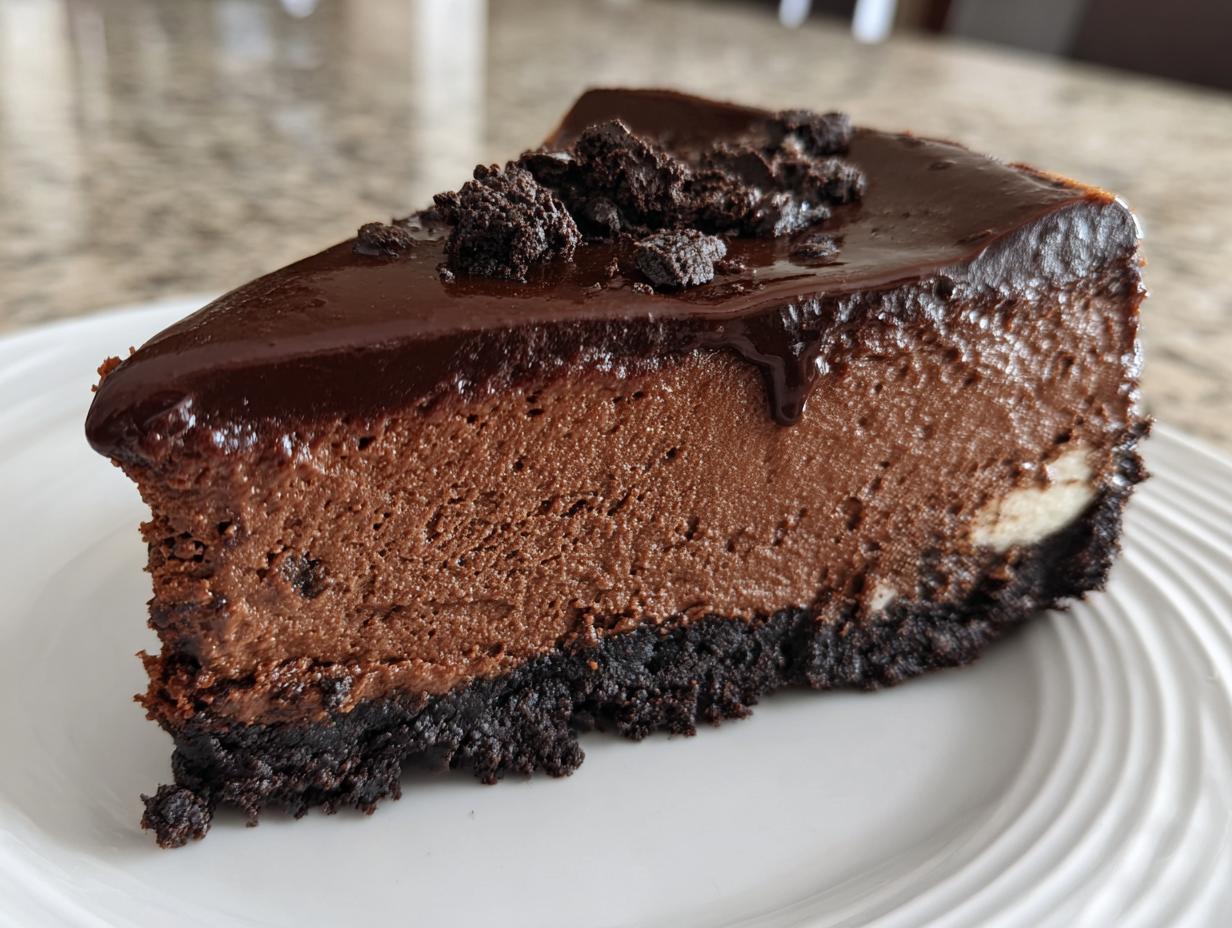
If you are looking for that show-stopping dessert that makes everyone stop talking the moment it hits the table, you’ve found it. Forget complicated failures; I’m sharing my absolute favorite recipe for a truly Rich and Creamy Chocolate Cheesecake, complete with that perfect, crunchy Oreo crust and a glossy chocolate ganache topping. For me, food is all about connection, and nothing seals a family gathering quite like cutting into a perfect slice of something decadent. Trust me when I say this chocolate cheesecake isn’t just a recipe; it’s a memory waiting to happen. It’s surprisingly straightforward, and you can find more easy dessert ideas right here.
- Why This Rich and Creamy Chocolate Cheesecake Recipe Works
- Ingredients for the Perfect Chocolate Cheesecake
- Step-by-Step Instructions for Your Chocolate Cheesecake Recipe
- Tips for Achieving the Ultimate Creamy Cheesecake Texture
- Variations on This Decadent Chocolate Dessert Ideas
- Storage and Reheating Instructions for Homemade Cheesecake
- Serving Suggestions for Your Gourmet Cheesecake
- Frequently Asked Questions About Chocolate Cheesecake
- Share Your Rich Chocolate Dessert Ideas
Why This Rich and Creamy Chocolate Cheesecake Recipe Works
I understand that baking a cheesecake can feel a little intimidating, especially when you’re hoping for that incredibly decadent, yet perfectly creamy texture. That’s why I’m giving you my tried-and-true method. This recipe, straight from my kitchen, focuses on simple techniques that guarantee an amazing result every single time. We combine rich melted chocolate with quality cocoa powder, giving you deep flavor without any bitterness. Plus, I walk you through the foolproof water bath technique—it’s the secret to avoiding those dreaded cracks!
When you follow these steps, you get a cheesecake that just melts in your mouth. If you’ve struggled with other recipes, you’ll find this creamy cheesecake guide is different. It’s all about careful temperatures and patience.
Key Attributes of Our Decadent Cheesecake
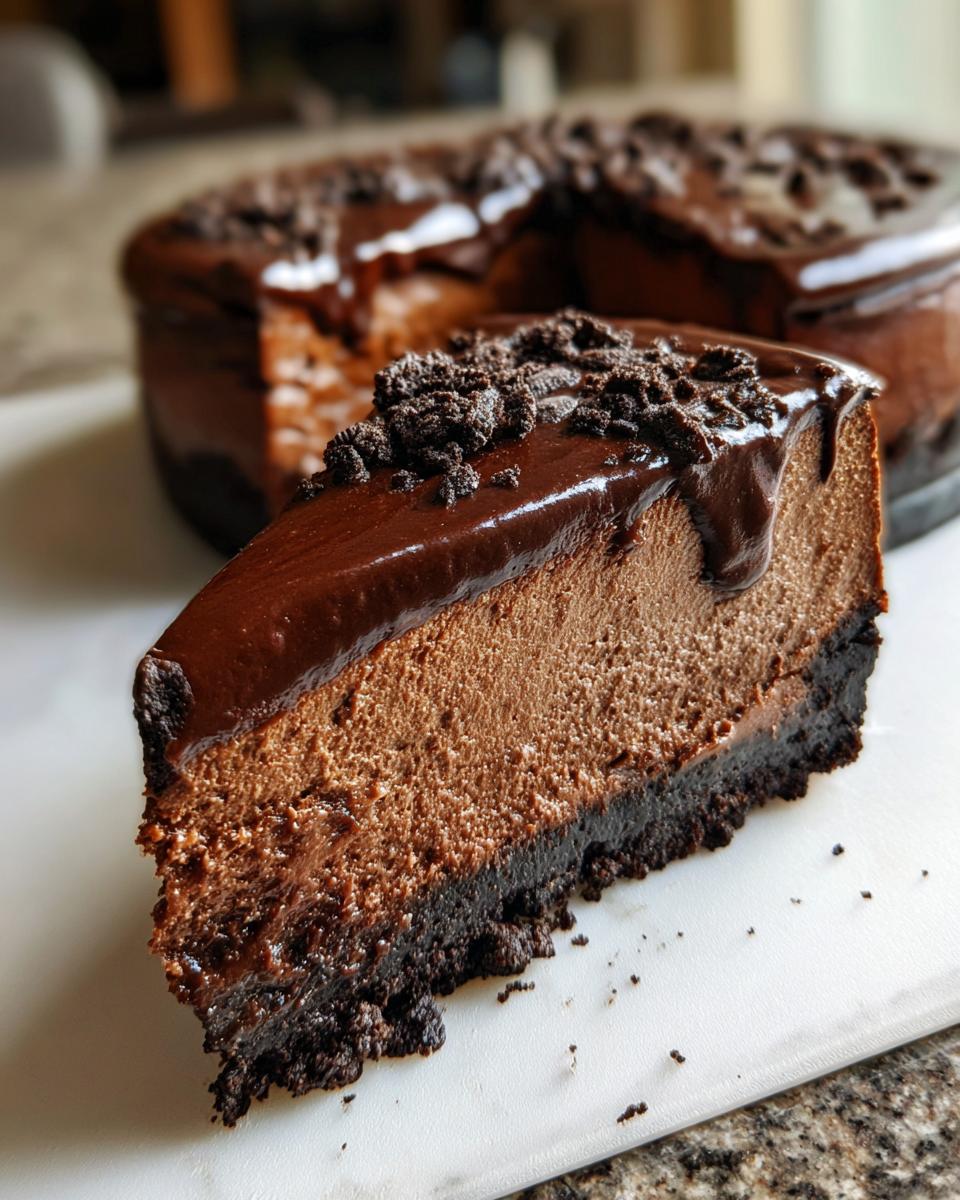
- The base is a crunchy, buttery Oreo Crust Cheesecake—so much better than graham crackers!
- We use a water bath to ensure that signature smooth, velvety texture throughout.
- That beautiful, shiny layer of homemade chocolate ganache makes it look gourmet.
- It’s a perfectly balanced blend of bittersweet and semi-sweet chocolate for true chocolate lovers.
Ingredients for the Perfect Chocolate Cheesecake
Okay, listen up! When we’re making something this decadent, the quality and quantity of your ingredients matter more than anything. This isn’t the time to eyeball things; precision is what keeps this chocolate cheesecake from cracking and ensures that unbelievably rich flavor profile. I’ve written everything out exactly as I use it. You’ll want to make sure everything for the filling is actually at room temperature—I mean, truly soft—before you even think about turning the mixer on. Don’t forget to check out my chocolate chip cheesecake inspiration later!
For the Oreo Crust Cheesecake Base
- One and three-quarters cups chocolate cookie crumbs (that’s about 30 Oreos, the whole cookie with the cream filling, don’t bother scraping it out!)
- One-quarter cup granulated sugar
- Six tablespoons unsalted butter, melted
For the Creamy Cheesecake Filling
This is where the magic happens, so pay attention to the textures here. The cream cheese must be soft, and that melted chocolate needs to be cooled slightly so you don’t scramble the eggs!
- Three (8 ounce) packages cream cheese, totally softened
- One and a half cups granulated sugar
- One-quarter cup unsweetened cocoa powder (use a good quality one, please!)
- One teaspoon vanilla extract
- One-quarter teaspoon salt
- Three large eggs
- Four ounces bittersweet chocolate, melted and cooled completely
For the Smooth Chocolate Ganache Topping
This topping comes together in seconds, but it makes all the difference in presentation. It’s the perfect final layer.
- One cup heavy cream
- Four ounces semi-sweet chocolate, finely chopped
Step-by-Step Instructions for Your Chocolate Cheesecake Recipe
Alright, let’s get baking! This is the part where you transform those rich ingredients into the best chocolate cheesecake you’ve ever made. I need you to trust the process here, especially when it comes to the oven steps. My best advice is to move with purpose but not rush the mixing. For a detailed look at the whole process, check out my full cheesecake tutorial, but here are the exact steps I follow to guarantee that gorgeous, creamy interior.
Preparing the Oreo Crust Cheesecake Base
First things first, get your oven warmed up to 350°F (175°C). Make sure you wrap that 9-inch springform pan tightly—I mean tightly—with heavy-duty foil. This protects it from the water bath later! Mix your cookie crumbs, that quarter cup of sugar, and the melted butter until it looks like wet sand. Press that mixture firmly into the bottom of the pan—push it down as much as you can! Then, pop it in the oven for 10 minutes. Once that’s done, pull it out and drop the oven temp down to 325°F (160°C).
Mixing the Rich Chocolate Filling
Take your beautifully softened cream cheese and beat it until it’s totally smooth—no lumps allowed! Now, slowly beat in the 1 1/2 cups of sugar, the cocoa powder, vanilla, and salt until everything is just barely combined. The most crucial step comes now: add those three eggs one at a time, mixing on low speed just until each one disappears. I have to stop myself from overmixing here every time because we want that creamy flavor, not an airy texture! Finally, gently fold in that melted, cooled bittersweet chocolate until the batter looks uniform and deeply colored.
Baking the Chocolate Cheesecake with a Water Bath
Pour that chocolate filling right over your cooled crust. Now, grab a large roasting pan—bigger than your springform pan! Set the cheesecake inside the roasting pan. Carefully pour hot water into the roasting pan until the water line comes up about halfway on the sides of the springform pan. That’s your water bath! Bake it for 55 to 65 minutes. You’re looking for the edges to be set firmly, but the very center should still have a slight, gentle jiggle when you touch the side of the pan softly.
Cooling and Chilling for the Best Results
Don’t panic when the time is up! Turn the oven off completely, but leave the cheesecake inside with the door cracked open just a tiny bit. Let it hang out in the cooling oven for a solid hour. This slow, gentle cool-down is key for avoiding cracks. After that hour, take it out, let it finish cooling on the counter, and then wrap it up tight. This homemade cheesecake needs at least six hours, but honestly, overnight chilling delivers the best texture.
Making and Applying the Chocolate Ganache
While the cheesecake is chilling, you can whip up that beautiful chocolate ganache topping. Heat your heavy cream slowly in a saucepan until it’s just simmering—don’t let it boil wildly! Take it off the heat and pour that hot cream right over your finely chopped semi-sweet chocolate in a bowl. Let it sit undisturbed for about five whole minutes. Then, whisk it gently until it’s silky smooth and glossy. Pour the ganache right over the top of your fully chilled cheesecake and spread it evenly. Pop it back in the fridge for about 30 minutes until that ganache sets up perfectly before you serve this rich chocolate dessert.
Tips for Achieving the Ultimate Creamy Cheesecake Texture
I know, I know—the fear of the crack. It haunts every baker who attempts a beautiful, decadent dessert like this one. The whole point of this chocolate cheesecake is that gorgeously smooth, dense, creamy consistency, and honestly, achieving it is less about magic and more about being smart with temperature and moisture retention. Trust me, once you learn these tricks, you’ll feel like a total pro. These aren’t just random tips; these are the details I pulled straight off my notes from testing batches until I got it perfect. We want that ‘wow’ factor when you cut into it!
My number one rule, which I stressed for the filling ingredients, is to let your cream cheese sit out until it’s genuinely room temperature. I mean, it should squish easily if you press it while handling it. Cold cream cheese equals lumps, and lumps mean an uneven bake! We’re aiming for velvety smoothness here, not a chunky surprise in the middle of this otherwise fantastic gourmet cheesecake.
Mastering the Water Bath Technique for Your Chocolate Cheesecake
If you take only one thing away from this whole section, let it be this: use the water bath! Seriously, it’s non-negotiable for that creamy cheesecake texture. The water bath, or Baine-Marie as some folks call it, creates this steamy, humid environment around your cheesecake as it bakes. This environment ensures the exterior doesn’t bake way faster than the center, which is what causes cracking.
Why is steam so important? It keeps the cheesecake happy and prevents rapid setting. If you absolutely can’t face wrapping the pan in foil and dealing with the water bath—although I highly recommend you try it—the only alternative is to bake it really low and slow, dropping the temp down to about 300°F (150°C) and adding an extra 10 to 15 minutes to the baking time. But honestly, the water bath is the simplest way to get that foolproof, crack-free result. You can also learn more about creating fluffy textures in my post on achieving creamy textures, which shares similar principles!
Variations on This Decadent Chocolate Dessert Ideas
Now that you’ve mastered the foundation of this amazing chocolate cheesecake, let’s talk about making it truly your own! Just because this recipe is already spectacular doesn’t mean we can’t play around a little bit. I love how flexible a great base can be, especially when we are dealing with something as fundamental as chocolate. Sure, the original is great for special occasions or as a stunning holiday dessert, but sometimes you just need to ramp up the chocolate factor to eleven!
Remember, we are sticking to the baked method here—that ultra-creamy texture is hard to beat! But we can absolutely play with the fillings and toppings. I’ve gathered a few ideas that my friends always insist I try when I make this for parties. If you’re interested in trying something completely different but equally chocolatey, check out my guide to making a flourless chocolate cake for comparison.
Creating a Triple Chocolate Dessert Experience
If you think four ounces of bittersweet chocolate in the batter wasn’t enough, then we need to load this baby up! To turn this into a true Triple Chocolate Dessert, try mixing in about one cup of high-quality semi-sweet or milk chocolate chips right before you pour the batter into the crust. Make sure the chips have been tossed in a tiny bit of flour first so they don’t sink straight to the bottom during baking—that’s a little trick I picked up years ago!
Another fun twist is changing up the chocolate you use in the filling itself. Instead of just bittersweet, try using four ounces of dark chocolate for the filling component, and then for the ganache, use a really good quality milk chocolate. The difference in flavor depth between dark, semi-sweet, and milk chocolate when layered like this is just phenomenal. It really takes this from a great rich chocolate dessert to one that people talk about for weeks!
And just a quick thought on crusts: if you are sick of Oreos for some crazy reason, you can use chocolate wafer cookies or even crushed chocolate graham crackers. Just make sure you adjust the butter slightly if the crumbs seem drier. It’s all about keeping that base firm enough to hold everything!
Storage and Reheating Instructions for Homemade Cheesecake
When you’ve made something this incredible—a truly decadent cheesecake—you want to make sure it lasts! I usually don’t have leftovers because my family descends like hawks, but I have perfected the storage process over the years. You definitely don’t want to just throw residual cake onto the counter; we need to protect that beautiful ganache topping and keep the base firm.
The short answer is that this chocolate cheesecake keeps wonderfully when refrigerated. Once the ganache has set completely, cover the springform pan—or transfer slices to an airtight container if you already cut it. It stays picture-perfect and tastes just as amazing for up to four full days in the fridge. The texture remains wonderfully creamy, which is exactly what we’re aiming for with this baked recipe!
Now, can you freeze it? Yes, you absolutely can, and believe me, having an emergency slice of homemade cheesecake tucked away for a rainy day is a great idea. If you plan to freeze it, I strongly recommend slicing it before you freeze it, and absolutely do not freeze it with the ganache on yet! Just wrap the individual slices tightly in plastic wrap, then slide them into a freezer-safe bag or container.
It usually takes a good 8 to 10 hours to thaw completely in the refrigerator if frozen. Once it’s thawed, then you can add the ganache topping you prepared earlier, or just let it thaw plain and top it with some fresh whipped cream instead. It’s a lifesaver when you need a quick, impressive dessert but don’t have time for a full baking session!
Serving Suggestions for Your Gourmet Cheesecake
You’ve done the hard work! You’ve managed the water bath, you’ve waited impatiently for the chill time, and now you have this stunning, deeply chocolatey centerpiece ready to go. How do we serve this gourmet cheesecake so it truly sings? Honestly, once that glossy chocolate ganache is perfectly set, it doesn’t need much visual help, but a little flavor counterpoint can really elevate the experience from great to absolutely unforgettable!
Since this is such a rich, intense dessert, I always look for something bright or slightly bitter to cut through that richness. This is what makes it the perfect ending for any big meal or a wonderful addition to your spread of holiday desserts. Think about what you’d serve at a big dinner party—you want something light on the palate after something heavy!
If you’re looking for savory inspiration to serve *before* this spectacular finish, I have an amazing creamy white chicken chili recipe that’s always a huge crowd-pleaser!
Here are my favorite ways to present this ultimate chocolate dessert recipes showstopper:
- Fresh Berries for Brightness: Don’t overcomplicate it! A simple scattering of raspberries or thinly sliced strawberries across the plate adds beautiful color and a necessary pop of tartness that balances the deep chocolate flavor. A mix of slightly tart blackberries works wonderfully, too.
- Whipped Cream with a Twist: If you want to serve it with something creamy, use lightly sweetened heavy cream whipped just to soft peaks. For an extra layer of flavor, infuse the cream with a little orange zest before whipping—it complements the dark chocolate beautifully.
- The Coffee Pairing: Truly, this is the best chocolate cheesecake pairing! Serve a small slice alongside a strong cup of espresso or a rich dark roast coffee. The bitterness of the coffee is the perfect foil for the sweetness of the filling and crust. You get that classic European feel!
- A Dusting of Contrast: If you decided to skip the ganache or added it on top of the ganache (which is decadent, I won’t judge!), a very light dusting of high-quality unsweetened cocoa powder or even a tiny bit of sea salt sprinkled over the top right before serving just makes the chocolate flavor pop even more.
No matter how you serve it, remember that presentation is part of the fun. Use a warm knife, wiping it clean between each slice, for those perfect, clean wedges. Everyone deserves a beautiful slice of this creamy perfection!
Frequently Asked Questions About Chocolate Cheesecake
I totally get it; sometimes you just need a quick answer before you dive in or while you’re waiting for that chilling time to end! Cheesecake questions pop up all the time, especially around cracking and timing. Here are a few things I hear all the time when folks are making my chocolate cheesecake recipe or exploring other easy cheesecake recipes. Don’t hesitate to drop your own questions in the comments below if I missed something!
Can I make this a No Bake Chocolate Cheesecake instead?
That’s a great question! This particular recipe—the one with the oven, the eggs, and the water bath—is engineered to be a baked, ultra-rich, dense version. A No Bake Chocolate Cheesecake is a completely different animal, my friend! No-bake versions rely on gelatin or whipped cream stabilizers to set up strictly in the fridge, so they end up lighter and usually fluffier than this dense beauty.
If you’re looking for something super quick that doesn’t need the oven at all, you should search specifically for “No Bake Chocolate Cheesecake recipes.” They are fantastic for summer when you don’t want to heat up the kitchen, but they won’t have this exact same intense, creamy pull that the baked version offers. I have a few ideas for those on the site, too! Check out my easy no-bake recipe collection for some inspiration!
What is the best way to prevent my chocolate cheesecake from cracking?
Ah, the dreaded crack! This is the number one fear for anyone baking a cheesecake, and honestly, it’s all about gentle cooking and cooling. If you remember nothing else, remember these two things: the water bath and the slow cool-down. The water bath keeps the air around the cake moist, meaning the edges don’t dry out and shrink faster than the center.
The second step is equally important: once the baking time is up, you must turn the oven off, crack the door open, and leave the cheesecake inside for at least one hour. This gradual temperature drop prevents thermal shock, which is what causes those ugly fissures. If you follow those steps for this Decadent Cheesecake, you’ll get smooth perfection every time!
Can I skip the Oreo Crust?
You can, but why would you want to skip the best part? The crunch of that cookie crust is the perfect texture contrast to the smooth, rich chocolate filling. If you absolutely must skip it, just press a thin layer of crushed graham crackers mixed with melted butter on the bottom. But really, this recipe shines because of that satisfyingly crunchy Oreo Crust Cheesecake layer beneath all that decadence!
How long does the chocolate ganache stay shiny?
The chocolate ganache topping is made with heavy cream and chocolate, which means it sets up firm in the fridge, keeping that beautiful mirror-like shine! As long as the cheesecake stays refrigerated and well-covered, the ganache should hold its glossy look for the entire time the cake remains fresh (about 4 days). If you take the cheesecake out to serve it, the ganache might soften a tiny bit at room temperature, but it should never actually melt unless it gets warm.
Share Your Rich Chocolate Dessert Ideas
Now that you have the blueprint for what I truly believe is the Best Chocolate Dessert on the block—that ultimate chocolate cheesecake—I really hope you give it a whirl! There is honestly no greater joy for me than knowing one of my trusted recipes has made it onto your family table for a holiday or just a special weekend treat.
When you finish yours, I absolutely want to hear about it! Did the ganache set up perfectly? How did your family react to that deep, rich chocolate flavor? Please don’t be shy—come back here and leave a rating and a little note in the comments below so I can see all your beautiful results. Hearing about your successes is what keeps me sharing these generational favorites! If you have any final kitchen questions after seeing this whole tutorial, you can always reach out to me directly via my contact page.
Go on, get that cream cheese softened, crumble those Oreos, and make some serious dessert magic happen!
PrintRich and Creamy Chocolate Cheesecake with Oreo Crust and Ganache
Make this decadent chocolate cheesecake for a show-stopping dessert. It features a crunchy Oreo crust, a rich, creamy chocolate filling, and a smooth chocolate ganache topping. This recipe is perfect for holidays or any special occasion.
- Prep Time: 30 min
- Cook Time: 65 min
- Total Time: 7 hours 35 min
- Yield: 12 servings 1x
- Category: Dessert
- Method: Baking
- Cuisine: American
- Diet: Vegetarian
Ingredients
- 1 3/4 cups chocolate cookie crumbs (about 30 Oreo cookies)
- 1/4 cup granulated sugar
- 6 tablespoons unsalted butter, melted
- 3 (8 ounce) packages cream cheese, softened
- 1 1/2 cups granulated sugar
- 1/4 cup unsweetened cocoa powder
- 1 teaspoon vanilla extract
- 1/4 teaspoon salt
- 3 large eggs
- 4 ounces bittersweet chocolate, melted and cooled
- 1 cup heavy cream
- 4 ounces semi-sweet chocolate, chopped (for ganache)
Instructions
- Preheat your oven to 350°F (175°C). Wrap the outside of a 9-inch springform pan tightly with heavy-duty aluminum foil.
- Prepare the crust: In a medium bowl, mix the chocolate cookie crumbs, 1/4 cup sugar, and melted butter until combined. Press the mixture firmly into the bottom of the prepared springform pan. Bake for 10 minutes. Let cool.
- Reduce the oven temperature to 325°F (160°C).
- Prepare the filling: In a large bowl, use an electric mixer to beat the softened cream cheese until smooth. Add 1 1/2 cups sugar, cocoa powder, vanilla extract, and salt. Beat until just combined.
- Beat in the eggs one at a time, mixing on low speed after each addition until incorporated. Do not overmix.
- Gently mix in the melted and cooled bittersweet chocolate until the batter is uniform.
- Pour the filling over the cooled crust. Place the springform pan inside a larger roasting pan. Carefully pour hot water into the roasting pan until the water reaches halfway up the sides of the springform pan (this is a water bath).
- Bake for 55 to 65 minutes, or until the edges are set but the center still jiggles slightly.
- Turn off the oven, crack the door open, and let the cheesecake cool inside the oven for 1 hour.
- Remove the cheesecake from the water bath and let it cool completely on a wire rack. Once cool, cover and chill in the refrigerator for at least 6 hours, or preferably overnight.
- Prepare the ganache: Heat the heavy cream in a small saucepan until it just begins to simmer. Remove from heat and pour over the chopped semi-sweet chocolate in a heatproof bowl. Let it sit for 5 minutes, then whisk until smooth.
- Pour the chocolate ganache over the chilled cheesecake. Spread evenly. Return the cheesecake to the refrigerator until the ganache is set, about 30 minutes.
- Release the springform sides before slicing and serving this gourmet cheesecake.
Notes
- For the smoothest texture, ensure your cream cheese is fully at room temperature before starting the filling.
- If you skip the water bath, you risk cracks. If you must skip it, bake at a lower temperature (300°F) for longer.
- This recipe is excellent for holiday desserts or any party dessert where you need a show-stopping chocolate lover’s dream.
Nutrition
- Serving Size: 1 slice
- Calories: 550
- Sugar: 45g
- Sodium: 350mg
- Fat: 38g
- Saturated Fat: 22g
- Unsaturated Fat: 16g
- Trans Fat: 0.5g
- Carbohydrates: 50g
- Fiber: 2g
- Protein: 9g
- Cholesterol: 110mg