
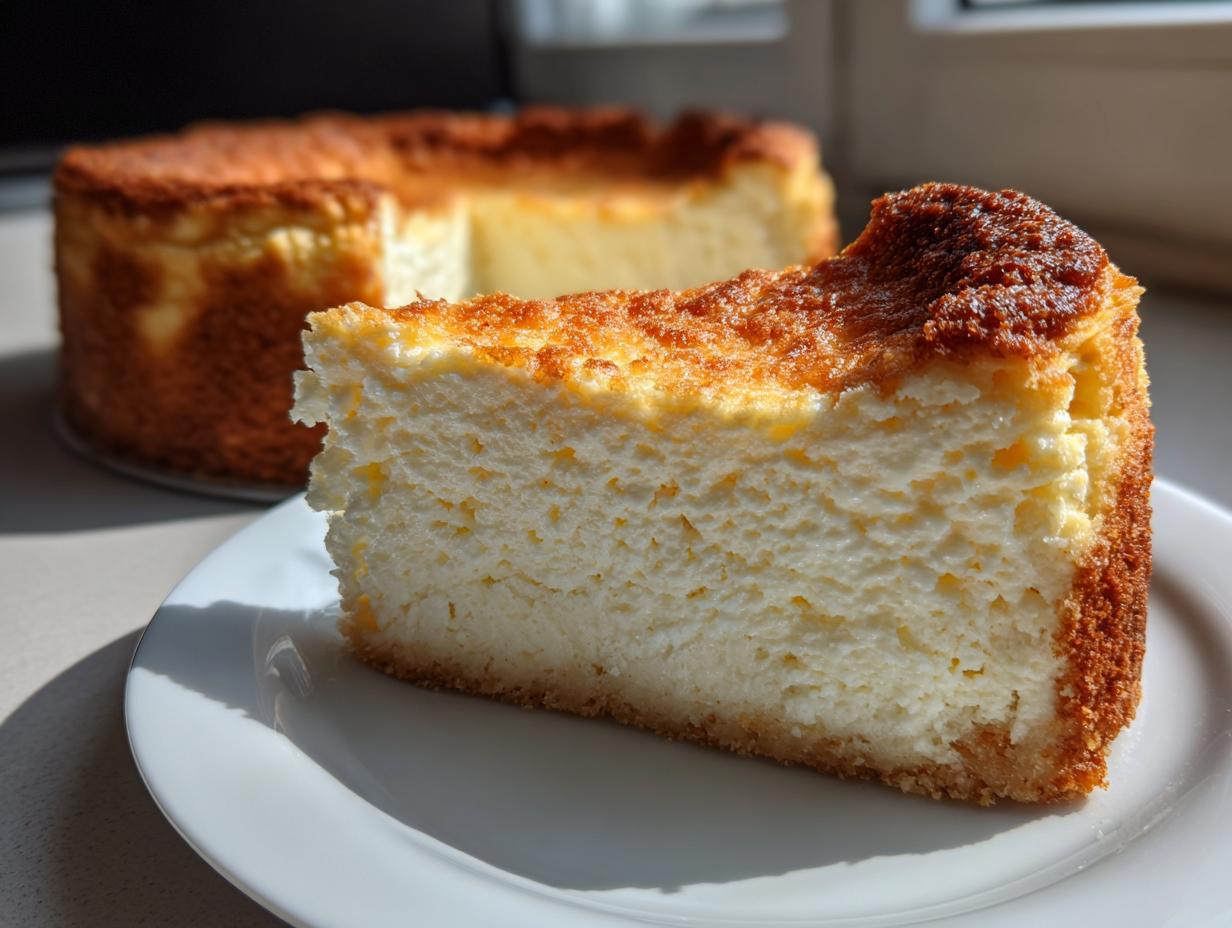
If you’ve ever looked at a slice of magnificent, tall **New York Cheesecake** and thought, “There’s no way I can make that perfect, creamy dream at home,” I want you to stop right there! I spent years in my kitchen, dedicating myself to mastering the core classics of American baking, just like my grandmother perfected her Italian heritage dishes. This isn’t just another recipe; this is my definitive guide. We’re unlocking the specific techniques needed to achieve that signature dense, rich texture and, yes, that famous smooth, absolutely no-crack surface. Get ready, because we’re making the best homemade cheesecake you’ve ever tasted. You can find more of my favorite sweet indulgences here: delicious dessert recipes.
- Why This New York Cheesecake Recipe Works: The Secrets to Creamy Perfection
- Gathering Ingredients for Your Homemade Cheesecake From Scratch
- Step-by-Step Instructions for the Ultimate New York Cheesecake
- Tips for Success When Making a New York Cheesecake
- Serving Suggestions for Your Decadent Dessert
- Storage and Reheating Instructions for Classic New York Cheesecake
- Frequently Asked Questions About Your New York Cheesecake Recipe
- Estimated Nutritional Data for This Rich Baked Cheesecake
- Share Your Ultimate Creamy Cheesecake Creations
Why This New York Cheesecake Recipe Works: The Secrets to Creamy Perfection
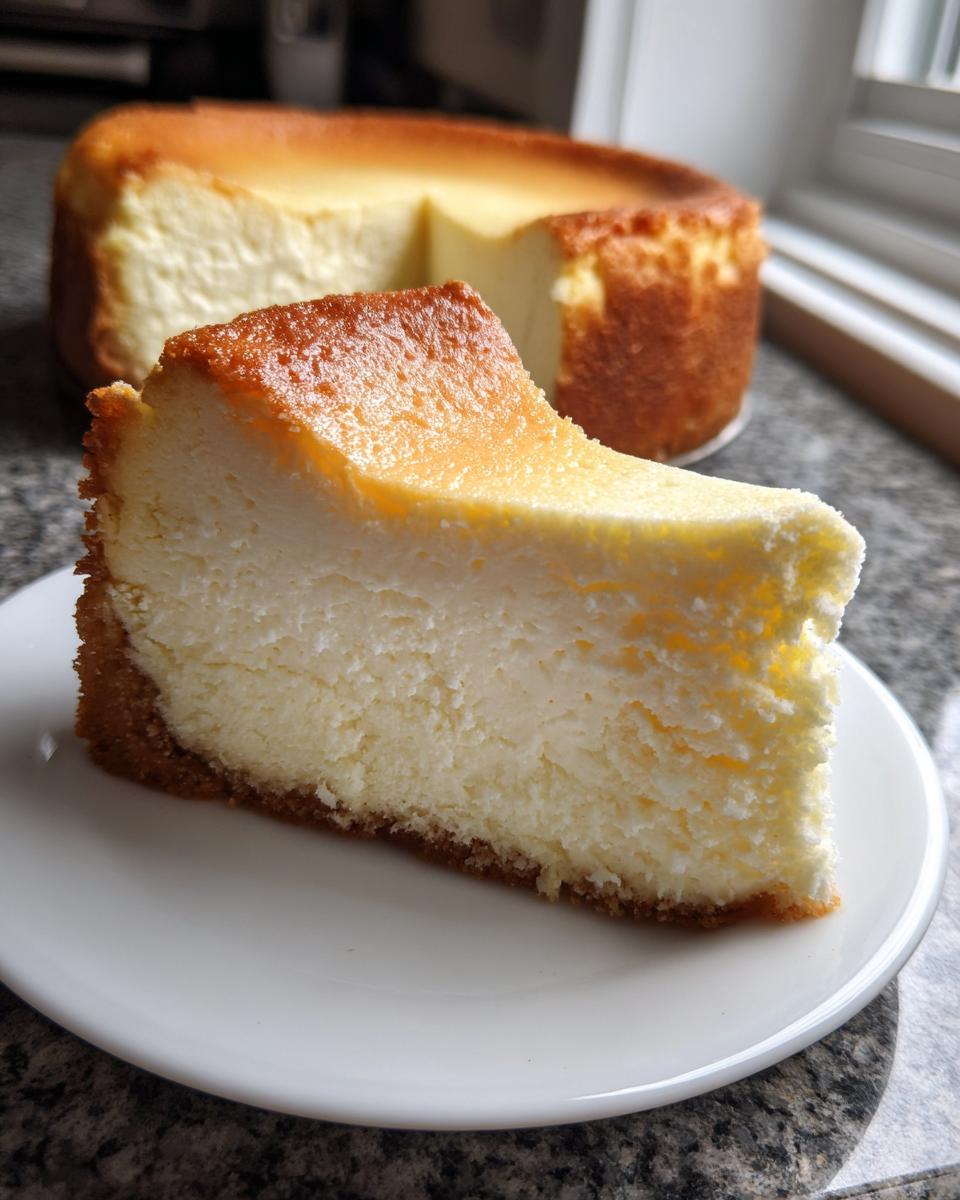
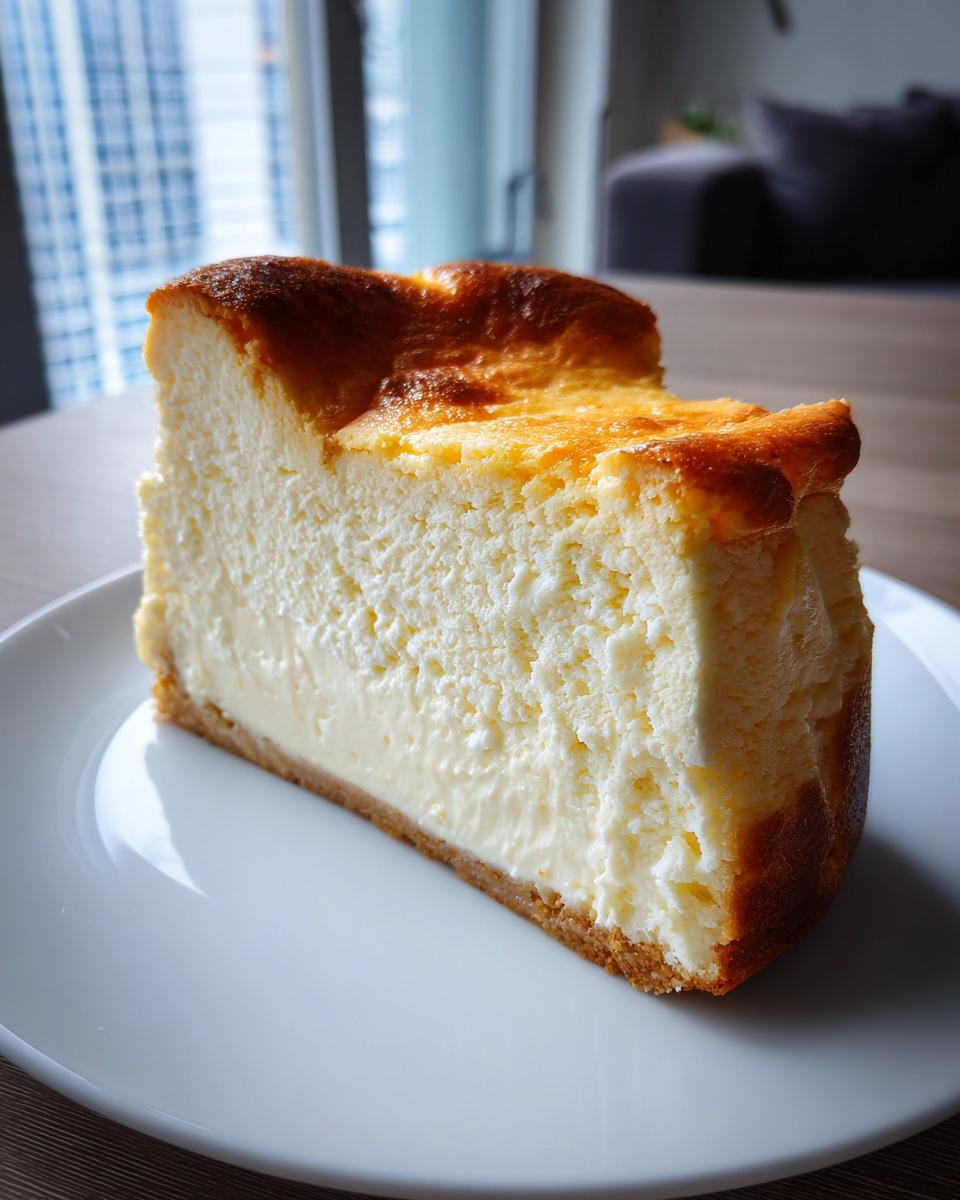
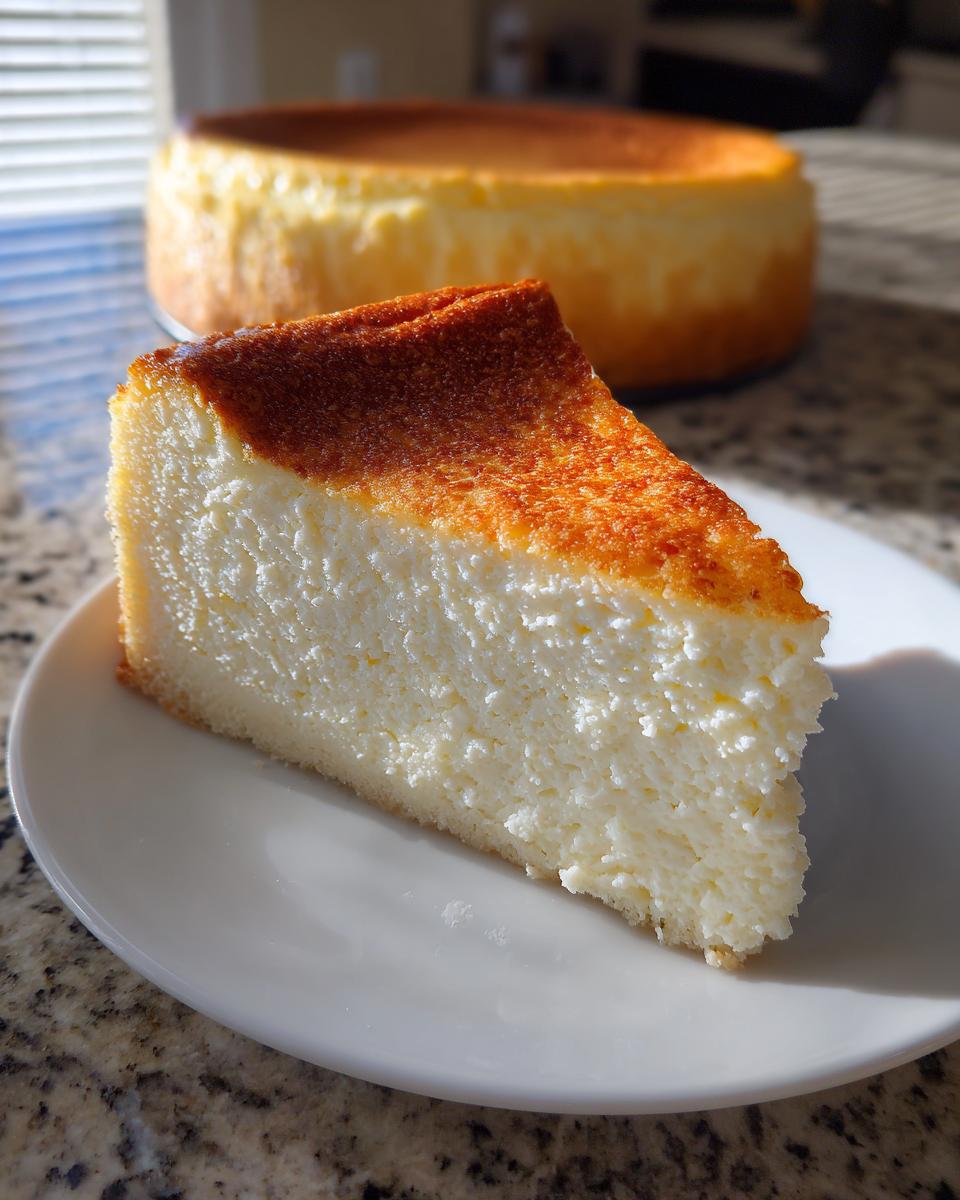
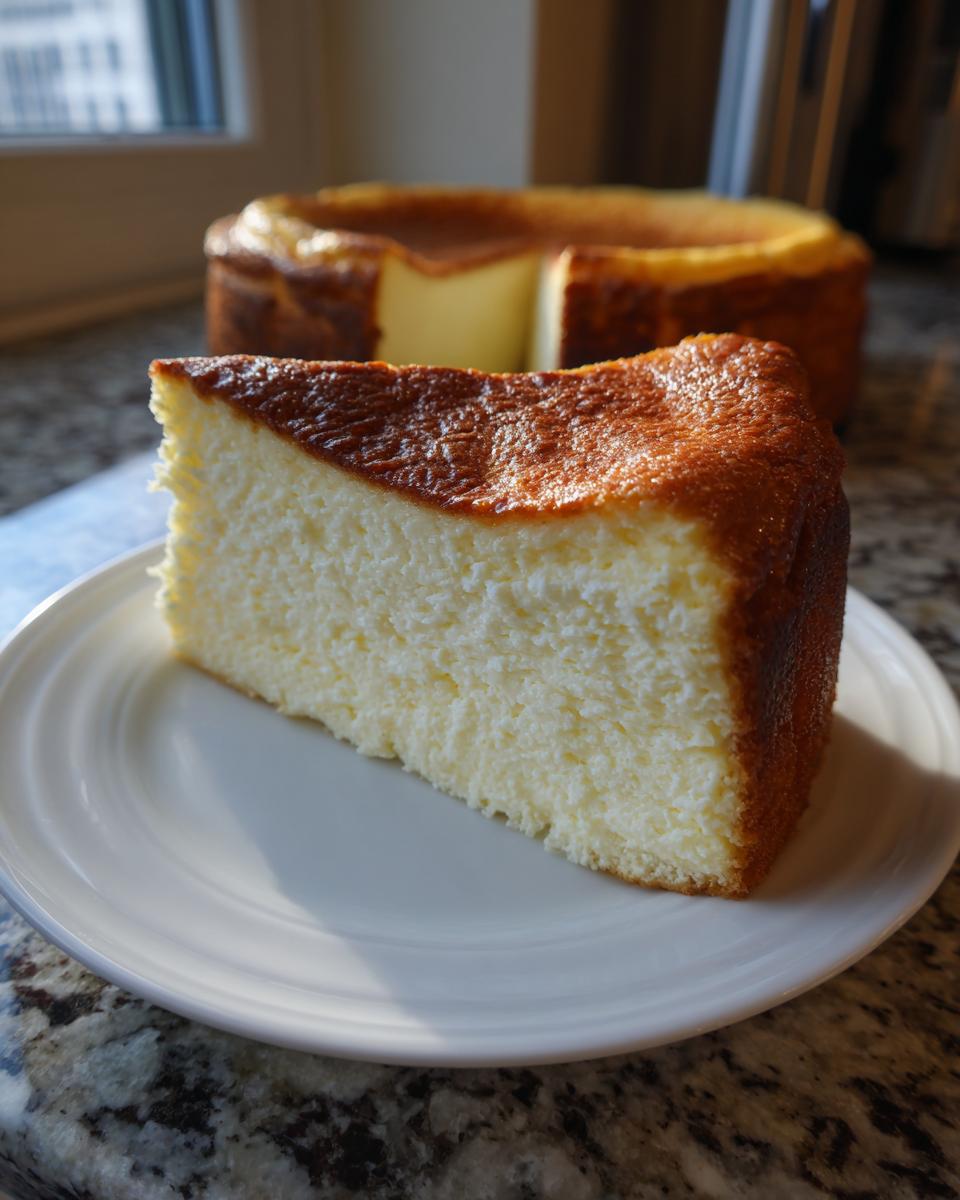
When I first started tackling this challenge, I got the usual cracks and sunken centers. It’s heartbreaking! But with cheesecakes—especially true **Classic New York Cheesecake**—technique is everything. This recipe isn’t just about the ingredients; it’s about respecting the process. We focus on three key areas that guarantee that rich, **Creamy Cheesecake** you’re dreaming of, ensuring the **Perfect Cheesecake Texture** every single time.
First, we must respect the temperature of our ingredients. Second, we introduce steam through the water bath. And finally, we resist the urge to cool it down too fast! These steps are non-negotiable if you want that tall, perfect result.
Ingredient Temperature: The Foundation of Smooth New York Cheesecake Filling
Seriously, don’t even think about grabbing cold cream cheese right out of the fridge. If you do, you’re guaranteed lumps! Everything—and I mean everything—needs to be at room temperature. This allows the cream cheese, eggs, and sour cream to emulsify beautifully, giving you that dense, velvety batter that defines a great cheesecake.
The Essential Water Bath Technique for No Crack Cheesecake
This is perhaps the biggest of all the Baking Secrets for Cheesecake: the water bath, or bain-marie. The pan sits in a larger roasting pan filled with hot water while it bakes. Why? It introduces steam into the oven environment. This moisture keeps the edges of your cake from baking faster than the middle. It’s the absolute best defense against sinks and fissures, guaranteeing that **Tall and Creamy Dessert** finish.
Gathering Ingredients for Your Homemade Cheesecake From Scratch
Okay, now that we know the secrets to success, let’s talk about what you need to have ready on the counter. Remember, assembly is quick, but having everything measured out saves time when the mixer is running. For the **Best Cheesecake Recipe** that truly delivers on that classic promise, we need high-quality stuff, especially that cream cheese! We aren’t messing around with low-fat here—it has to be the full-fat kind for that signature **Dense Cheesecake Filling**.
For the Graham Cracker Crust Cheesecake Base
- 1 1/2 cups graham cracker crumbs (Make sure these are finely crushed!)
- 1/4 cup granulated sugar
- 6 tablespoons unsalted butter, melted
When you mix these three together, press them down into that springform pan firmly. I mean firmly! Use the bottom of a measuring cup to really pack that **Graham Cracker Crust Cheesecake** base down so it stays put during baking.
For the Rich Baked Cheesecake Filling
- 4 (8 ounce) packages full-fat cream cheese, softened to room temperature (I cannot stress this enough!)
- 1 1/2 cups granulated sugar
- 1/4 cup all-purpose flour
- 1 teaspoon vanilla extract
- 1/4 teaspoon salt
- 1 cup sour cream, room temperature
- 4 large eggs, room temperature
- 1 tablespoon lemon juice
See? Simple ingredients, but that temperature requirement is key for achieving that incredibly **Rich Baked Cheesecake** interior we’re aiming for. Every single one of those dairy and egg items must be cozy and warm before they even think about meeting the mixer!
Step-by-Step Instructions for the Ultimate New York Cheesecake
Alright, let’s get baking! Making this **Classic New York Cheesecake** is surprisingly straightforward once you know these crucial steps. I’ve laid out the technique so clearly here—seriously, this is how you make it look effortless, even though we’re doing some advanced stuff like the water bath. Think of this as your blueprint for an **Easy New York Cheesecake** success story!
Preparing and Pre-Baking the Graham Cracker Crust
First things first, get your oven preheated to 350°F (175°C). Mix your crust ingredients—crumbs, sugar, and that melted butter—and press them tight into your 9-inch springform pan. Pop that into the preheated oven for exactly 10 minutes. Once that’s done, pull it out to cool down. Now, this is important for the next step: grab some heavy-duty aluminum foil and wrap the outside bottom and sides of your springform pan *very* tightly. You don’t want any leaks! Then, set that foil-wrapped pan inside a larger roasting pan.
Mixing the Dense Cheesecake Filling Without Adding Air
This is where we conquer cracks! Start with the cream cheese on medium speed until it’s perfectly smooth—zero lumps allowed. Then, add the dry components: the sugar, flour, salt, and vanilla. Mix only until that’s combined. Next, gently mix in the sour cream and lemon juice. The absolute key moment is the eggs. Add them one at a time, mixing on low speed. You must stop the moment the last trace of egg disappears into the batter. If you keep going, tiny air bubbles get trapped! Those air bubbles expand, contract during cooling, and bam—cracks everywhere. We want a smooth batter!
Baking and Slow Cooling for a Perfect Cheesecake Texture
Now for the magic of the water bath! Carefully pour hot water into the outer roasting pan until it comes up about halfway on the sides of your cheesecake pan. Place this whole setup into the oven, now set to 325°F (160°C). Bake for 60 to 75 minutes. You’ll know it’s ready when the edges look firm, but that very center, maybe two inches across, still has a tiny wobble when you gently nudge the roasting pan. The slow cool-down is just as important as the bake! Turn the oven off, prop the door open with a wooden spoon, and just leave the cake inside for a full hour. This gentle temperature transition keeps the cake from shrinking too fast and gives us that flawless top. You can find more general baking ideas over here at delicious dessert recipes.
Tips for Success When Making a New York Cheesecake
We’ve covered the main steps, but I want to share a couple more insights I learned while striving to make the **Best Cheesecake Recipe**. Trust me, these small details elevate your **New York Cheesecake** from good to truly unforgettable. It’s all about honoring the ingredients and allowing them to do their job properly.
If you take away anything from this, remember to be patient during the cooling phase—that’s the finishing move! If you ever need to ask me a direct question about technique or substitutions, don’t hesitate to reach out through my contact page.
Ingredient Notes and Substitutions for Creamy Cheesecake
Please, please, please stick to full-fat cream cheese. I tried using reduced-fat once years ago just to see, and it resulted in a sad, soft dessert that just couldn’t hold its structure. **Full-fat** is non-negotiable for achieving that signature New York density!
Also, don’t skip the lemon juice. It might seem small, but that tiny bit of acid interacts with the dairy to enhance the flavor without making it taste like lemon. It cuts through the richness beautifully. No substitutions there either, if you want that classic, tangy depth!
Serving Suggestions for Your Decadent Dessert
When you finally pull this glorious **New York Cheesecake** out of the fridge, the hardest part is deciding what to put on top. Honestly, it’s so rich and classic, it barely needs anything! I think a simple dollop of tart fruit sauce cuts right through that decadence perfectly. Think fresh raspberries or a nice homemade blueberry sauce like the one I use here: blueberry jam recipe.
If you want something a little different, a light pear preserve would also pair wonderfully: pear preserves old-fashioned canning. But remember the real magic happens after the chill—make sure you let it chill overnight! That’s when the filling fully sets into that dense, creamy texture we worked so hard for.
Storage and Reheating Instructions for Classic New York Cheesecake
You’ve made it! Now, storage is crucial to maintain that **Perfect Cheesecake Texture**. For best results, especially if you’re getting ready for **Holiday Cheesecake Recipes**, you absolutely must chill this bad boy for at least six hours, but seriously, overnight is the gold standard. Cover it loosely with plastic wrap—you don’t want the wrap touching the surface when it’s this cold.
If you have leftovers (which I doubt!), it keeps beautifully in the fridge for up to five days. Want to freeze it? Yes, you can! Let it cool completely, wrap it tight in plastic, then foil, and it’ll be great for up to a month. Thaw it slowly in the fridge overnight.
Frequently Asked Questions About Your New York Cheesecake Recipe
I know you might have a few last-minute worries rattling around before you dive in, especially with something as iconic as the **New York Cheesecake**! It’s totally normal. I’ve captured the most common questions I get from readers trying this out for the first time. Trust me, addressing these small points guarantees you get that wonderfully **Dense Cheesecake Filling** we’re aiming for.
Why is my new york cheesecake cracking even with a water bath?
If you’ve used the water bath and still got a crack, 99% of the time, it boils down to two things: overmixing the eggs, which whips in air, or cooling it down too fast. The whole point of the gradual oven cool-down we discussed is to let the structure settle gently. If you pull a hot cake immediately into a cool kitchen, it shrinks too fast and pops open on top. Patience is truly tested here!
Can I make this cheesecake without the graham cracker crust?
You absolutely can, especially if you just want pure, unadulterated **Creamy Cheesecake** filling! Some folks love a crustless version, and it definitely bumps up the decadent factor. But I will tell you, that buttery, slightly salty **Graham Cracker Crust** really provides a necessary textural contrast to all that rich filling. It gives you the classic experience, so I always recommend keeping it, but it’s your bake!
How long does the new york cheesecake need to chill before serving?
This is another crucial patience puzzle! The minimum time for the **Classic New York Cheesecake** to chill and set up is six full hours. I know when you first pull it out of the oven, you want to slice it right away, but if you do, it’ll just be sweet, slightly firm custard. For that truly dense, signature mouthfeel, it has to sleep in the fridge overnight. It firms up so much more beautifully after that long slow chill. You can explore some other great easy weeknight dinners while you wait!
Estimated Nutritional Data for This Rich Baked Cheesecake
When we talk about a **Rich Baked Cheesecake**, we know it’s an indulgence, and those calories are earned through pure deliciousness! But since I believe in full transparency with my readers, I’ve included the estimated nutritional breakdown below. This helps you plan for those special moments or **Holiday Cheesecake Recipes** gatherings.
Keep in mind, this information is based on the ingredient list provided, and exact counts will always vary depending on the specific brands of butter or cream cheese you use. Think of this as a helpful starting point, not a strict medical analysis!
- Serving Size: 1 slice
- Calories: 450
- Sugar: 35g
- Sodium: 300mg
- Fat: 30g
- Protein: 8g
- Carbohydrates: 38g
See? It’s definitely a treat! But oh my goodness, that texture is worth every single bit of that dairy goodness. It’s exactly what a proper **Homemade Cheesecake From Scratch** should taste like.
Share Your Ultimate Creamy Cheesecake Creations
Now I’ve handed over all my hard-earned secrets for making the most incredible **New York Cheesecake**—the rich filling, the perfect crust, and the slow cooling process—it’s your turn! Baking is a shared language, and I absolutely love hearing how my recipes turn out in your kitchens. Did you manage that flawless, no-crack surface? Did the lemon juice give it the perfect tang?
Please, take a moment to rate this recipe right below this section! If you nailed the **Perfect Cheesecake Texture**, let everyone know by leaving a comment below. I read every single note you send my way! And if you’ve got a stunning photo of your **Decadent Dessert**, tag me on social media. I always feature reader bakes when I can. I love seeing the joy a simple, perfectly executed dessert can bring to your family table. If you ever have questions after reading the guide, remember you can always reach out via my contact page. Happy baking!
PrintThe Ultimate Creamy, Crack-Free New York Cheesecake Recipe
Make the best homemade New York Cheesecake with this recipe. It delivers a rich, dense, and perfectly creamy texture with a classic graham cracker crust, using techniques that prevent cracking.
- Prep Time: 25 min
- Cook Time: 75 min
- Total Time: 1 hour 40 min
- Yield: 12 servings 1x
- Category: Dessert
- Method: Baking
- Cuisine: American
- Diet: Vegetarian
Ingredients
- 1 1/2 cups graham cracker crumbs
- 1/4 cup granulated sugar (for crust)
- 6 tablespoons unsalted butter, melted
- 4 (8 ounce) packages full-fat cream cheese, softened to room temperature
- 1 1/2 cups granulated sugar (for filling)
- 1/4 cup all-purpose flour
- 1 teaspoon vanilla extract
- 1/4 teaspoon salt
- 1 cup sour cream, room temperature
- 4 large eggs, room temperature
- 1 tablespoon lemon juice
Instructions
- Prepare the crust: Preheat your oven to 350°F (175°C). Mix graham cracker crumbs, 1/4 cup sugar, and melted butter. Press the mixture firmly into the bottom of a 9-inch springform pan. Bake for 10 minutes. Remove and let cool. Reduce oven temperature to 325°F (160°C).
- Prepare the water bath: Wrap the outside bottom and sides of the springform pan tightly with heavy-duty aluminum foil to prevent water leakage. Place the wrapped pan inside a larger roasting pan.
- Make the filling: In a large bowl, beat the softened cream cheese with an electric mixer on medium speed until completely smooth. Scrape down the sides.
- Gradually beat in 1 1/2 cups sugar, flour, vanilla extract, and salt until just combined. Do not overmix.
- Beat in the sour cream and lemon juice. Mix on low speed until smooth.
- Add the eggs one at a time, mixing only until each egg is incorporated. Stop mixing as soon as the last egg disappears into the batter. Overmixing adds air, which causes cracks.
- Pour the filling over the cooled crust in the springform pan.
- Bake using the water bath: Carefully pour hot water into the roasting pan until it reaches about halfway up the sides of the springform pan.
- Bake for 60 to 75 minutes. The edges should look set, but the center 2 inches should still have a slight jiggle when gently nudged.
- Cool slowly: Turn off the oven, but leave the cheesecake inside with the oven door propped open slightly (use a wooden spoon) for 1 hour. This slow cooling prevents cracking.
- Remove the cheesecake from the water bath and foil. Let it cool completely on a wire rack at room temperature for about 1 hour.
- Chill: Cover the cheesecake loosely and refrigerate for at least 6 hours, or preferably overnight, before serving. This achieves the dense, creamy texture.
Notes
- Use room temperature ingredients for the filling to ensure a smooth, lump-free batter.
- Do not use a low-fat cream cheese; full-fat is necessary for the rich New York style texture.
- If you skip the water bath, you risk a dry texture and cracks on the surface.
Nutrition
- Serving Size: 1 slice
- Calories: 450
- Sugar: 35g
- Sodium: 300mg
- Fat: 30g
- Saturated Fat: 18g
- Unsaturated Fat: 12g
- Trans Fat: 0.5g
- Carbohydrates: 38g
- Fiber: 1g
- Protein: 8g
- Cholesterol: 120mg