

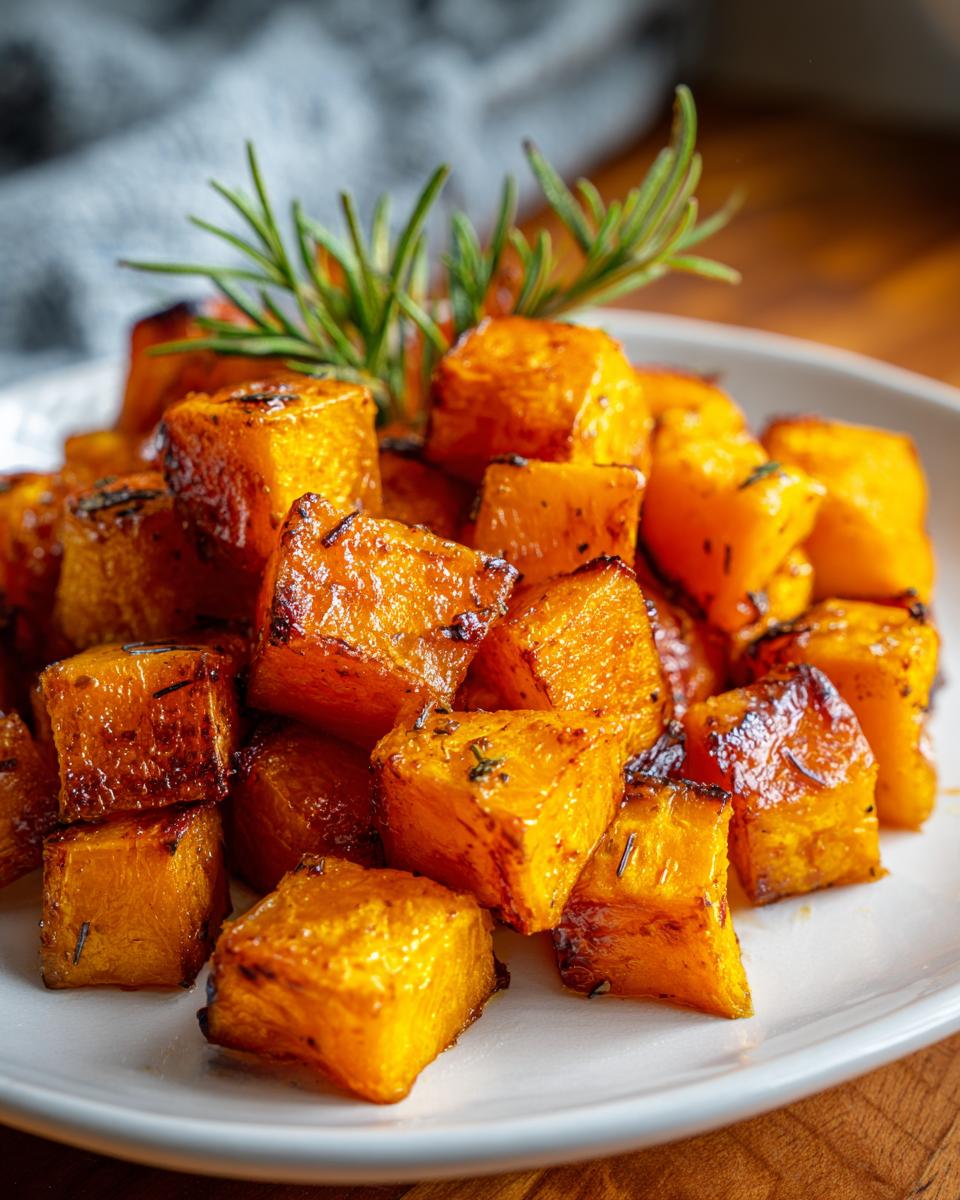
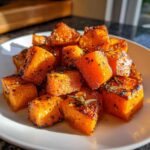
Oh, I just love when vegetables stop being boring and *actually* taste like dessert, but still feel totally healthy, you know? That’s the magic that happens when you master the perfect roast. Forget mushy, pale vegetable sides! Today, we are ditching the fuss and going straight for pure, golden perfection with my Perfect 5-Ingredient Roasted Butternut Squash with Maple and Rosemary. Trust me, this recipe for expertly roasted butternut squash is ridiculously easy but delivers that unbelievable sweet and savory balance every single time. That’s the Chefsily philosophy Isabella Rossi lives by—big flavor explosion using only simple, reliable steps. If you’re looking for a side dish that’s foolproof, this is it!
- Why This is the Best Roasted Butternut Squash Recipe
- Ingredients for Perfect Roasted Butternut Squash Cubes
- How to Roast Butternut Squash: Step-by-Step Instructions
- Tips for Perfect Tender Roasted Squash Cubes
- Making Roasted Butternut Squash a Complete Fall Vegetable Side Dish
- Storage and Reheating Your Roasted Butternut Squash
- Frequently Asked Questions About Roasted Butternut Squash
- Estimated Nutritional Information for Roasted Butternut Squash
- Share Your Experience Making This Simple Side Dish
Why This is the Best Roasted Butternut Squash Recipe
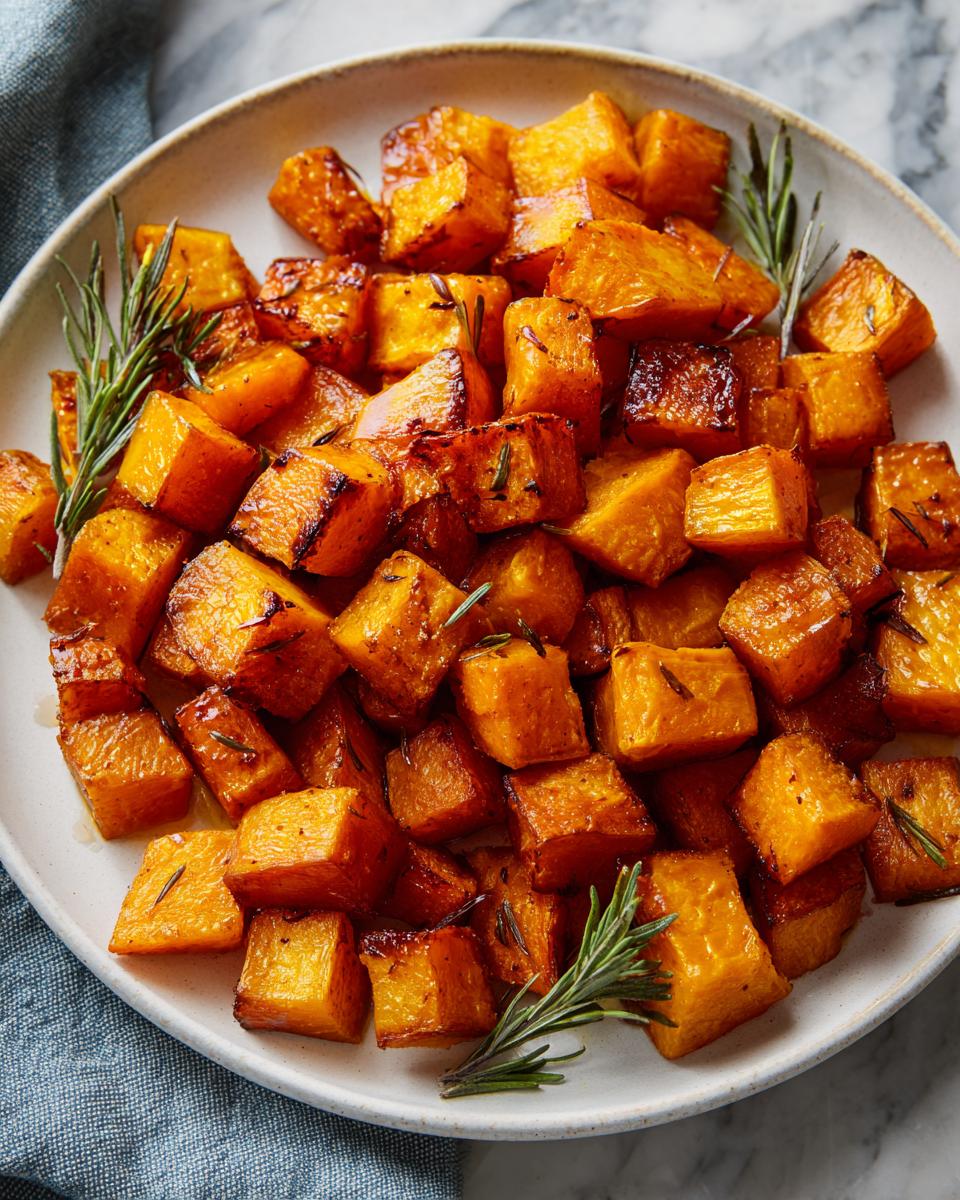
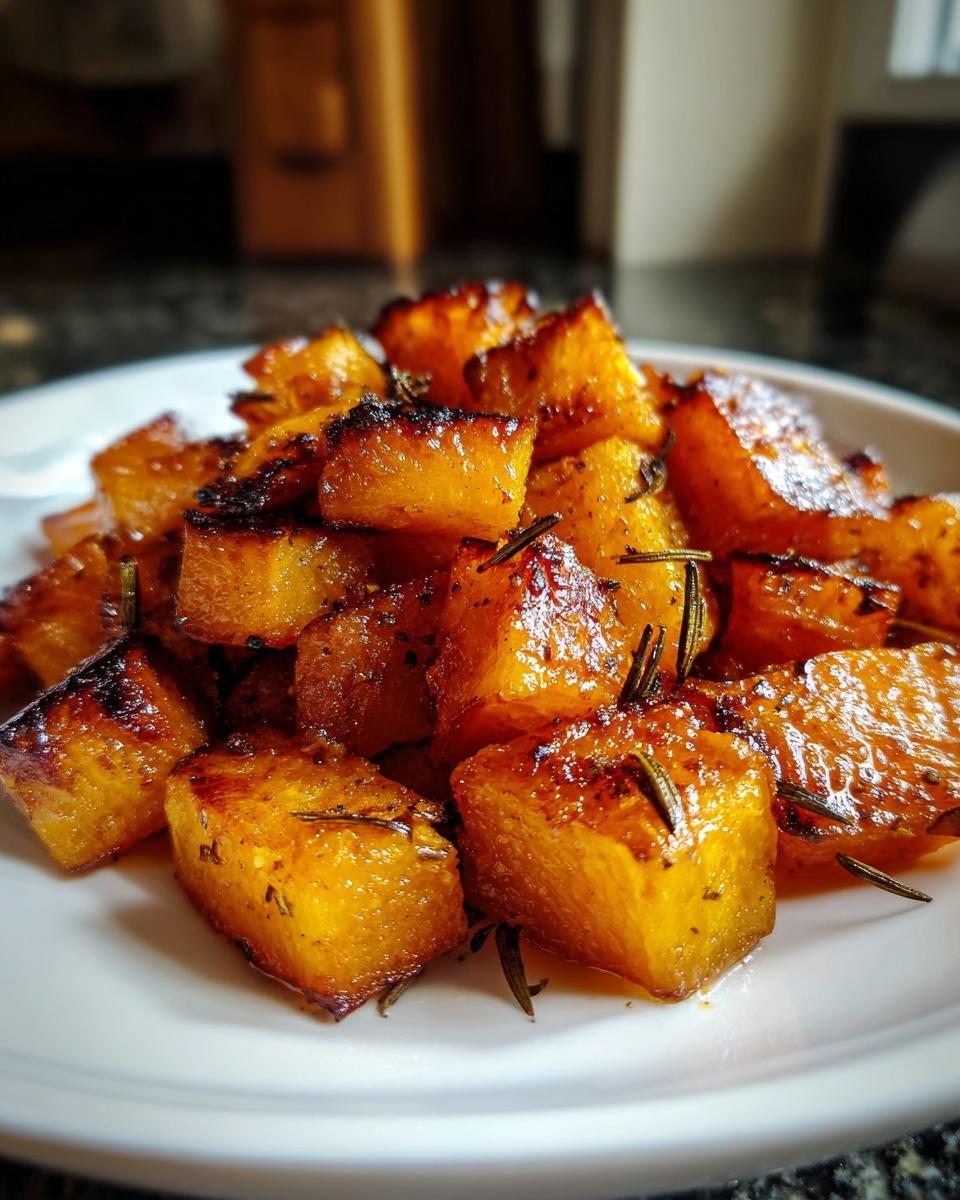
I honestly think this is the best butternut squash recipe out there because it skips all the complicated extras. Seriously, you only need five things, people! My goal here is maximum payoff for minimum effort, which is why I love roasting vegetables so much. We are aiming for those glorious dark brown, almost black spots—that’s where the flavor lives! The subtle sweetness from the maple syrup hitting that high heat creates the most incredible caramelized butternut squash you’ll ever taste. I discovered that maple and fresh rosemary are soulmates; the herbaceous, slightly piney scent of the herb cuts through the syrup’s sweetness perfectly. It brings depth to what sounds like a super simple vegetable. Don’t forget to bookmark this one for your next big holiday spread!
Quick Prep, Maximum Flavor in Your Roasted Butternut Squash
You truly cannot beat the timing here. With just about ten minutes of prep time—mostly just chopping—you can have these gorgeous cubes seasoned and headed into the oven. That’s less time than ordering takeout, I promise! This dish solidifies my belief that it’s one of the very easiest roasted vegetables you’ll ever make. Plus, if you want to try something new with it later, check out my notes on how this batch can become a base for my easy brown sugar cinnamon pear crisp—just kidding! But really, it’s fantastic.
Ingredients for Perfect Roasted Butternut Squash Cubes
Part of why this recipe is such a reliable staple is that the ingredient list is so short and sweet. We’re keeping things incredibly simple here because we want the squash itself to shine. You don’t need a pantry full of specialty spices to create something amazing; these are the basics for a fantastic simple homemade side dish.
Here is what you’ll need on hand:
- Two medium butternut squash, peeled, seeded, and cut into very deliberate 1-inch cubes.
- Three tablespoons of good quality olive oil—don’t skimp here!
- Two tablespoons of pure maple syrup. We want that real maple flavor, not pancake syrup, okay?
- One teaspoon of fresh rosemary, and you must chop it finely so it distributes evenly.
- Half a teaspoon of kosher salt. We need that nice, clean saltiness to balance that maple.
That’s it! Five ingredients total. It’s almost criminal how good this turns out for being so straightforward.
How to Roast Butternut Squash: Step-by-Step Instructions
Alright, let’s get this vegetable party started! This is where we learn exactly how to roast butternut squash so it turns out golden and delicious. First and most importantly, fire up that oven to 400 degrees Fahrenheit, or 200 Celsius if you’re using those settings. While it heats up, get a nice big baking sheet ready—I always slap parchment paper on mine because cleaning sticky, caramelized sugar off a sheet pan is nobody’s idea of fun. This recipe is fast, clocking in around 30 minutes cook time, which is fantastic for weeknights!
Preparing the Squash for Optimal Roasted Butternut Squash Texture
Peeling the squash is the toughest part, I won’t lie to you. I use a sturdy Y-peeler and just take it slow, being careful around those curves. Once it’s peeled, scoop out all those stringy seeds—toss them, or rinse them and roast them like savory little snacks later! Next, you must chop everything into uniform 1-inch cubes. Uniformity matters because we want every piece of roasted butternut squash to cook at the same speed. Here’s my little secret for guaranteed crispy edges: after you cube it, lay the pieces out on a clean kitchen towel and pat them until they are as dry as you can reasonably get them. Wet squash steams, and we want roasting, not steaming!
Seasoning for Sweet and Savory Side Dishes
Now for the fun part where we create those fantastic sweet and savory side dishes! Put all those dry cubes into your largest mixing bowl. Drizzle the olive oil first, then drizzle that beautiful pure maple syrup right over the top. Whisk in your finely chopped fresh rosemary and the kosher salt last. Now, toss, toss, toss! Make sure every single surface of the squash has a little bit of that sweet-savory coating. If you’re looking for a more savory profile, you could add a crack of black pepper here, but the maple and rosemary combo is pure gold, trust me. If you want to see how another fantastic cook handles a quick roast, check out their take on Quick Roasted Butternut Squash.
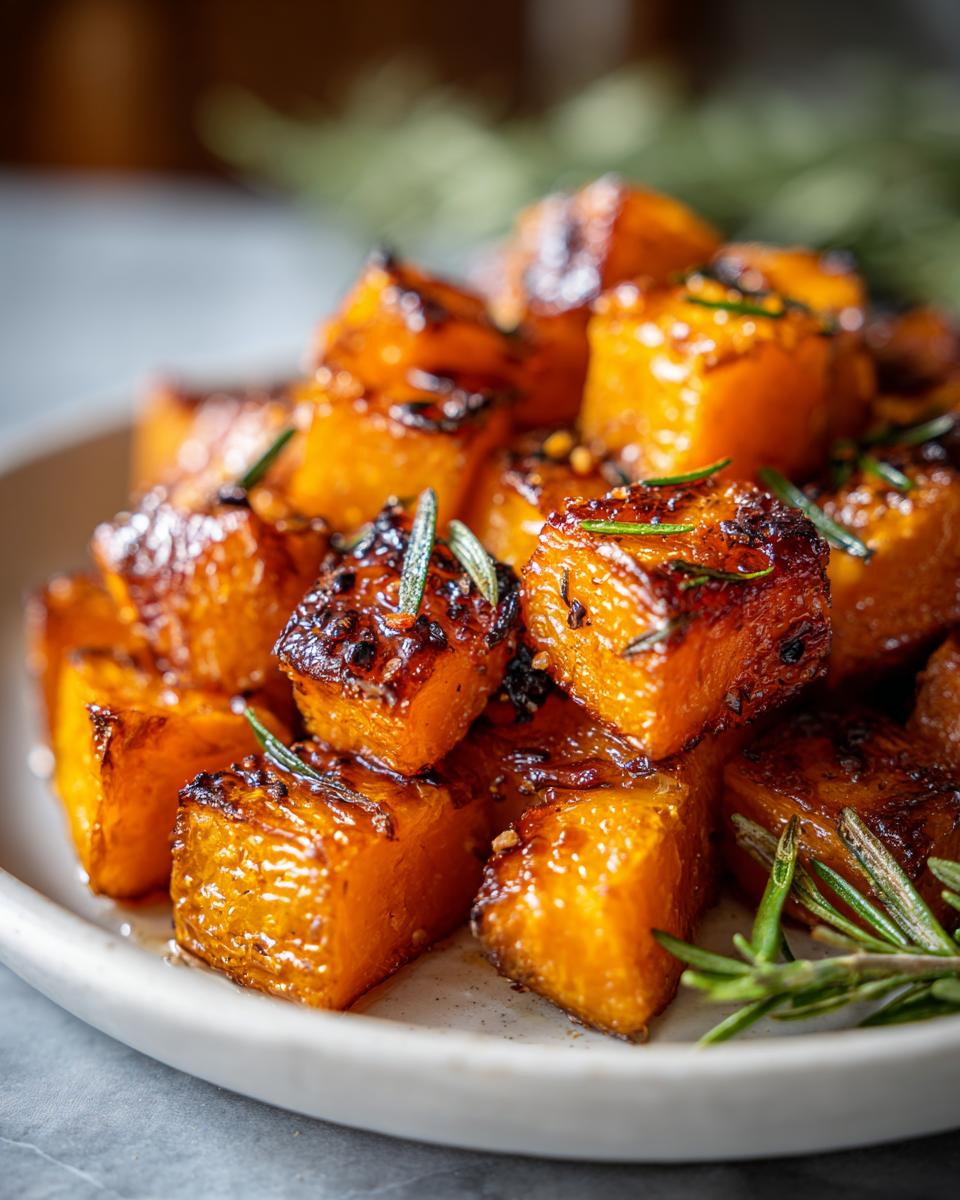
When you finally spread this seasoned squash onto your baking sheet (remember: use two pans if you have too much for one!), make absolutely certain it’s in a single layer. Seriously, do not let those pieces overlap! Overcrowding is the enemy of crispy roasted vegetables. If they are stacked, they will steam instead of caramelizing. Pop that tray into the hot oven and let the magic happen for about 25 to 30 minutes, giving them a good stir halfway through. You’ll know they’re done when they are super fork-tender. If you want more ideas for easy sides, check out my easy homemade naan bread on the skillet recipe!
Tips for Perfect Tender Roasted Squash Cubes
I know we shot for maximum crispiness, but the real goal here is that beautiful texture contrast: crunchy edges melting into a creamy, tender roasted squash cube center. The number one trick for achieving that perfect interior texture is simple—don’t rush the heat! Keeping the oven hot at 400°F is key to caramelization, but if your pieces look done on the outside but still feel slightly hard inside, just give them another five minutes. Don’t be afraid to test them with a fork!
When done correctly, your oven roasted squash should yield easily when pierced, almost like it’s been briefly steamed, even though it’s been roasted. If you notice yours are cooking too fast on the edges but staying raw in the middle, it usually means your pieces weren’t uniform enough—you need to practice that even cubing next time! For more insight on timing, you can always peek at this guide on How to Roast Butternut Squash in Oven, but honestly, trust your fork.
Adjusting Seasoning for Your Roasted Butternut Squash
While the maple rosemary is my favorite, this recipe is so forgiving! You are the boss of the seasoning profile. If you happen to be hosting friends who prefer less sweetness, just pull back on that maple syrup to one tablespoon. That’s when you should introduce some black pepper. A quarter teaspoon of freshly cracked black pepper is amazing alongside the salt. Sometimes, if I’m making this savory for a weeknight and want to save the sweet version for Thanksgiving, I’ll swap the maple entirely for garlic powder and a tiny pinch of dried thyme. It still caramelizes beautifully; it just leans more into that savory roasted vegetable experience. Don’t forget to check out my creamy veggie pasta if you need another broccoli pasta one-pot recipe for contrast!
Making Roasted Butternut Squash a Complete Fall Vegetable Side Dish
Honestly, the best thing about mastering roasted butternut squash is how versatile it is once it’s caramelized and sweet. It jumps easily from a simple Tuesday night accompaniment to a star player on your holiday table. This recipe makes the perfect fall vegetable side dish, hands down. The maple and rosemary combo just screams cozy, comforting autumn!
When I serve this, it pairs famously well with roasted chicken or pork tenderloin, which brings a nice lean protein to balance the natural sweetness of the squash. If you’re putting together your big Thanksgiving menu, this is a must-have; it’s far lighter than heavy casseroles, which is why I love it so much on a big spread of Thanksgiving vegetable sides.
Plus, don’t feel like you have to serve it hot immediately! Leftovers are my favorite. You can toss these sweet and savory cubes cold into a big salad, like my classic 7-layer salad for lunch the next day. Or, you can lightly mash some up right in the pan to create a quick, flavorful base for a soup starter. It’s just one of those magic ingredients that delivers flavor no matter how you use it. For more great ideas on how to serve up roasted goodness, take a peek at this savory option from elsewhere, Savory Roasted Butternut Squash.
Storage and Reheating Your Roasted Butternut Squash
It’s so satisfying when you have delicious leftovers, right? Especially with something as perfect as perfectly roasted butternut squash! The good news is, this recipe holds up great for future meals, which makes it perfect for batch cooking your veggie lentil salad recipe prep work.
Once your squash has cooled completely—and this is important for avoiding mush—you need to store it in an airtight container. I usually use glass containers because they don’t seem to hold onto smells or weird textures like plastic containers sometimes do. You can keep these beauties in the fridge for about four to five days. After that, you might notice they start losing their crispiness, but they are still perfectly fine for using in soups or purees!
Now, reheating is where you have to be smart if you want to keep that lovely texture we worked so hard for. My preferred method, hands down, is using the oven again. Spread them in a single layer on a baking sheet—don’t overcrowd it, remember the steaming enemy!—and just warm them through at about 350 degrees Fahrenheit for about 8 to 10 minutes. This dries out any moisture the squash absorbed while chilling and wakes up those crispy edges again.
If you’re in a true pinch and need these fast, the microwave will work, but you have to be careful. Microwave them in short 30-second bursts, stirring in between. Just know the texture will lean way more toward that soft, tender interior and less toward the caramelized exterior. It’s totally fine for a quick lunch, but for the best experience, use the oven reheat method!
Frequently Asked Questions About Roasted Butternut Squash
I get so many great questions every time a simple recipe like this goes out! It’s wonderful to see so many people excited about making the perfect addition to their table. Here are a few things I hear most often about making this butternut squash recipe! If you need more inspiration for quick meals, you can always check out my ideas for healthy breakfast ideas that use simple ingredients!
Can I skip the maple syrup in this roasted butternut squash recipe?
Oh, absolutely, you can! If you’re trying to cut back on sugar or just prefer a purely savory roast, just skip the maple syrup entirely. That maple is what gives us those gorgeous, almost candy-like crispy edges, so you might lose a little bit of that intense caramelization. If you skip it, make sure you toss the squash well with the olive oil and salt, and maybe consider adding that cracked black pepper or a little garlic powder for flavor depth. This still results in a fantastic roasted butternut squash, just less sweet!
What is the best way to cut butternut squash for roasting?
For this specific method—where we want that perfect contrast of crispy exterior and tender interior—consistency is everything! I stress 1-inch cubes repeatedly because smaller pieces burn before the inside cooks, and larger pieces stay hard in the middle. As for peeling? That’s the workout part! Always use a very stable cutting board, peel away from your body using a sturdy vegetable peeler, and use a sharp knife to help trim the tough ends. Make sure you scoop out *all* the seeds and stringy guts before you cube it up. This preparation is key to getting those perfect tender roasted squash cubes.
I also always suggest checking out other folks’ testing processes sometimes—it helps me refine my own cooking! For instance, you can look at their results over at Best Roasted Butternut Squash Oven Recipe to compare notes on texture.
What is the best oven temperature for roasting butternut squash?
We stick to a pretty high heat for this recipe, 400°F (200°C), and I highly recommend it. That high heat works quickly to start evaporating moisture and caramelizing the natural sugars—and the maple syrup—on the outside of the squash. If you drop the temperature much lower, say below 375°F, you risk the squash stewing in its own moisture for too long before it manages to actually roast and crisp up. Stick with the 400°F, and you’ll see those beautiful edges form in under 30 minutes!
Can I make this vegan?
Yes! This butternut squash cooking guide is inherently vegan since we use olive oil instead of butter! The star ingredient here is the pure maple syrup, which is a plant-based sweetener. So, you don’t have to change a single thing about the seasoning or the cooking method to keep this strictly plant-based. It makes for one of the simplest, most satisfying healthy squash recipes for any vegan or vegetarian guest you might have over!
Estimated Nutritional Information for Roasted Butternut Squash
I always think it’s smart to have a rough idea of what’s on the plate, especially when you’re serving up something so naturally good for you! Remember, I’m no registered dietitian, so these numbers are just good faith estimates based on the five main ingredients and four servings we calculated for the Perfect 5-Ingredient Roasted Butternut Squash recipe. Use this only as a guide for your healthy squash recipes planning!
Here is the breakdown per serving, just to show you how light and wonderful this side dish really is:
- Calories: Around 210 per serving
- Total Fat: About 9 grams (mostly healthy unsaturated fats!)
- Carbohydrates: Roughly 33 grams
- Fiber: A solid 6 grams—that’s fantastic for a vegetable side!
- Sugar: About 14 grams (thanks to that lovely maple syrup, but it’s natural sugar!)
- Protein: A small boost at 2 grams
- Sodium: Very reasonable at 230 mg
See? It’s loaded with fiber and still keeps the sugar and fat content in check, making it a great choice whether you’re making it for a quick dinner or planning out those big sweet and savory side dishes for the holidays. It just proves that simple ingredients, treated right, always win in the kitchen!
Share Your Experience Making This Simple Side Dish
Now that you’ve tasted the joy of perfectly done, maple-kissed roasted butternut squash, I genuinely want to hear all about it! Cooking is a conversation, and I love seeing how you all put your own spin on the recipes I share here at Chefsily.
Did you stick exactly to the rosemary and maple, or did you try adding a pinch of cinnamon? Maybe you used a different herb? Don’t keep those delicious little secrets to yourself!
Please take a moment to scroll down and leave the recipe a rating—five stars if it blew your mind, which I totally expect it to! And definitely drop a comment explaining how this simple side dish worked for your dinner plans. Was it a weeknight hero, or did it shine brightest at your holiday table?
If you snapped a picture of your beautifully caramelized cubes, please tag me on social media! Seeing your beautiful food coming out of your ovens is what keeps me inspired in the kitchen every single day. If you have any questions as you continue your cooking journey, don’t hesitate to reach out through our contact page. Happy roasting, everyone!
PrintPerfect 5-Ingredient Roasted Butternut Squash with Maple and Rosemary
Make easy roasted butternut squash with crispy edges and a tender interior using just five simple ingredients. This sweet and savory side dish is perfect for quick dinners or holiday meals.
- Prep Time: 10 min
- Cook Time: 30 min
- Total Time: 40 min
- Yield: 4 servings 1x
- Category: Side Dish
- Method: Oven Roasting
- Cuisine: American
- Diet: Vegetarian
Ingredients
- 2 medium butternut squash, peeled, seeded, and cut into 1-inch cubes
- 3 tablespoons olive oil
- 2 tablespoons pure maple syrup
- 1 teaspoon fresh rosemary, finely chopped
- 1/2 teaspoon kosher salt
Instructions
- Preheat your oven to 400 degrees Fahrenheit (200 degrees Celsius). Line a large baking sheet with parchment paper for easy cleanup.
- In a large bowl, combine the cubed butternut squash, olive oil, maple syrup, chopped rosemary, and kosher salt. Toss everything together until the squash pieces are evenly coated.
- Spread the seasoned squash in a single layer on the prepared baking sheet. Do not overcrowd the pan; use two sheets if necessary to promote caramelization.
- Roast for 25 to 30 minutes, stirring halfway through the cooking time. The squash is done when it is tender when pierced with a fork and has caramelized, golden-brown edges.
- Remove from the oven and serve immediately as a healthy squash recipe or fall vegetable side dish.
Notes
- For extra crispy roasted vegetables, ensure the squash pieces are dry before tossing them with the oil.
- If you prefer a more savory profile, reduce the maple syrup to 1 tablespoon and add 1/4 teaspoon of black pepper.
- This recipe works well for making a base for butternut squash soup later.
Nutrition
- Serving Size: 1 serving
- Calories: 210
- Sugar: 14
- Sodium: 230
- Fat: 9
- Saturated Fat: 1
- Unsaturated Fat: 8
- Trans Fat: 0
- Carbohydrates: 33
- Fiber: 6
- Protein: 2
- Cholesterol: 0