
When the summer sun is blazing, the last thing anyone wants to do is turn on the oven! Right? That’s when you need desserts that are cool, creamy, and taste like pure nostalgia. Forget dragging out the ice cream maker; I’ve got the showstopper that brings all the magic of the old-fashioned ice cream parlor right to your table: the incredible banana split cake. This beauty captures those essential banana, chocolate, pineapple, and cherry flavors in one glorious, chilled layer. It’s proof that simple assembly leads to spectacular results, something Isabella Rossi is totally dedicated to—taking those beloved American classics and making them super accessible for us busy home cooks. Trust me, this no-bake masterpiece is about to become your go-to, delicious dessert for every gathering.
- Why This No-Bake banana split cake is Your New Summer Favorite
- Gathering Ingredients for Your banana split cake
- Step-by-Step: Assembling the No-Bake banana split cake
- Tips for the Best No Bake Layered Cake Experience
- Variations for Your Creamy Fruit Cake
- Serving Suggestions for This Simple Party Treat
- Storage and Reheating Instructions for Your Chilled Banana Dessert
- Frequently Asked Questions About the banana split cake
- Estimated Nutritional Information for banana split cake
Why This No-Bake banana split cake is Your New Summer Favorite
When you need a showstopper without the sweat, this is the recipe you grab. Seriously, this **banana split cake** checks every box for easy summer desserts. It’s incredibly low-effort but gives you that satisfying, layered look people always rave about at BBQs. Plus, since it completely relies on chilling time, you maximize your party prep time!
It’s quickly become my designated potluck perfect dessert because it travels well (as long as you keep it cool!) and always disappears first. You get all the nostalgic joy of a classic ice cream sundae, just held together in a gorgeous, sliceable format. See why I love other no-bake wonders too?
Zero Oven Time: The Ultimate No Oven Needed Desserts
This is the definition of no oven needed desserts! We aren’t baking anything here, folks. The structure comes entirely from properly mixing that cream cheese base with the whipped topping and letting it firm up in the fridge. That chilling time is crucial! It transforms the soft components into a stable, heavenly no bake layered cake that holds its shape beautifully when you finally dig in.
Capturing the Classic Banana Split Flavors
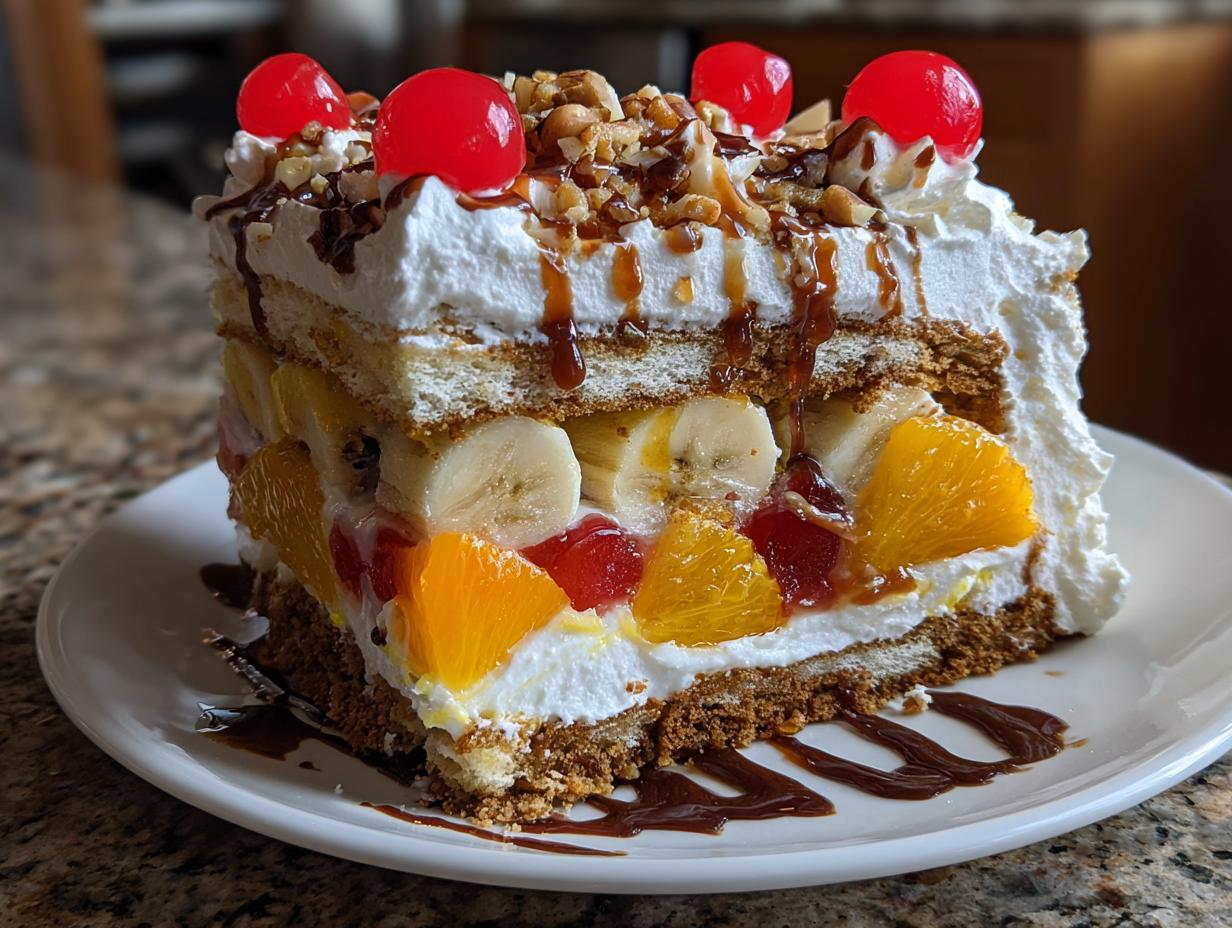
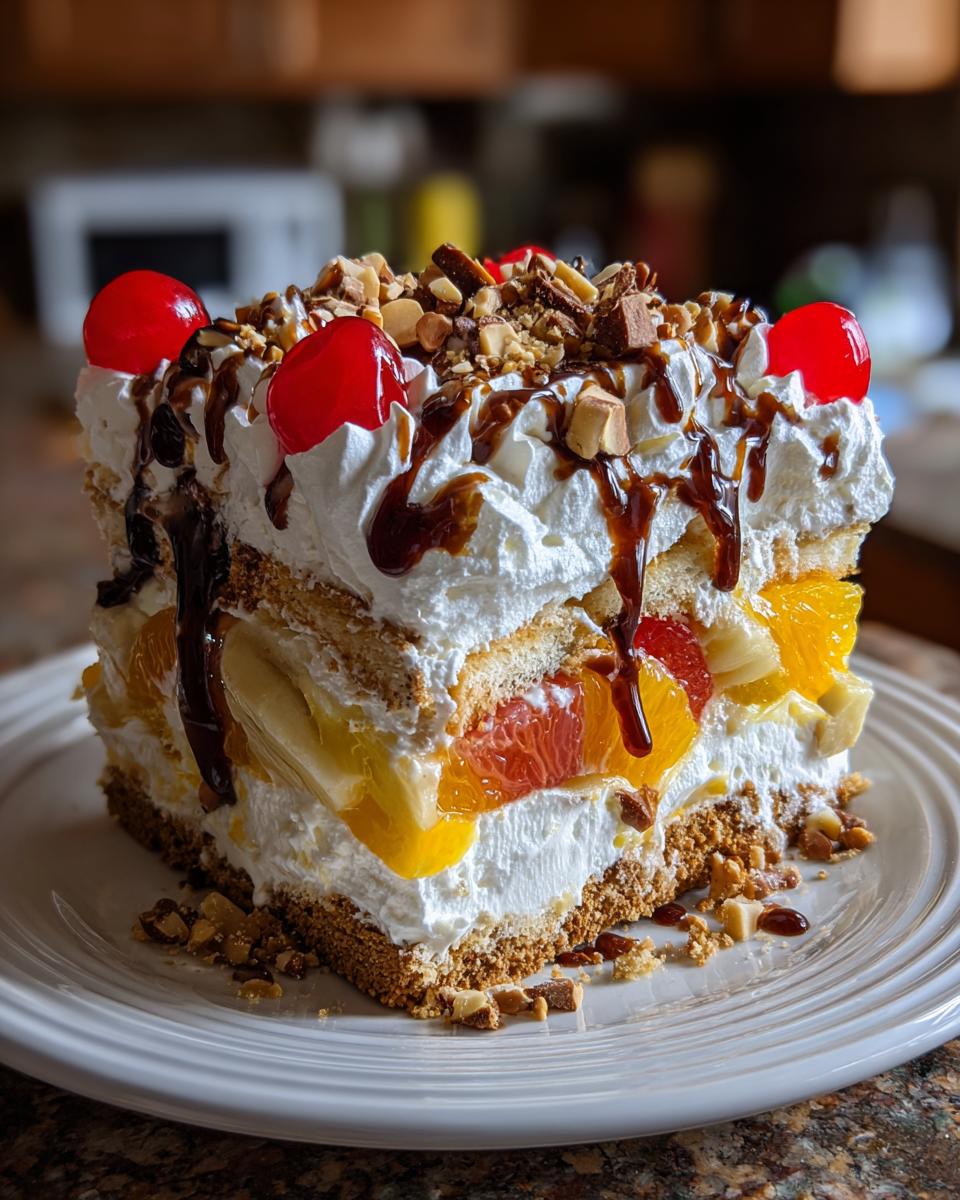
This dessert isn’t just a creamy trifle; it’s a classic sundae rebuilt! We nail that amazing banana pineapple strawberry dessert profile by layering fresh banana with crushed pineapple. Then, you bring in the whipped topping creaminess and finish it off with that rich chocolate drizzle and nuts. Every single bite tastes exactly like the sundae you got at the parlor as a kid!
Gathering Ingredients for Your banana split cake
Okay, you’ve decided to make the best banana split cake ever! Since this is a chilled dessert, picking the right ingredients is half the battle. I’ve broken down what you need into three simple groups so you aren’t scrambling while trying to assemble your layers. The secret to keeping this a perfect creamy fruit cake and not a watery mess? Draining your fruit! I mean *seriously* drain it. You definitely don’t want canned juice soaking into that gorgeous crust.
For the Graham Cracker Crust Recipes Base
- 1 1/2 cups graham cracker crumbs (I just crush mine up in a zip-top bag!)
- 1/2 cup melted butter (Use the real stuff, never margarine!)
- 1/2 cup granulated sugar
For the Creamy Filling and Fruit Layers
This is where the magic happens. Make sure your cream cheese is truly softened—sitting on the counter for an hour usually does the trick.
- 1 (8 ounce) package cream cheese, softened
- 1 cup powdered sugar
- 1 (12 ounce) container frozen whipped topping, thawed, divided (We use half now, half later!)
- 3 ripe bananas, sliced
- 1 (20 ounce) can crushed pineapple, drained well (Remember my warning about draining!)
- 1 (11 ounce) can mandarin oranges, drained well
For the Finishing Touches: Toppings for Your banana split cake
These are the classic sundae elements that make this recipe special. If you wanted to try something different, you could use my favorite pecan centers mixed into the nuts!
- 1/2 cup chopped pecans or walnuts
- 1/4 cup chocolate syrup
- Maraschino cherries for topping
Step-by-Step: Assembling the No-Bake banana split cake
Now for the fun part—putting this beautiful, chilly creation together! Since there’s no oven involved, assembly is fast, but you need to move with purpose between steps, especially when adding those delicate fruit layers. Remember, we’re building structure here, just like a perfect sundae! If you want to check out how I handle other simple assembly desserts, just look at my tips for no-bake eclair cake recipes.
Preparing and Chilling the Crust
First things first: that base! Get a mixing bowl and combine your graham cracker crumbs, melted butter, and that half cup of sugar. Mix it until it looks like wet sand. Then, press this mixture firmly and evenly into the bottom of your 9×13 dish. Don’t skimp on pressing it down; a dense base is key for great graham cracker crust recipes. Pop that into the fridge for about 15 minutes while you tackle the next layer. That quick chill helps it set up nicely!
Creating the Cream Cheese Base
Grab your big clean bowl and get that softened cream cheese beating with the powdered sugar until it’s completely smooth—no lumps allowed! Now, this is vital: take *half* of your thawed whipped topping and gently fold it into the cream cheese mixture. I mean gently! If you beat it in, you deflate all that air, and we want this filling light, not heavy. Folding keeps the mixture fluffy.
Layering the **banana split cake** Components
Time to build! Spread about half of that lovely cream cheese mixture directly over your chilled crust. Next, layer on all your sliced bananas. Then, carefully spoon over your well-drained crushed pineapple and those mandarin oranges. Spread the remaining cream cheese mixture right over the fruit layers. This acts like a delicious glue to hold everything together.
Finishing and Setting the Chilled Banana Dessert
Once the cream cheese layers are done, top the whole thing with the rest of your whipped topping. Get creative with your drizzle of chocolate syrup and sprinkle those chopped nuts on top. Don’t forget those bright red cherries! Cover the dish tightly, and this is where patience comes in. You absolutely must chill this chilled banana dessert for a minimum of four hours. Honestly? Overnight is truly best for the ultimate set.
Tips for the Best No Bake Layered Cake Experience
We’ve made it through the assembly, but to ensure this no bake layered cake is absolutely perfect when it’s time to serve, a couple of little tricks learned from trial and error really make all the difference. I followed Isabella’s advice to double-check my preparation details, and it paid off huge! Skipping these small steps can leave you with a soupy mess, and nobody wants that when they’re expecting a stunning creamy dessert.
Avoiding Watery Layers in Your banana split cake
Listen closely, because this is non-negotiable for holding that clean structure! Those canned fruits—the pineapple and the mandarin oranges—hold onto SO much extra liquid. After you think you’ve drained them, dump them out onto a few layers of paper towels. Gently press down on them to wick away every bit of excess moisture you can. If they are wet, they will bleed into your cream cheese layer, and that ruins the dessert’s integrity fast.
Making This a Great Make Ahead Chilled Dessert
This recipe shines as a make ahead chilled dessert, which is why it’s a lifesaver for big parties. You absolutely *can* prepare the entire banana split cake the day before you plan to serve it. In fact, I think the flavors meld together so beautifully overnight! However, I wouldn’t push it past 24 hours. The bananas start to darken a tiny bit, even sealed up tight, so aiming for the day before slicing is your sweet spot.
Variations for Your Creamy Fruit Cake
Just because this is a classic recipe doesn’t mean we can’t shake things up a little! That’s the fun of these wonderful, easy layered desserts—they are such great canvases for customization. If you love exploring retro dessert recipes, you know the base structure is often the real keeper, and we can totally tweak the toppings and middle layers here. Since we are working with the structure of a classic no-bake cheesecake style dessert, most swaps keep the structure solid!
Swapping Fruit in the banana split cake
If you aren’t a huge fan of mandarin oranges, you can totally swap them out for fresh sliced strawberries! Just make sure you pat them down really well before adding them to your layers so you don’t water down that delicious cream cheese mixture. Adding in strawberries only enhances that happy banana pineapple strawberry dessert vibe we are going for in this **banana split cake**.
Texture Tweaks: Nuts and Chocolate Drizzle Dessert
The nuts are totally flexible here! Don’t feel bound to pecans or walnuts. Try toasting some slivered almonds for an extra crunch—toasting always ramps up the flavor! As for the chocolate, if you want to switch up that classic chocolate drizzle dessert look, try melting one tablespoon of peanut butter with a tablespoon of semi-sweet chocolate chips instead of just using chocolate syrup on top. It gives it a slightly nutty, richer layer!
Serving Suggestions for This Simple Party Treat
Since this is a chilled dessert and not a baked cake, presentation is everything, right? For the cleanest look when serving this banana split cake, I highly recommend chilling it until it’s absolutely firm—usually overnight is best. When you cut it, use a long, sharp knife dipped in hot water and wiped dry between every single slice. This keeps those creamy layers looking neat and defined! You can serve it in generous squares if you’re aiming for that casual, backyard feel, or use a pie server to gently lift out wedges if you want it to look a bit more formal.
I always try to put the cherries on right before serving so they stay bright red, not drowned by the chocolate! And if you, like me, love making a great spread of classic make-ahead sides for your parties, this cool, refreshing cake balances out heavier main dishes perfectly!
Storage and Reheating Instructions for Your Chilled Banana Dessert
Because this is a lovely, luscious banana split cake, we treat it like a special, chilled delight. All the magic happens in that refrigerator! You absolutely must keep this under tight cover in the fridge. It keeps that whipped topping fluffy and protected from any lingering kitchen smells. Use plastic wrap right against the surface, then cover the whole dish. This is key for excellent storage & reheating instructions for any chilled treat!
Now, here’s the big warning: absolutely, under no circumstances, should you try to reheat this dessert! It’s designed to be served cold. Microwaving or warming it up would just melt your beautiful cream cheese and whipped topping layers into a puddle. If you’ve got leftovers, just store them right back in the fridge. I sometimes make moist blueberry bread for breakfast, but this cake is strictly a cool-weather indulgence!
Frequently Asked Questions About the banana split cake
It’s natural to have a few questions when assembling something this sweet and layered, especially when it’s a no bake layered cake that relies on chilling time! I try to answer everything I usually get asked when I bring this banana split cake to a gathering. If you enjoyed making this, you might also love checking out my recipes for things like creamy white chicken chili when you need something savory!
Can I use fresh strawberries instead of canned pineapple in this No Bake Layered Cake?
Oh, you absolutely can! If you’ve got fresh berries, go for it. That fresh bright flavor is amazing. However, you have to prep them just like the canned fruit—maybe even more so! Slice your fresh strawberries thin and pat them down really well with paper towels to remove surface moisture before you layer them in. We want rich flavor, not runny fruit juice seeping into our dreamy filling.
What is the best way to slice this banana split cake cleanly?
This is my number one tip for looking like a total pro when serving this! Since the filling is soft and creamy, using a cold, wet knife works wonders. Before you make your first cut, dip your sharp knife into a glass of hot water, wipe it completely dry, and then slice down firmly. You can rinse and repeat this process between every single slice, and you’ll get those perfect, neat squares everyone photographs!
Can this dessert be frozen?
I really wouldn’t recommend it for this specific recipe, no. It falls into the category of treats that do *not* like going into the freezer. The light, airy texture of the whipped topping and the cream cheese mixture tends to separate and get a little grainy or watery once it thaws out. It’s best enjoyed within 2 to 3 days directly from the refrigerator for the creamiest texture!
Estimated Nutritional Information for banana split cake
I always want you to know what you’re digging into, but remember that with a dessert that uses fresh fruit and varying brands of whipped topping, these numbers are just a helpful starting point! Since this is a no oven needed dessert, the structure is mostly fats and sugars, so enjoy it mindfully, knowing it’s packed with deliciousness. We keep things simple, so the estimations are based on the standard ingredients listed in the recipe.
Here’s a general snapshot per serving, based on cutting the dish into 12 generous slices:
- Serving Size: 1 slice
- Calories: Approximately 350
- Sugar: Around 35g (That condensed milk/syrup adds up!)
- Fat: About 19g (Mostly from the butter and cream cheese base)
- Protein: About 4g
- Carbohydrates: Around 45g
Please know that these figures are just estimates. If you use a lighter whipped topping or skip the chocolate drizzle, your numbers will look different! It’s all about what works best for your family when planning those easy weeknight dinners or weekend celebrations. Happy eating!
PrintNo-Bake Banana Split Cake
Make this simple, creamy No-Bake Banana Split Cake that captures all the classic ice cream parlor flavors without using an oven. It is perfect for summer parties and potlucks.
- Prep Time: 25 min
- Cook Time: 0 min
- Total Time: 4 hr 25 min
- Yield: 12 servings 1x
- Category: Dessert
- Method: No Bake
- Cuisine: American
- Diet: Vegetarian
Ingredients
- 1 1/2 cups graham cracker crumbs
- 1/2 cup melted butter
- 1/2 cup granulated sugar
- 1 (8 ounce) package cream cheese, softened
- 1 cup powdered sugar
- 1 (12 ounce) container frozen whipped topping, thawed, divided
- 3 ripe bananas, sliced
- 1 (20 ounce) can crushed pineapple, drained well
- 1 (11 ounce) can mandarin oranges, drained well
- 1/2 cup chopped pecans or walnuts
- 1/4 cup chocolate syrup
- Maraschino cherries for topping
Instructions
- Mix graham cracker crumbs, melted butter, and 1/2 cup granulated sugar in a bowl. Press this mixture firmly into the bottom of a 9×13 inch baking dish. Chill the crust for 15 minutes.
- In a separate large bowl, beat the softened cream cheese and powdered sugar until smooth. Gently fold in half of the thawed whipped topping until just combined.
- Spread half of the cream cheese mixture evenly over the chilled crust.
- Arrange the sliced bananas over the cream cheese layer.
- Spoon the drained crushed pineapple and drained mandarin oranges over the bananas.
- Spread the remaining cream cheese mixture over the fruit layers.
- Top the cake with the remaining whipped topping.
- Drizzle the chocolate syrup over the whipped topping layer. Sprinkle with chopped nuts.
- Place several maraschino cherries on top for decoration.
- Cover the dish and chill the No-Bake Banana Split Cake for at least 4 hours, or preferably overnight, before slicing and serving.
Notes
- Drain the crushed pineapple and mandarin oranges very thoroughly to prevent the cake from becoming watery. Press the fruit between paper towels if needed.
- For an extra layer of flavor, you can mix 1/4 cup of melted semi-sweet chocolate chips into the cream cheese mixture instead of using only syrup on top.
- This is a great make-ahead chilled dessert; prepare it one day before your event for the best texture.
Nutrition
- Serving Size: 1 slice
- Calories: 350
- Sugar: 35g
- Sodium: 210mg
- Fat: 19g
- Saturated Fat: 8g
- Unsaturated Fat: 11g
- Trans Fat: 0g
- Carbohydrates: 45g
- Fiber: 2g
- Protein: 4g
- Cholesterol: 30mg