
Oh, the holidays! If you’re anything like me, Izzy, you want all the festive joy without spending three days straight in the kitchen wrestling with fussy doughs. That’s why I am *thrilled* to share these Christmas Gooey Butter Cookies with you today. Seriously, these are my secret weapon for a packed holiday schedule!
We’re using a brilliant trick here—yellow cake mix! It strips away all the measuring complexity, leaving you with just pure, melt-in-your-mouth magic. These cookies are impossibly soft, wonderfully chewy, and undeniably gooey. If you’re looking for more easy wins in the dessert category, check out my collection of delicious dessert recipes!
They are the definition of simple holiday baking that looks like you spent all day on them. Growing up in Chicago, my grandmother always said the best treats were the ones made with love, not fuss. These buttery, festive squares fit that philosophy perfectly. They practically ensure I have time to sit down with a cup of tea after the baking is done!
- Why These Christmas Gooey Butter Cookies Are Your Holiday Must-Make
- Gathering Ingredients for Your Christmas Gooey Butter Cookies
- Step-by-Step Guide to Perfect Christmas Gooey Butter Cookies
- Tips for Success with Your Holiday Butter Cookies
- Variations for Festive Crinkle Top Cookies
- Storage and Keeping Your Christmas Gooey Butter Cookies Fresh
- Frequently Asked Questions About Cake Mix Gooey Cookies
- Nutritional Estimates for Gooey Christmas Sweets
- Share Your Festive Baking Creations
Why These Christmas Gooey Butter Cookies Are Your Holiday Must-Make
Okay, listen up! If you need a showstopper for your holiday cookie tray that doesn’t require endless rolling and cutting, these are it. These become delightfully Soft Christmas Cookies. They don’t just taste good; they practically vanish because they’re such incredible Melt In Your Mouth Christmas Desserts. They are designed to be easy and impressive!
- The Secret to the Gooey Texture: This is where the magic happens, folks. We skip the complicated butter layering because the base dough is mixed with melted butter, but the filling is pure cream cheese goodness. That contrast—the slightly dense cakey bottom meeting that soft, creamy top—is what gives you that signature ooey, gooey center every single time.
- Simple Assembly for Easy Christmas Baking: Forget making doughs from scratch when you’re busy checking everyone off your gift list. Using that yellow cake mix makes our Christmas Gooey Butter Cookies a total breeze. They bake up uniformly, are perfect for cutting into squares, and they are hands-down my favorite Festive Cookie Exchange Recipe because everyone raves about the texture!
If you enjoyed learning about this speedy method, you might also love my recipe for soft and chewy pudding cookies—another great way to use simple ingredients for maximum holiday impact!
Gathering Ingredients for Your Christmas Gooey Butter Cookies
Before we even think about preheating the oven, we need our supplies! Because this recipe is genius in its simplicity, you probably have most of this in your pantry already. Using cake mix is such a fantastic shortcut, but we want to make sure you grab the right amounts so your Christmas Gooey Butter Cookies turn out absolutely perfect.
Here’s what you need to assemble for this buttery holiday dream. Trust me, the sprinkles make all the difference in turning a simple butter cookie into a festive knockout!
- 1 box (15.25 ounces) yellow cake mix (Yes, that big box is what gives us the structure!)
- 1/2 cup unsalted butter, melted (Make sure this is measured accurately after melting!)
- 1 large egg (This goes into the base dough)
- 8 ounces cream cheese, softened (Crucial—it must be room temperature soft!)
- 1 large egg (This one is for the creamy filling)
- 1 teaspoon vanilla extract
- 1 1/2 cups powdered sugar, divided (We use some for the filling and some for dusting later, so keep that total amount clear!)
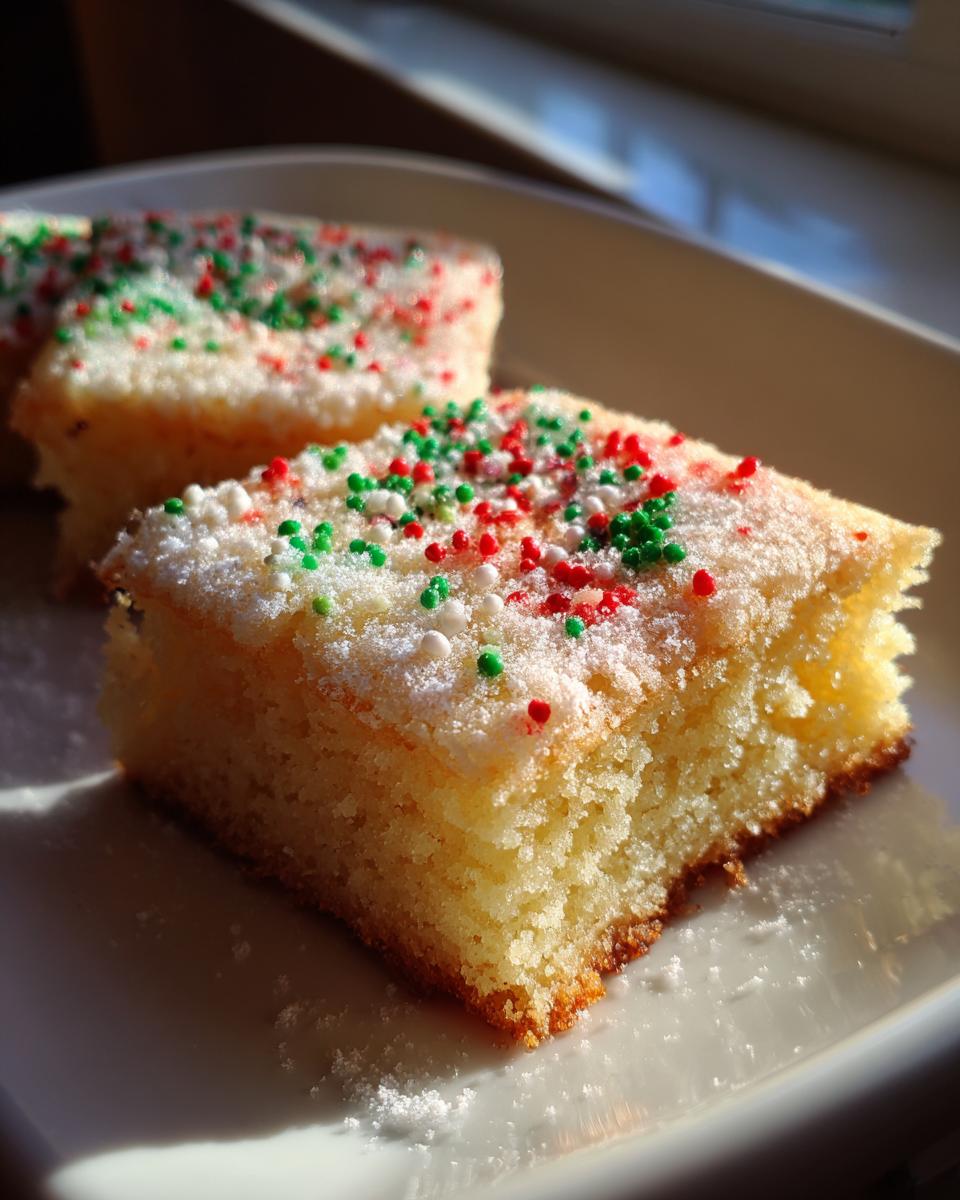
- 1/2 cup red and green sprinkles (Get the good, crunchy ones; they look so festive against that white top!)
That’s really it! Simple, right? If you want another fun way to use a box mix during the holidays, you have to try my strawberry cake mix cookies—another total crowd-pleaser, though these gooey butter squares are for guaranteed success!
Step-by-Step Guide to Perfect Christmas Gooey Butter Cookies
Alright, this is where we bring it all together! Don’t let the two layers scare you; this is pure dump-and-stir magic, honest. We need to keep an eye on our time management here, especially that cooling time at the end, because that’s the secret handshake for achieving that perfect soft, chewy texture in your Christmas Gooey Butter Cookies. Let’s get baking!
Preparing the Base Layer
First things first: get that oven warmed up to 350 degrees Fahrenheit. Always line your baking sheets if you were making regular drop cookies, but since these bake in a pan, we’re lining a standard 9×13 inch baking pan with parchment paper. This makes lifting the whole thing out later way easier, I promise.
Now for the crust! In a medium bowl, you’re just going to mix the entire box of yellow cake mix, half a cup of that melted butter, and the first egg. Mix it up until it looks like a shaggy, soft dough. Don’t overwork it! Press this dough right down into the bottom of your prepared 9×13 pan. Use the bottom of a measuring cup or just your clean fingers to get it nice and even across the bottom. Then, set that pan aside while we whip up the filling.
Creating the Cream Cheese Filling for Christmas Gooey Butter Cookies
Time for the layer that makes these dreams happen! Grab your large bowl—this needs to be smooth. Start by beating your 8 ounces of softened cream cheese until it is absolutely lump-free and velvety smooth. This is really important; if the cream cheese is cold, you’ll end up with little clumps, and we don’t want that in our beautiful Christmas Gooey Butter Cookies.
Once it’s looking like fluffy clouds, add in the second egg and that teaspoon of vanilla extract. Beat it until everything is just combined. Next, take that 1 cup of powdered sugar and add it in *gradually*. You want to beat it slowly so the sugar doesn’t go flying everywhere! Keep mixing until that entire creamy mixture is smooth again. Pour this lovely filling over your cake mix base, spread it gently, and then—the fun part—sprinkle that half cup of red and green sprinkles all over the top!
Baking and Achieving the Gooey Center
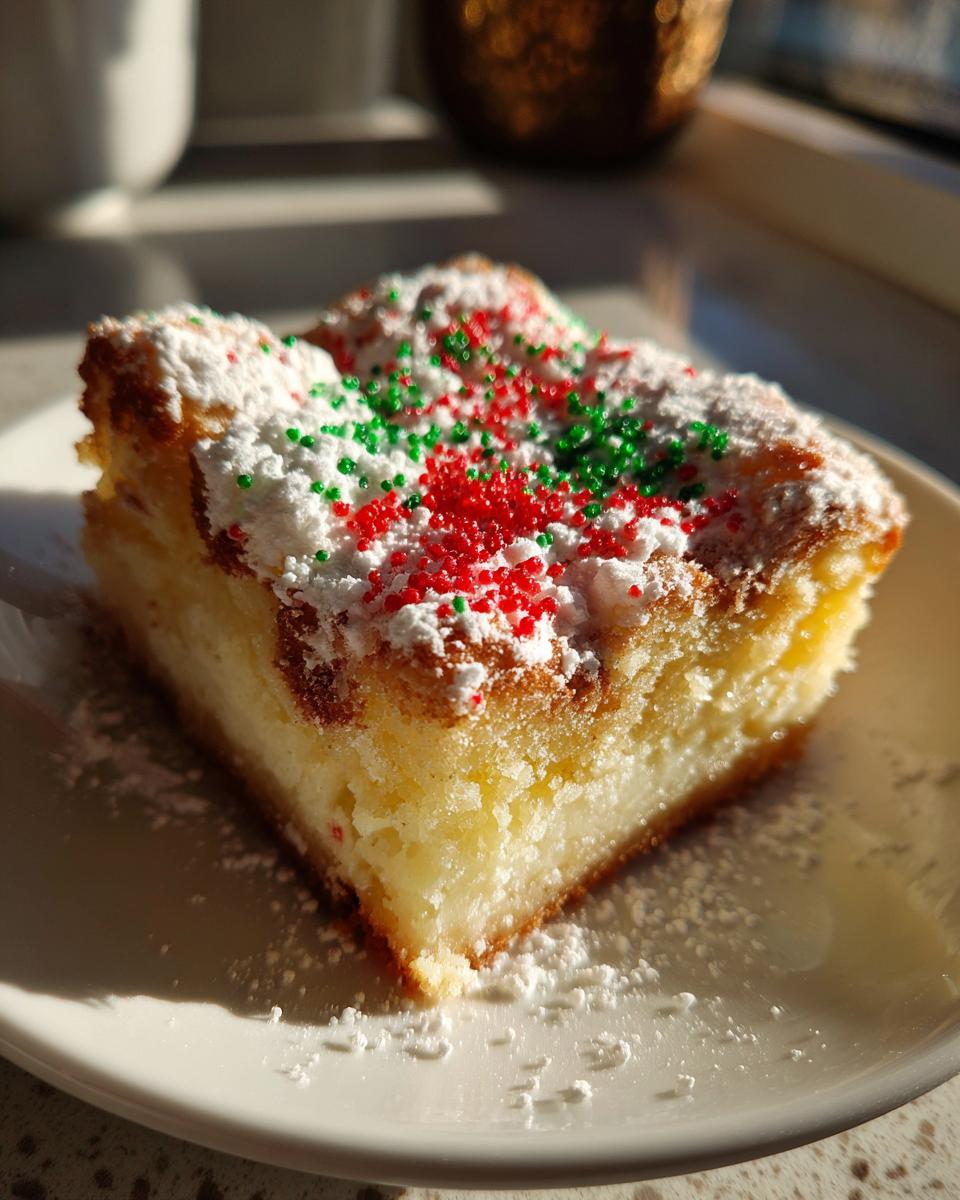
Pop that pan into your preheated oven for about 20 to 25 minutes. You are looking for visual cues here, not just a timer! The edges should look set and maybe just slightly golden brown. But here’s my expert tip: the center should still look a tiny bit soft. If you wait until it looks completely firm, you’ve gone too far, and you’ll miss that signature gooey magic! You can learn more about perfecting textures in my soft and chewy cut-out sugar cookie guide, which shares similar texture secrets.
Crucially, once they come out, you must let them cool completely in the pan on a wire rack. I know, I know, waiting is the hardest part, especially when they smell this good! But cutting them while warm guarantees they fall apart. Cooling is what lets that center firm up just enough to slice cleanly, giving you those perfect, thick, chewy squares.
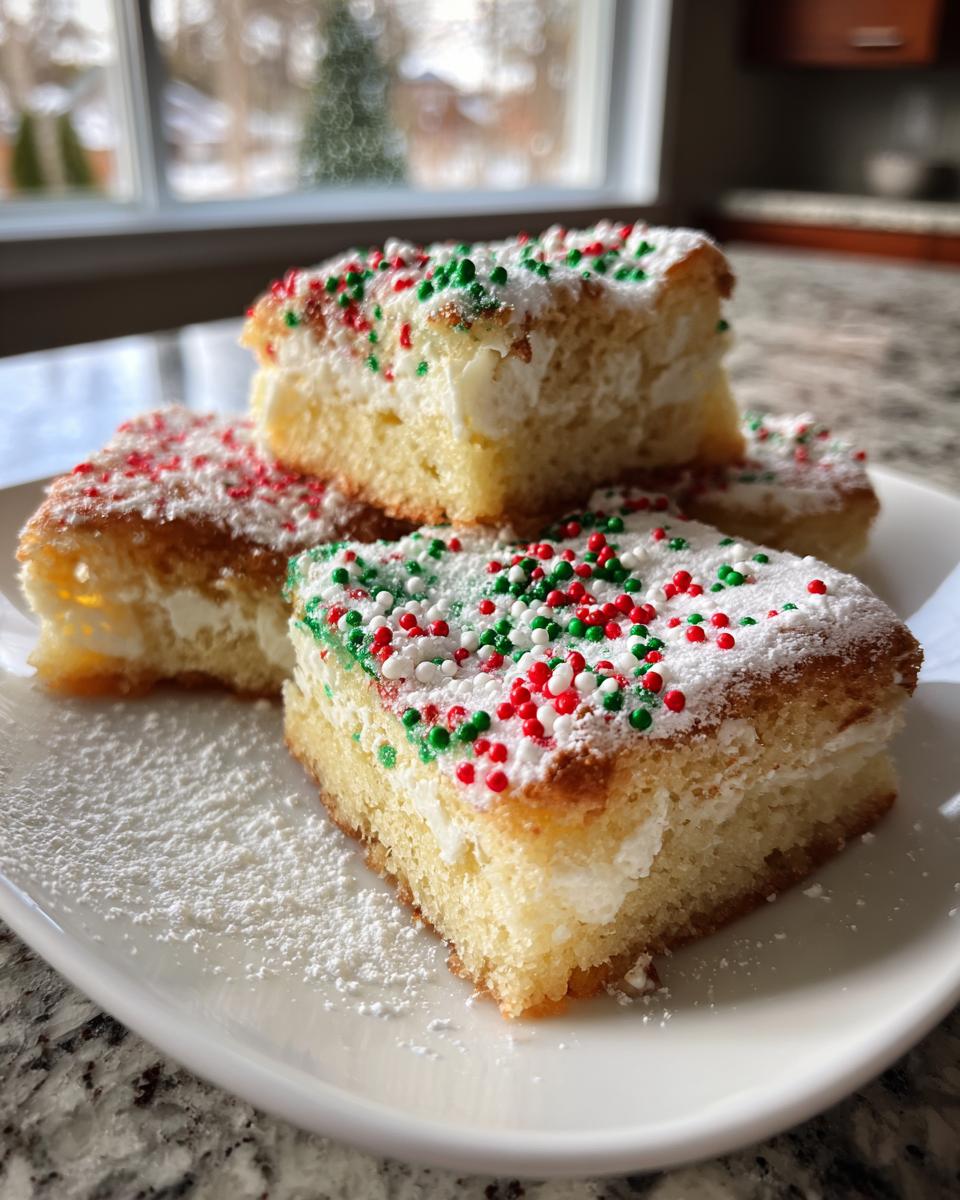
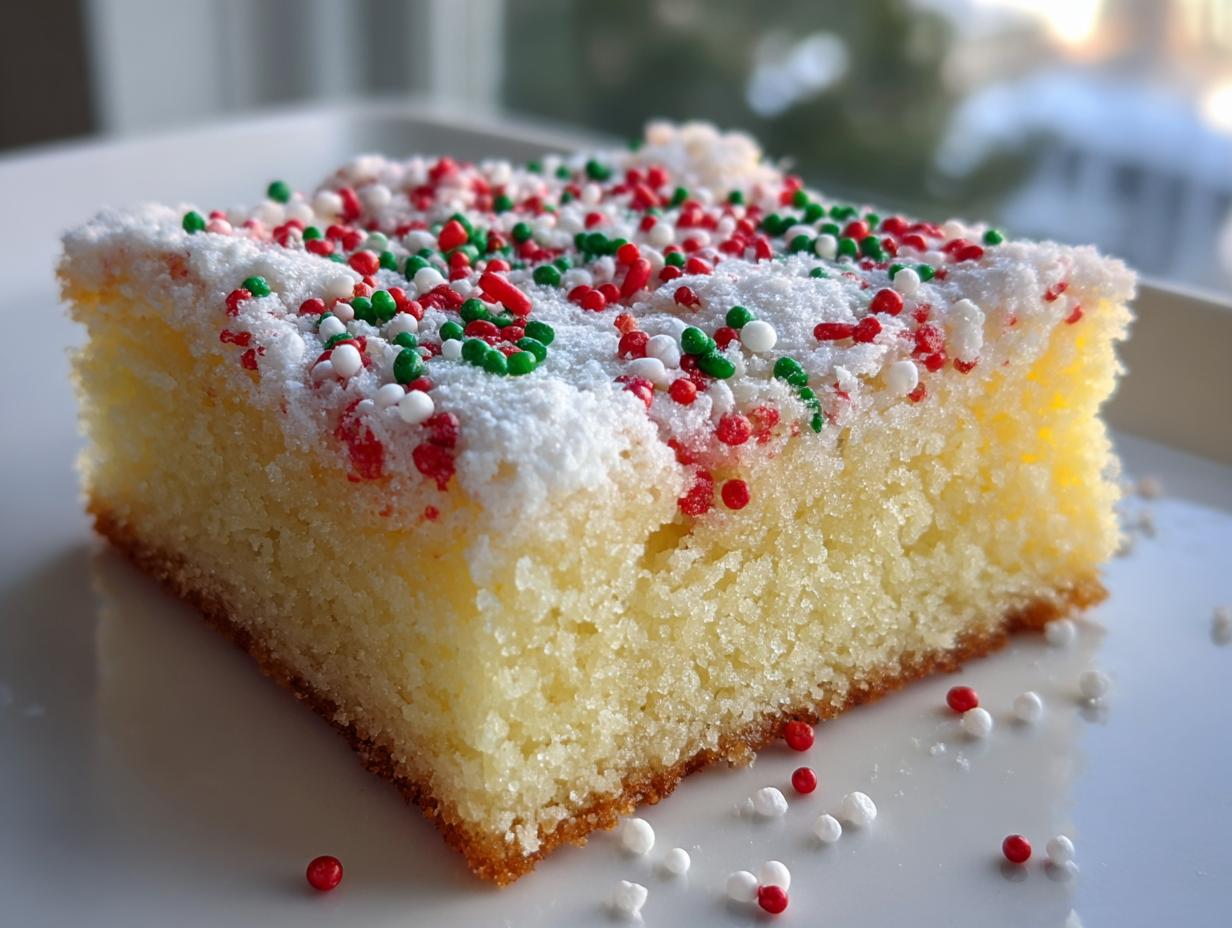
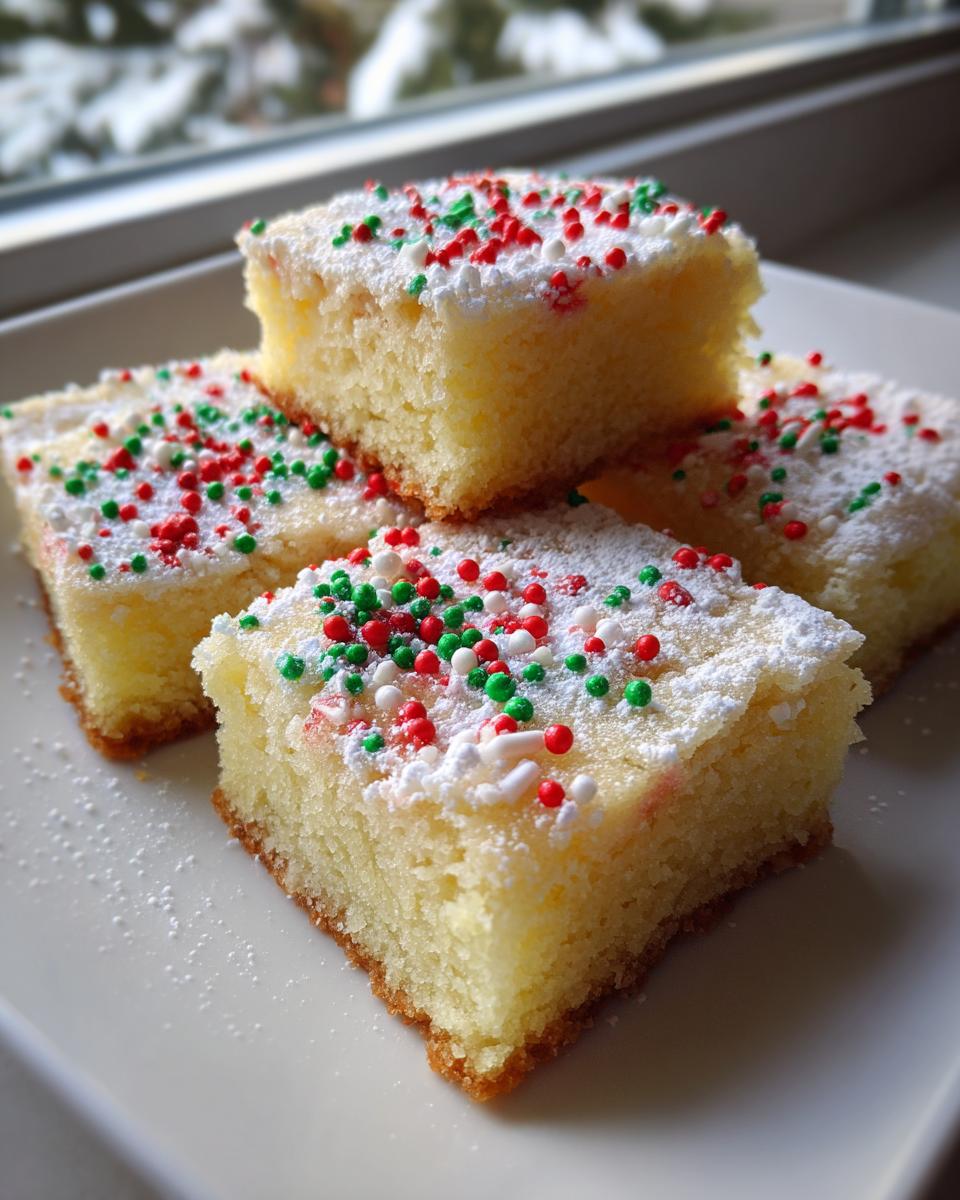
Once they’ve fully cooled—and I mean *fully*—lift the whole thing out using the parchment paper edges and cut them into squares. Then, just lightly dust the tops with any remaining powdered sugar before you serve them!
Tips for Success with Your Holiday Butter Cookies
We’ve got the recipe down, but when you’re baking for the holidays, sometimes the difference between a great cookie and a *legendary* cookie is just one tiny technique. Since these are some of the best Holiday Butter Cookies around, let’s nail down a couple of points that ensure perfect texture and that beautiful festive look!
Temperature Matters for Cream Cheese Holiday Cookies
If you take one thing away from this section, please let it be this: cream cheese must be soft. I mean truly soft! If you try to beat cold or even slightly cool cream cheese, you’re going to end up fighting lumps the entire time you mix the filling. Those lumps don’t disappear in the oven; they just bake into little dense pockets.
For the smoothest, richest filling that blends perfectly with that cake mix base, pull your cream cheese out at least an hour before you plan to mix. It should give easily when pressed with a finger. When the temperature is right, this step becomes so quick, resulting in the best texture for these Cream Cheese Holiday Cookies.
Achieving the Perfect Powdered Sugar Christmas Cookies Finish
The presentation on these squares is key, especially when they are sitting out on a crowded dessert table! Everyone loves seeing that snowdrift effect on top, but applying the powdered sugar at the wrong time can ruin the whole look. If you dust the cookies while they are still warm, that powdered sugar will melt right into the creamy filling, leaving you with a sticky, patchy glaze instead of that classic matte finish.
My trick for perfect Powdered Sugar Christmas Cookies is patience! Let the entire pan cool completely—and I mean cool to room temperature, which might take an hour or two. Then, cut them into squares. Once they are separated, take the remaining half-cup of powdered sugar and use a fine-mesh sieve to dust them lightly. They look stunning, and the coating stays intact long enough for everyone to admire them before devouring them!
For more tips on creating beautiful, uniform cookies that are consistently soft, you can check out my guide on baking soft and chewy iced oatmeal cookies—the cooling and finishing steps are surprisingly similar!
Variations for Festive Crinkle Top Cookies
The beauty of using a cake mix base like this is how easily we can switch things up year after year, keeping our holiday baking exciting without changing the effort level! While I adore the classic red and green sprinkles that give us those beautiful Festive Crinkle Top Cookies, there are so many other ways to dress these up for a cookie exchange or just because you want something a little different.
The base structure—the gooey butter cookie layers—should stay exactly the same. Don’t mess with the ratio of cake mix to cream cheese filling; that’s what guarantees that melt-in-your-mouth texture we worked so hard for! Instead, focus your creativity on the toppings or extract swaps.
If you want a warmer flavor profile, try swapping out the vanilla extract for almond extract, or maybe even a hint of lemon extract. Lemon pairs surprisingly well with the richness of the cream cheese filling! For more decadent ideas that still rely on a creamy, dreamy center, you can sometimes adapt the concept to things like my chocolate chip cheesecake style, just keeping everything bar-shaped instead of a full cake.
Here are a few quick swaps you can make to keep next year’s batch feeling brand new:
- Swap the Sprinkles: Instead of traditional holiday colors, try crushed candy canes *on top of* the creamy layer before baking for a nice peppermint crunch.
- Drizzle Magic: Once the cookies are completely cool and dusted with powdered sugar, melt a few ounces of white chocolate chips with a teaspoon of coconut oil and drizzle it artfully over the squares. It looks so fancy!
- Nutty Crunch: For the base layer, skip the melted butter entirely and use brown butter instead. Then, mix a half-cup of finely chopped pecans or walnuts right into the base dough before pressing it into the pan. It adds an amazing richness!
Remember, the crust and the filling are the stars, so feel free to experiment with those small flavor pairings while keeping the structural ingredients the same. That way, you always end up with incredible Christmas Gooey Butter Cookies!
Storage and Keeping Your Christmas Gooey Butter Cookies Fresh
You’ve made these perfect, soft squares, and now you have a 9×13 pan full of absolute holiday perfection. What do you do next? Do you hide them immediately so no one else finds them? (I might have done that once!) More practically, how do we store these so they stay wonderfully gooey and don’t dry out before the big cookie exchange?
The structure of our Christmas Gooey Butter Cookies—with that rich cream cheese layer—means they have a slightly different storage need than a standard sugar cookie. The good news is, they are actually excellent make-aheads! You can get these done days before Christmas and they’ll still taste like you just pulled them from the oven.
Here are my best tips for keeping these treats at their peak softness and flavor. If you’re looking for other make-ahead holiday sides, my recipe for easy candied sweet potatoes is another one that tastes great when prepped early!
Room Temperature Storage is Usually Best
For the best texture, I highly recommend keeping these cookies at room temperature for up to four days. Why not the fridge? Well, cold temperatures can sometimes firm up that glorious, soft cream cheese filling unexpectedly. We want chewy, not stiff!
You must make sure they are completely cool before you store them, though. If there is any residual warmth, condensation will form inside the container, leading to soggy bottoms, and nobody wants a soggy base on their perfect square!
Store them in a single layer if you can, especially if they are still slightly sticky, or place small sheets of parchment paper between layers. An airtight container works perfectly, but avoid stacking them too high if you’re worried about crushing that beautiful powdered sugar dusting.
Freezing for Later Holiday Baking Planning
If you’re planning waaaay ahead—say, you’re baking for a huge cookie tray in January—go ahead and freeze them! This is where you need to be careful with the final step. For the best results, cut the cookies into squares first, but *do not* dust them with the final layer of powdered sugar yet.
Wrap the stack tightly in plastic wrap, maybe even throwing a layer of foil around that for good measure to prevent freezer burn. They should last beautifully for about two to three months. When you’re ready to serve them, just let them thaw overnight in the refrigerator, then bring them out onto the counter for about an hour to come to room temperature.
Right before serving, dust them with that final bit of powdered sugar. They honestly taste just as fresh as day one! I find that these Holiday Butter Cookies hold up better in the freezer than a lot of those delicate, shortbread-style things.
Tips to Refresh Slightly Dry Cookies
Now, let’s say you made them five days ago, and they are still delicious, but maybe not quite as melt-in-your-mouth as they were initially? Don’t worry! You don’t need to reheat them like a brownie.
Just place a cut square in the microwave for about 8 to 10 seconds. I’m serious—ten seconds max! The butter and cream cheese will soften right up, and you’ll get that incredible rush of gooeyness back instantly. Don’t even try twenty seconds, or you’ll end up with a melted puddle. A little bit of controlled warmth brings the texture right back to life!
Frequently Asked Questions About Cake Mix Gooey Cookies
I get so many messages after the holidays about people trying to replicate that perfect soft center, so I wanted to gather a few quick answers here for you! These are all about getting your Cake Mix Gooey Cookies just right, every single time. Believe me, I’ve tested all the variables so you don’t have to!
Can I make these Christmas Gooey Butter Cookies ahead of time?
Yes, absolutely! In fact, I recommend it, especially if you are baking for a big party or cookie exchange. The texture actually seems to settle in beautifully overnight after they’ve cooled completely in the pan. Here’s the key: make them, let them cool to room temperature, cut them into squares, and store them in an airtight container, layering with parchment paper if necessary.
The only thing I insist you wait on is that final dusting of powdered sugar! If you dust them right away, the moisture from the filling—even when cooled—will start to dissolve the sugar. Dust them the day you plan to serve them for that perfect, snowy look. That way, you keep the beautiful presentation for your Christmas Gooey Butter Cookies.
What is the best way to get the ‘gooey’ texture?
If you ask me, the “gooey” factor relies almost entirely on not overbaking and respecting the cooling period. When you see those edges set, pull them out! If you wait until the middle looks totally done, you’ve baked away the gooeyness and you’ll end up with a firm bar instead of a soft square.
Secondly, that cooling period is non-negotiable. As the cookies cool slowly in the pan, the center firms up just enough so that when you slice them, you get that beautiful demarcation between the crust and the soft, rich filling. Rushing this step is the number one way to lose that signature texture in any Chewy Holiday Treat!
Can I use a different cake mix flavor for these Chewy Holiday Treats?
That’s a great question! The yellow cake mix is my top recommendation because it has a classic vanilla/butter base that complements the sweetness of the cream cheese perfectly without fighting it. However, I know some folks love customizing!
You can definitely use a white cake mix—it will result in a slightly less rich flavor, maybe leaning a little more vanilla-forward, but it works wonderfully as another base for these Chewy Holiday Treats. If you try chocolate cake mix, though, you’re stepping into a whole new recipe! Stick to yellow or white for the best results that maintain that classic gooey butter profile. For more reliable results across the board, remember you can always check out my guide on easy chicken taco recipes if you need a break from baking!
Nutritional Estimates for Gooey Christmas Sweets
Okay, let’s talk numbers for a second. I know when we’re baking special holiday treats like these Gooey Christmas Sweets, we aren’t usually aiming for diet food, but I always like to give you a general idea of what’s in a single square. Since these are rich, buttery, and absolutely divine, they pack a little punch!
I ran the numbers based on the standard recipe yields for 36 squares. Remember, these are just good faith estimates designed to help you budget your holiday enjoyment, because every single ingredient and measurement can slightly alter the final count. These are meant to be enjoyed, not scrutinized!
Here is the breakdown for what’s generally in one square of our amazing Christmas Gooey Butter Cookies:
- Serving Size: 1 square
- Calories: 180
- Sugar: 18g
- Sodium: 150mg
- Fat: 9g
- Saturated Fat: 5g
- Carbohydrates: 23g
- Protein: 2g
Keep in mind, that sugar content comes mostly from the cake mix, the powdered sugar dusting, and the cream cheese filling—it’s the price we pay for that dreamy texture! If you’re looking for something a little lighter on the rich side, this isn’t the place to start, but if you want the best cookie experience, this density is worth it.
For more delicious recipes that help you plan out your holiday menu—whether you’re looking for appetizers or side dishes—you can always browse some of my other favorites, like this easy creamy dill dip recipe. Happy indulging!
Share Your Festive Baking Creations
I truly hope you loved making these Christmas Gooey Butter Cookies as much as I love baking them every single year. For me, the kitchen is always buzzing in December, and these squares are always the first to disappear off the cooling rack!
Now that you’ve tried this recipe, I absolutely need to hear about it! Was the center as gooey as you dreamed? Did the red and green sprinkles look perfect on your serving platter this year? Seriously, don’t be shy!
Please take a moment to leave me a rating right here on the recipe page—it helps other home bakers know this recipe is solid gold for the holidays. I thrive on knowing I’ve made someone’s busy holiday season just a little bit sweeter and easier.
And if you took a pretty picture of your batch—maybe sitting next to a mug of hot cocoa or waiting for Santa—I would be so honored if you shared it! Tag me on social media, or if you want to share thoughts on your experience, drop a comment below. I love seeing how different kitchens bring these simple recipes to life. If you want to see some of the gorgeous cookies other bakers have made, check out some inspiration from other holiday recipes, like the beautiful treats featured by The Tasty Fork!
Thank you for trusting me with your holiday baking this year. If you want to learn more about my philosophy in the kitchen and why I focus on approachable, delicious recipes like this one, you can always read more about Chefsily here!
PrintChristmas Gooey Butter Cookies

Make these soft, chewy Christmas Gooey Butter Cookies for a festive treat that melts in your mouth. This easy recipe uses cake mix and cream cheese for a perfect holiday texture.
- Prep Time: 15 min
- Cook Time: 25 min
- Total Time: 40 min
- Yield: 36 squares 1x
- Category: Dessert
- Method: Baking
- Cuisine: American
- Diet: Vegetarian
Ingredients
- 1 box (15.25 ounces) yellow cake mix
- 1/2 cup unsalted butter, melted
- 1 large egg
- 8 ounces cream cheese, softened
- 1 large egg
- 1 teaspoon vanilla extract
- 1 1/2 cups powdered sugar, divided
- 1/2 cup red and green sprinkles
Instructions
- Preheat your oven to 350 degrees Fahrenheit. Line baking sheets with parchment paper.
- In a medium bowl, combine the yellow cake mix, 1/2 cup melted butter, and 1 egg. Mix until a soft dough forms.
- Press the dough evenly into the bottom of an ungreased 9×13 inch baking pan. Set aside.
- In a separate large bowl, beat the softened cream cheese until smooth.
- Add the second egg and vanilla extract to the cream cheese mixture. Beat until combined.
- Gradually add 1 cup of the powdered sugar to the cream cheese mixture, beating until the filling is smooth and creamy.
- Spread the cream cheese mixture evenly over the cake mix base in the baking pan.
- Sprinkle the top evenly with red and green sprinkles.
- Bake for 20 to 25 minutes, or until the edges are set but the center still looks slightly soft. Do not overbake.
- Remove the pan from the oven and let the cookies cool completely in the pan on a wire rack. Cooling is important for the gooey texture.
- Once cool, cut the cookies into squares.
- Place the remaining 1/2 cup of powdered sugar in a shallow dish. Dust the tops of the cooled squares lightly with the remaining powdered sugar before serving.
Notes
- For an extra gooey center, slightly underbake the cookies by about 2 minutes.
- You can substitute the yellow cake mix with white cake mix if preferred.
- Chill the dough for 30 minutes before pressing it into the pan for easier handling.
Nutrition
- Serving Size: 1 square
- Calories: 180
- Sugar: 18
- Sodium: 150
- Fat: 9
- Saturated Fat: 5
- Unsaturated Fat: 4
- Trans Fat: 0
- Carbohydrates: 23
- Fiber: 0
- Protein: 2
- Cholesterol: 35