
Oh, you know that feeling, right? You’re sitting down to a big bowl of pasta or soup and you think, “This meal needs something incredible.” It needs those legendary, warm, soft, slightly salty sticks of pure joy. We all crave those restaurant-style breadsticks, especially the ones we dream about from that famous Italian chain. Well, stop wishing and start baking! I’m Isabella Rossi, and I’m here to tell you that my ultimate soft & chewy Olive Garden Copycat breadsticks recipe is going to change your weeknights forever. For me, food is all about comfort and connection, and nothing says ‘welcome home’ quite like perfect, buttery bread. If you want to know more about our philosophy here at Chefsily, you can always check out our About Us page. Trust me, this is the foolproof recipe you’ve been needing.
- Why This Homemade Breadsticks Recipe Works So Well
- Gathering Ingredients for Your Olive Garden Breadsticks Copycat
- How to Prepare Easy Breadsticks: Step-by-Step Instructions
- Tips for Perfect Restaurant Style Breadsticks Success
- Make Ahead Breadsticks and Storage Instructions
- Serving Suggestions for These Italian Breadsticks
- Frequently Asked Questions About Homemade Breadsticks
- Estimated Nutritional Data for Garlic Breadsticks
- Share Your Soft Breadsticks Creations
Why This Homemade Breadsticks Recipe Works So Well
Look, not all recipes promise what they deliver, but this one actually gets you those incredible, pillowy delights. We’re aiming for true restaurant style breadsticks here, and the secret isn’t magic; it’s just giving the dough what it needs. It’s all about texture and that coating everyone swoons over. If you follow these few pointers, you’ll nail that signature result every single time.
Achieving That Signature Soft Breadsticks Texture
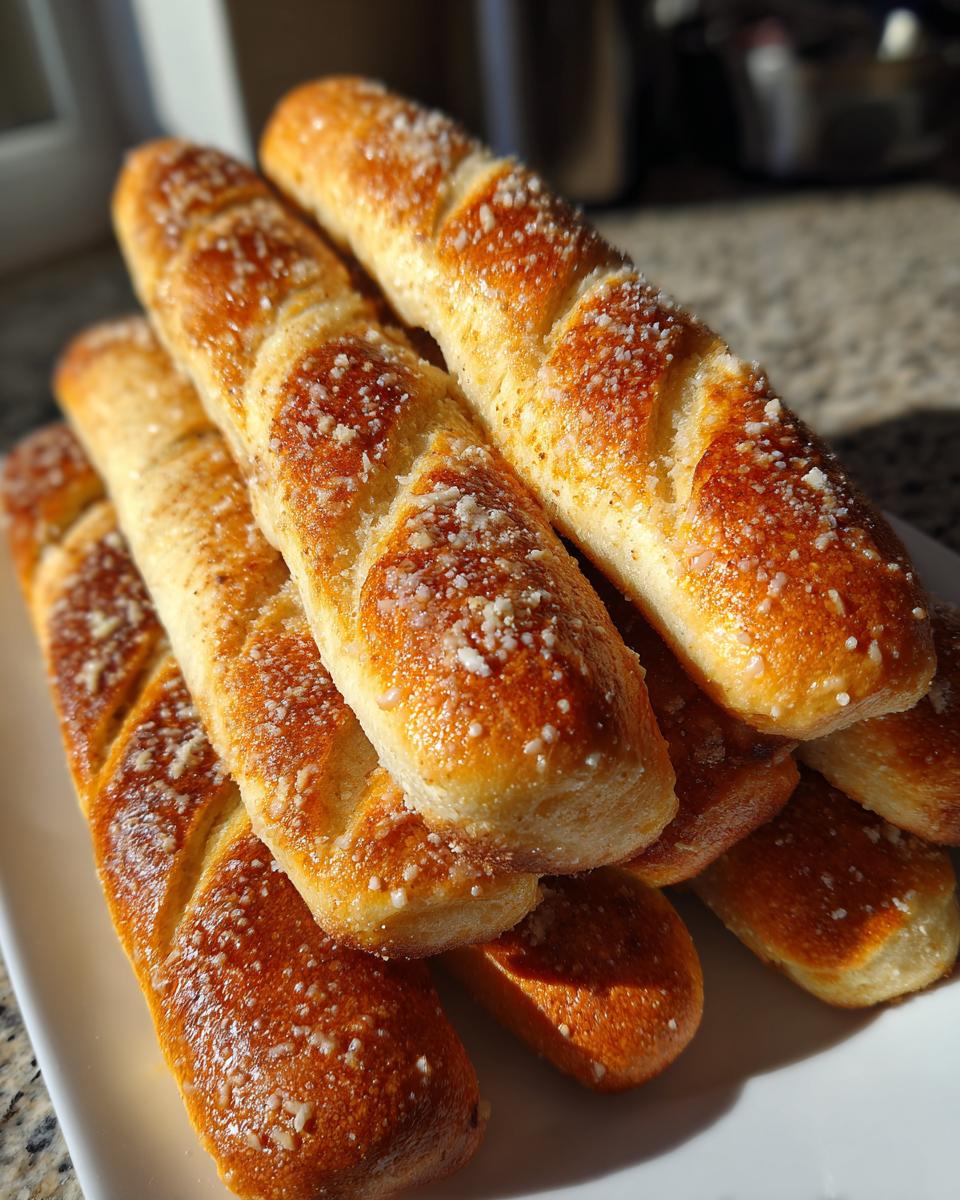
The chewiness you’re looking for comes directly from developing the gluten network. You need to knead this dough until it’s super smooth and happy—don’t skimp on those 7 minutes! Then, you let it rest. That first long rise is non-negotiable because it lets the air pockets form slowly, resulting in those famously soft breadsticks that pull apart beautifully instead of being cakey or dense.
The Secret to Perfect Garlic Breadsticks Recipe Topping
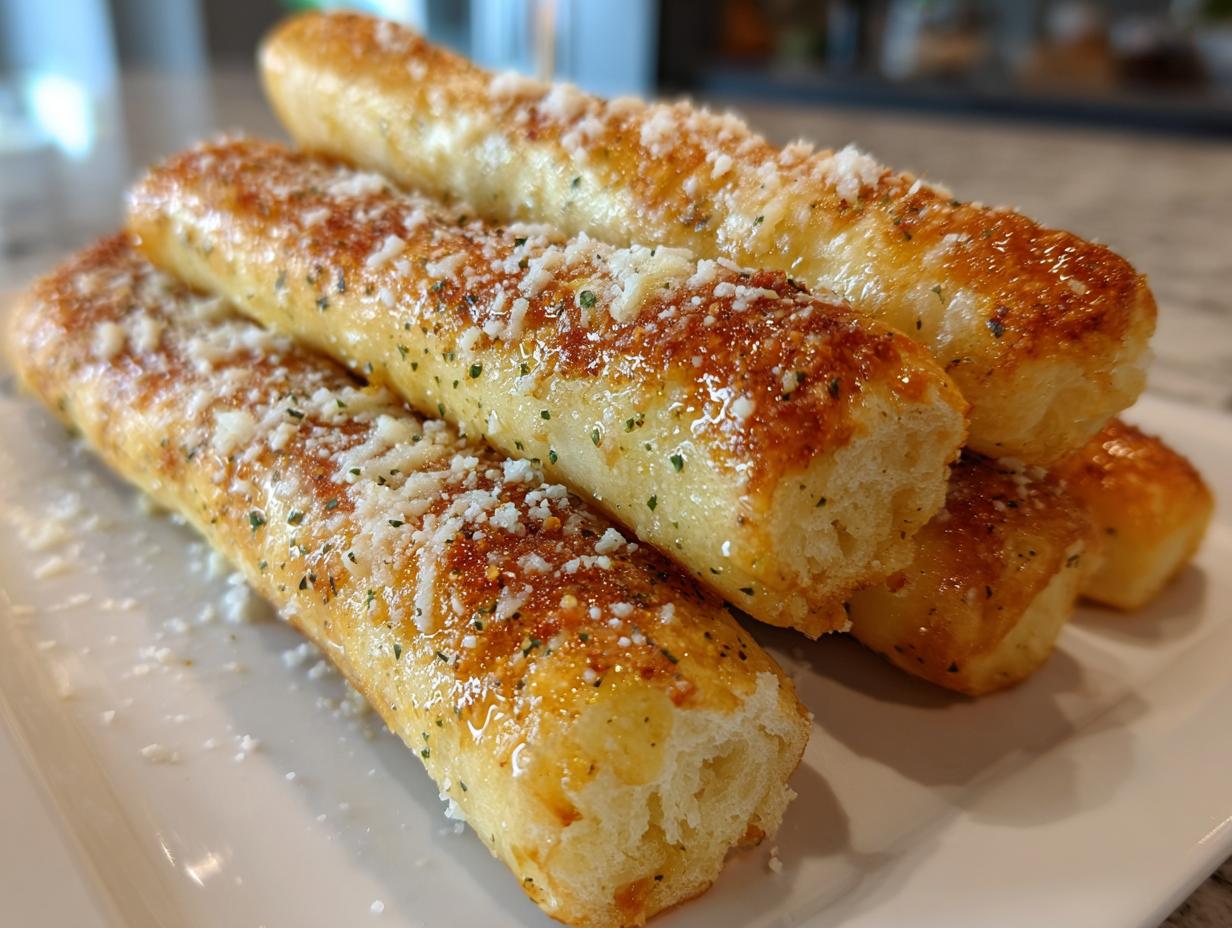
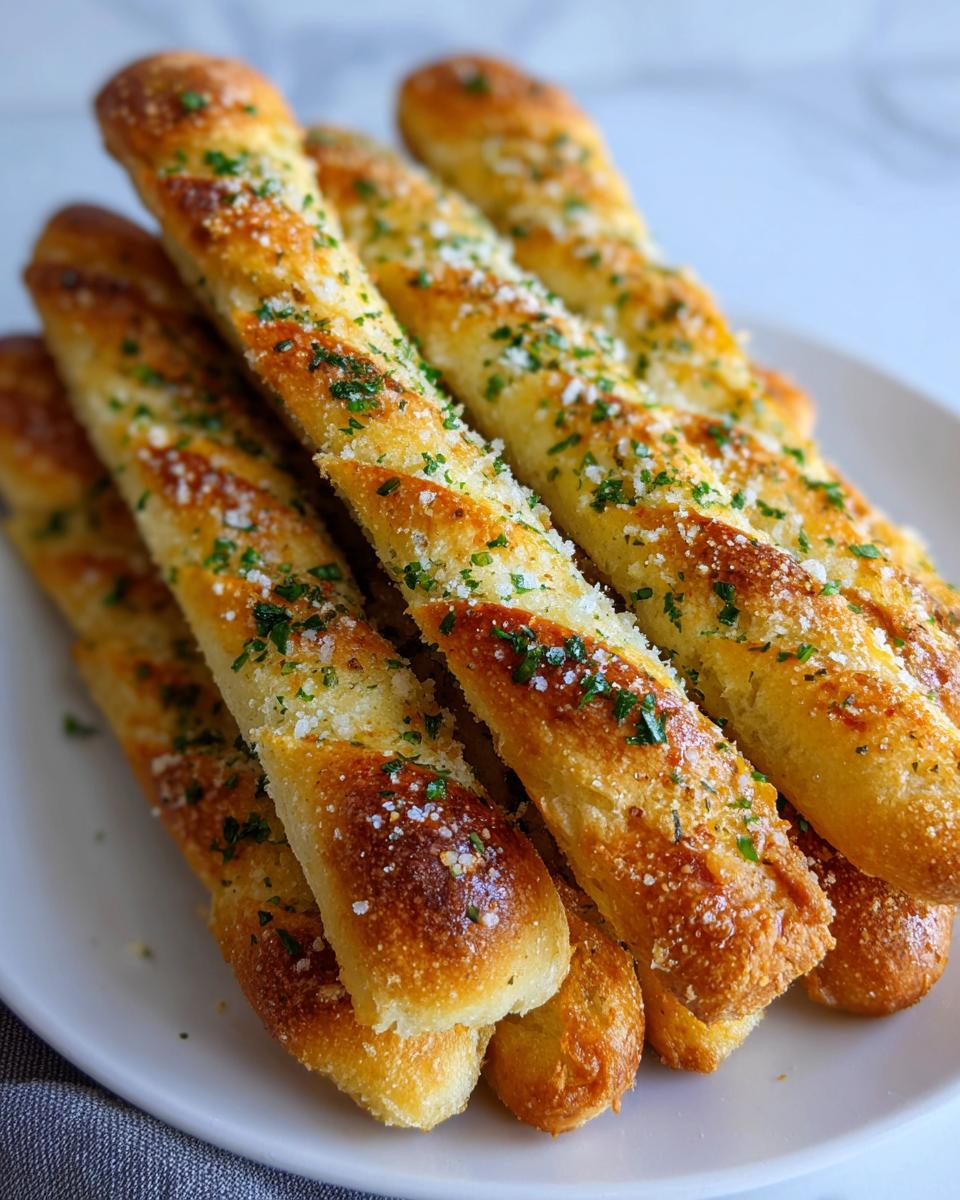
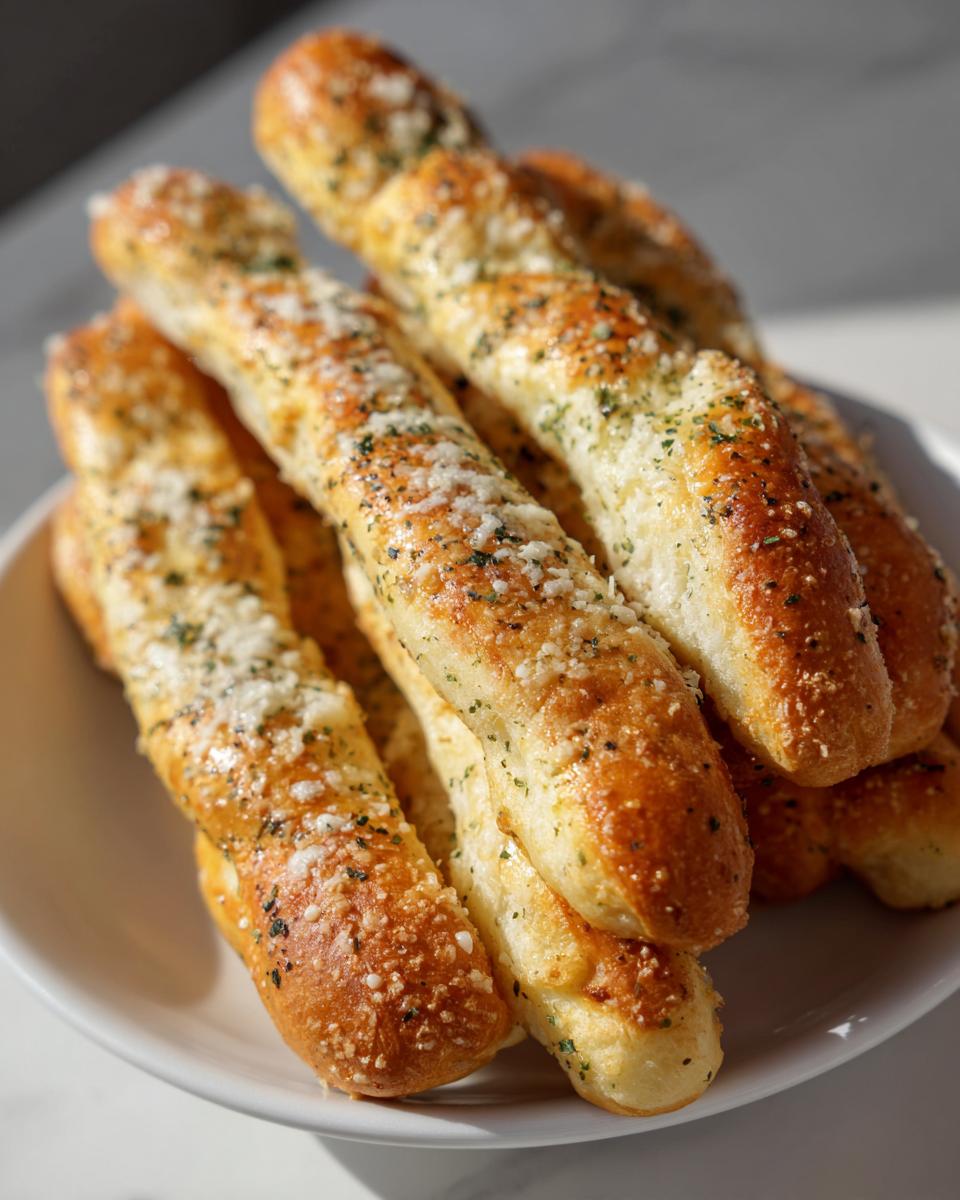
Okay, here is where the copycat flavor lives. We don’t just melt butter; we infuse it. The balance of minced fresh garlic, a hint of Italian seasoning, and generously grated Parmesan cheese floating in melted butter creates this magical drizzle. When you brush this over your hot breadsticks right out of the oven, it soaks right in, giving you that signature savory crunch without feeling greasy!
Gathering Ingredients for Your Olive Garden Breadsticks Copycat
You can’t make magic without the right supplies! Because we want these breadsticks to be spot-on delicious and easy, I like to keep my shopping list simple. We’ll need ingredients for the dough first—that’s our foundation for a great Homemade Dough Recipe—and then a separate list for that unbeatable topping. Having everything laid out makes the whole process feel so much calmer, trust me!
Dough Ingredients for Homemade Breadsticks Recipe
- 1 1/2 cups warm water (about 110 degrees F)
- 2 1/4 teaspoons active dry yeast
- 2 tablespoons granulated sugar
- 4 cups all-purpose flour, plus more for dusting
- 1 teaspoon salt
- 1/4 cup olive oil, plus more for brushing
Garlic Parmesan Breadsticks Finishing Mixture
This mixture is what brings the big flavor! Gather these before you pull the breadsticks from the oven:
- 1/2 cup unsalted butter, melted
- 4 cloves garlic, minced
- 1 teaspoon dried Italian seasoning
- 1/2 teaspoon salt
- 1/4 cup grated Parmesan cheese
Need some quick dinner ideas to serve alongside these? Check out my favorites for easy weeknight dinners!
How to Prepare Easy Breadsticks: Step-by-Step Instructions
Alright, time to roll up our sleeves! This is the fun part where we turn simple flour and water into pillowy gold. I’ve broken down the whole process into manageable chunks because nobody wants to feel rushed when they’re aiming for perfection. Follow these steps closely, and you’ll have the best breadsticks dough you’ve ever worked with, guaranteed.
Mixing and Kneading the Soft Breadsticks Dough
First things first, we need to wake up that yeast! Take your large bowl and gently mix the warm water, sugar, and yeast together. Don’t rush this—let it sit on the counter for a good 5 to 10 minutes until it gets foamy on top. That foam tells you the yeast is alive and ready to work its magic!
Once it’s bubbly, shoot in 3 cups of your flour, the teaspoon of salt, and that 1/4 cup of olive oil. Mix that up until it’s shaggy. Now, slowly add the rest of the flour until a soft dough starts to happen. Turn that dough out onto a lightly floured surface. You’re going to knead this for a solid 5 to 7 minutes. Keep working it until it feels smooth, bouncy, and perfectly elastic. That’s how you get those beautiful, soft breadsticks!
The Rising Process for Chewy Breadsticks
Once you’ve kneaded it, place your dough ball into a lightly oiled bowl. Give it a little turn so the whole surface gets coated—this stops it from drying out. Cover that bowl tightly with plastic wrap or a kitchen towel. Now, find the warmest spot in your kitchen and let it sit undisturbed for 1 to 1.5 hours. Don’t cheat! That long rest is essential for making these the most chewy breadsticks you’ve ever had.
Shaping and Baking Your Buttery Breadsticks
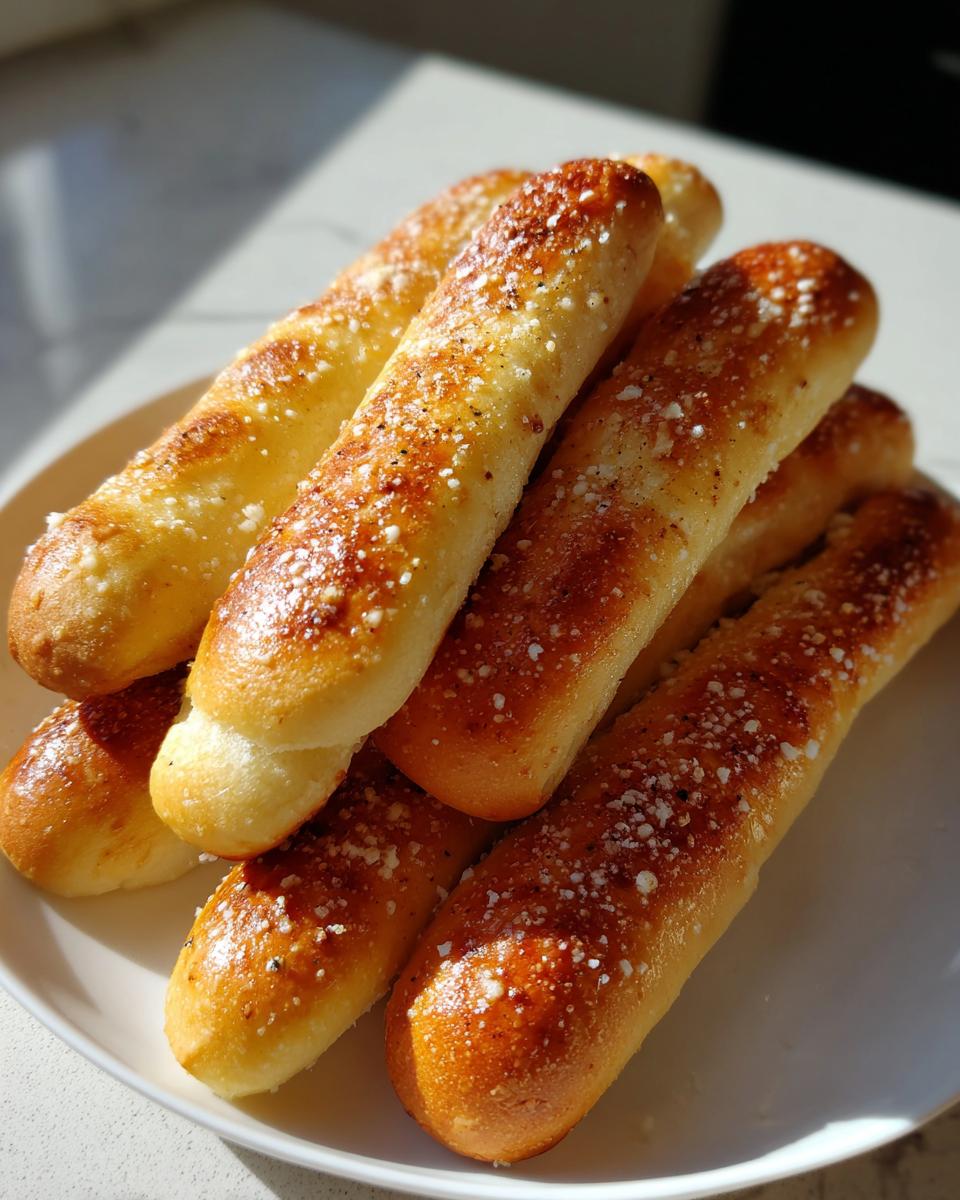
When your dough has doubled, preheat that oven to 400 degrees F (200 degrees C). Make sure you line a big baking sheet with parchment paper—I learned the hard way that these can stick if you don’t!
Gently punch the air out of the risen dough. Divide it into 12 equal pieces. Now, roll each piece out gently until it’s skinny, aiming for about 10 inches long. Lay them out on your prepared sheet. Let them rest again for 15 minutes, covered loosely. Before they go in, brush the tops lightly with a bit more olive oil. Bake them for just 10 to 12 minutes until they are barely golden brown.
Applying the Garlic Butter Topping to Warm Breadsticks
This is the grand finale! While those beauties are in the oven, mix up your topping: melted butter, minced garlic, Italian seasoning, salt, and Parmesan cheese. The second those breadsticks come out of the oven—and I mean immediately—start brushing that glorious garlic butter all over them. You want that heat to melt the butter and help the Parmesan stick perfectly. You can find more amazing flavor combinations, like how to make a great garlic aioli, on the blog!
If you want to see how others made their quick, easy versions, check out this easy garlic breadsticks recipe for comparison!
Tips for Perfect Restaurant Style Breadsticks Success
Now that you know the absolute basics, let’s talk about taking these from “great homemade” to “I can’t stop eating them” status! Building authority isn’t just about following steps; it’s knowing *why* you do them and how to tweak them for your own cravings. These little tricks are what separate a good batch of breadsticks from the legendary ones.
Making Cheesy Breadsticks Variation
I know, I know—you can’t have a good haul of these without thinking about adding cheese! When you’re dreaming of cheesy breadsticks, this is the easiest way to get that ooey-gooey factor right on top. Wait until those breadsticks have been baking for about 7 or 8 minutes. Then, pull the pan out quickly and sprinkle your favorite shredded mozzarella cheese right over the tops. Pop them back in for the last 3 minutes of baking. The heat will melt it perfectly, and then when you brush on that garlic butter, it all seals together! It’s heavenly.
Flour Choice for Texture Control
This is a trade secret I picked up from my friend who worked in a bakery! If you want to lean into the texture and make them incredibly chewy breadsticks, swap out the all-purpose flour for bread flour. Bread flour has more protein, which builds a stronger gluten structure during kneading. This makes the final product a little more substantial and gives you that satisfying pull. If you stick with the all-purpose flour, as written in the main recipe, you get a slightly softer, more tender bite, closer to a dinner roll. Both are fantastic, so choose your fighter!
For some other killer savory bakes, I always turn to my recipe for garlic Parmesan mashed potatoes—it’s my go-to sidekick for these! See what I mean about pairing flavor profiles? If you want to hear how another baker mastered the copycat version, check out the tips on Kristine’s Kitchen Blog.
Make Ahead Breadsticks and Storage Instructions
I know how life gets—sometimes you just don’t have an hour and a half to let dough rise. That’s why this recipe is wonderful for make ahead breadsticks! You can whip up that gorgeous dough, knead it smooth, and then pop the whole oiled bowl right into the fridge. It can chill out there for up to 24 hours. Just remember, if you’re baking them straight from the fridge, you absolutely must let the dough sit on the counter for at least an hour to warm up before you shape it, or they’ll be too stiff.
When it comes to leftovers (if you even have any!), store your cooled breadsticks in an airtight container at room temperature. They stay surprisingly soft for about two days. To reheat them and bring that buttery flavor back to life? Skip the microwave! Pop them on a baking sheet at 350 degrees F for about five minutes. They heat up perfectly and get that fresh-from-the-oven chewiness again. If you’re looking for an amazing dipping sauce to go alongside, my easy honey BBQ sauce is seriously addictive!
Serving Suggestions for These Italian Breadsticks
Honestly, once you smell that garlic butter hitting the oven, you could serve these breadsticks with anything and it would be amazing. But if you’re planning a full meal, you need the right partners! These are absolutely perfect as an appetizer bread sticks platter while everyone is finishing up their apps, or they can slot right in as a hearty dinner side dish bread.
My favorite way to use them? They are the mandatory sidekick to any saucy pasta dish. Think about dunking them into a rich marinara or swirling them around the last bit of sauce on your plate. They are fantastic alongside a creamy soup, too. Seriously, a bowl of tomato soup and a handful of these? That’s an instant dinner winner in my book. I always make a double batch when I’m planning on serving my creamy lemon pasta because they disappear first!
They also stand up beautifully to heartier things. They have enough substance to tackle a thick stew or a chili. If I’m making my hearty chili on a chilly night, these Italian breadsticks are way better than crackers. I sometimes even make them thinner, almost like breadsticks dippers, just to make sure everyone gets enough to soak up all that goodness!
Frequently Asked Questions About Homemade Breadsticks
Can I use store-bought dough for these breadsticks?
Oh, you totally *can* use store-bought dough if you’re having a super busy night. It definitely makes for quick bread recipe status! However, I have to be honest: the texture just won’t be the same as when you make the dough from scratch. Store-bought dough often has preservatives that lead to a slightly tougher or less airy result. Our Homemade Breadsticks Recipe relies on that specific yeast activation and kneading time to get that perfect chew. If you use canned dough, you skip the essential first rise, so you’re sacrificing that signature pillowy softness. It’s a trade-off, for sure!
How do I reheat leftover breadsticks to keep them soft?
The microwave is always the fastest way, but it can make things rubbery, so approach it with caution—just 10 seconds should do the trick for softening them up fast. For the absolute best results, though, you want to use the oven! Preheat your oven to 350 degrees F. Place your leftover buttery breadsticks directly on the rack or a baking sheet and warm them for about 5 minutes. They crisp up slightly on the outside while reviving that inside softness wonderfully. Don’t forget a little extra sprinkle of Parmesan when they come out!
What makes these ‘Olive Garden Breadsticks Copycat’ recipes so popular?
It all comes down to that glorious, textural contrast, my friend! Everyone loves a good copycat recipe, and this one nails the texture. The base has to be incredibly soft and almost cloud-like inside, but nicely browned on the outside. Then, you drench those warm sticks in massive amounts of that heavily seasoned garlic butter. It’s just the right combination of salty, garlicky, savory, and soft. That heavy hand with the butter coating is the real secret sauce that keeps us lining up for refills!
If you have any other burning questions about technique or substitutions, feel free to reach out to us anytime through our contact page!
Estimated Nutritional Data for Garlic Breadsticks
I always tell people that cooking from scratch, especially with bread, means the nutrition info is really just an estimate—we didn’t precisely weigh every grain of salt! But for those of you keeping track, I put together the estimated data based on the ingredients for one of these beautiful breadsticks. This information is just a guideline, and it helps assure everyone that these tasty sides aren’t completely guilt-free, though they are totally worth it!
This estimate is based on one serving (one breadstick) and sourced from my best ingredient analysis. You can always check our general privacy policy if you have site-related questions, but for this food data, remember this is just for reference!
- Calories: 190
- Fat: 7g
- Sodium: 350mg
- Carbohydrates: 28g
- Protein: 5g
See? Totally reasonable for a homemade treat! Keep in mind that if you go crazy with dipping sauce or load up on extra mozzarella when making your cheesy breadsticks, those numbers will climb higher!
Share Your Soft Breadsticks Creations
Now that you’ve got a stack of these incredible, warm, buttery breadsticks cooling on your counter, I really want to know how they turned out for you! Did they achieve that perfect chewiness? Did the garlic butter smell up your whole house (in the best possible way, I hope)? Please, don’t keep your success a secret!
I absolutely love hearing about your baking adventures. Leave a rating right below this section—five stars if they’re begging to be served again next week! More importantly, drop a comment and tell me about your experience making the Homemade Breadsticks Recipe. Did you add extra herbs? Did you try the mozzarella trick?
If you snapped a picture of your beautiful, golden sticks ready for dipping, please tag us on social media! Seeing your results really fuels my passion here on Chefsily. It reminds me that these simple recipes we share truly bring joy to tables across the country. You can always check out our Terms of Use if you have any questions about sharing your photos.
And hey, if you want to compare notes on the garlic butter blend with another trusted baker, check out the one I love from Lily on Savory by Lily—it’s always fun to see different takes on the classics!
PrintThe Ultimate Soft & Chewy Olive Garden Copycat Breadsticks with Garlic Parmesan Butter
Make soft, chewy, restaurant-style breadsticks at home. This easy recipe replicates the famous Olive Garden breadsticks, topped with a rich garlic Parmesan butter sauce.
- Prep Time: 25 min
- Cook Time: 12 min
- Total Time: 1 hour 47 min
- Yield: 12 breadsticks 1x
- Category: Appetizer
- Method: Baking
- Cuisine: American
- Diet: Vegetarian
Ingredients
- 1 1/2 cups warm water (about 110 degrees F)
- 2 1/4 teaspoons active dry yeast
- 2 tablespoons granulated sugar
- 4 cups all-purpose flour, plus more for dusting
- 1 teaspoon salt
- 1/4 cup olive oil, plus more for brushing
- 1/2 cup unsalted butter, melted
- 4 cloves garlic, minced
- 1 teaspoon dried Italian seasoning
- 1/2 teaspoon salt
- 1/4 cup grated Parmesan cheese
Instructions
- Activate the yeast: In a large bowl, combine the warm water, sugar, and yeast. Let this mixture sit for 5 to 10 minutes until it becomes foamy.
- Mix the dough: Add 3 cups of the flour, 1 teaspoon of salt, and 1/4 cup of olive oil to the yeast mixture. Mix until combined. Gradually add the remaining flour until a soft dough forms.
- Knead the dough: Turn the dough out onto a lightly floured surface. Knead for 5 to 7 minutes until the dough is smooth and elastic.
- First rise: Place the dough in a lightly oiled bowl, turning to coat. Cover the bowl with plastic wrap or a clean towel and let it rise in a warm place for 1 to 1.5 hours, or until doubled in size.
- Preheat and shape: Preheat your oven to 400 degrees F (200 degrees C). Line a large baking sheet with parchment paper. Punch down the risen dough and divide it into 12 equal pieces. Roll each piece into a long, thin breadstick shape, about 10 inches long. Place the breadsticks on the prepared baking sheet.
- Second rise: Cover the shaped breadsticks loosely and let them rest for 15 minutes.
- Bake: Brush the tops lightly with olive oil. Bake for 10 to 12 minutes, or until lightly golden brown.
- Prepare the garlic butter topping: While the breadsticks bake, combine the melted butter, minced garlic, Italian seasoning, and 1/2 teaspoon of salt in a small bowl.
- Finish: Immediately after removing the breadsticks from the oven, brush them generously with the garlic butter mixture. Sprinkle evenly with the grated Parmesan cheese.
- Serve: Serve the homemade breadsticks warm as a dinner side dish or appetizer.
Notes
- For a chewier texture, use bread flour instead of all-purpose flour.
- If you want cheesy breadsticks, sprinkle mozzarella cheese over the tops during the last 3 minutes of baking before adding the garlic butter.
- You can make the dough ahead of time and refrigerate it for up to 24 hours for make ahead breadsticks. Allow it to come to room temperature before shaping.
Nutrition
- Serving Size: 1 breadstick
- Calories: 190
- Sugar: 2
- Sodium: 350
- Fat: 7
- Saturated Fat: 3
- Unsaturated Fat: 4
- Trans Fat: 0
- Carbohydrates: 28
- Fiber: 1
- Protein: 5
- Cholesterol: 10