
Let’s be honest, trying to make good sushi at home often ends with sticky rice sticking to everything *except* the seaweed. You know that perfect, slightly sweet, glossy texture you get at your favorite spot? It feels like magic, right? Well, I’m Isabella Rossi, and I promise you, it’s not magic—it’s just technique! My entire philosophy here at Chefsily is taking those supposedly “hard” restaurant secrets and making them totally doable for you on a weeknight. Forget dry, falling-apart rolls. This guide is the ultimate, no-sweat breakdown on how to create perfect sushi rice, whether your trusty stove is your best friend or you prefer whipping it up in the Instant Pot. We’re aiming for that incredible, perfectly seasoned, sticky base every single time.
- Why This Perfect Sushi Rice Guide Works for Home Cooks
- Essential Ingredients for Flavorful Sushi Rice
- How to Cook Sushi Rice Perfectly: Stovetop Method
- Sushi Rice Instant Pot Recipe: A Hands-Off Approach
- Preparing the Rice Vinegar Mixture for Sushi Rice
- The Critical Step: Seasoning and Cooling Your Sushi Rice
- Tips for Success When Making Homemade Sushi Staple
- Storage and Reheating Instructions for Leftover Sushi Rice
- Frequently Asked Questions About Perfect Sushi Rice at Home
Why This Perfect Sushi Rice Guide Works for Home Cooks
I’ve spent years deconstructing recipes so you don’t have to waste time guessing! This isn’t just another recipe; it’s a complete system designed to give you that reliable, restaurant-quality finish for your sushi rice. I know you want results that stick together beautifully when you roll them, but they can still be perfectly fluffy when you put them in a bowl. That’s what we focus on here. It’s about making the complex simple, like how I broke down this cauliflower rice casserole.
- Method Flexibility: We cover both the classic stovetop simmering technique and the faster Instant Pot method. Pick whichever works best for your kitchen energy level that night!
- Texture Priority: We drill down on rinsing and seasoning techniques that guarantee a sticky, yet tender grain every time.
- Authenticity Built-In: While I love finding shortcuts, rice quality matters here. Using the right grain is non-negotiable for that true sushi flavor profile.
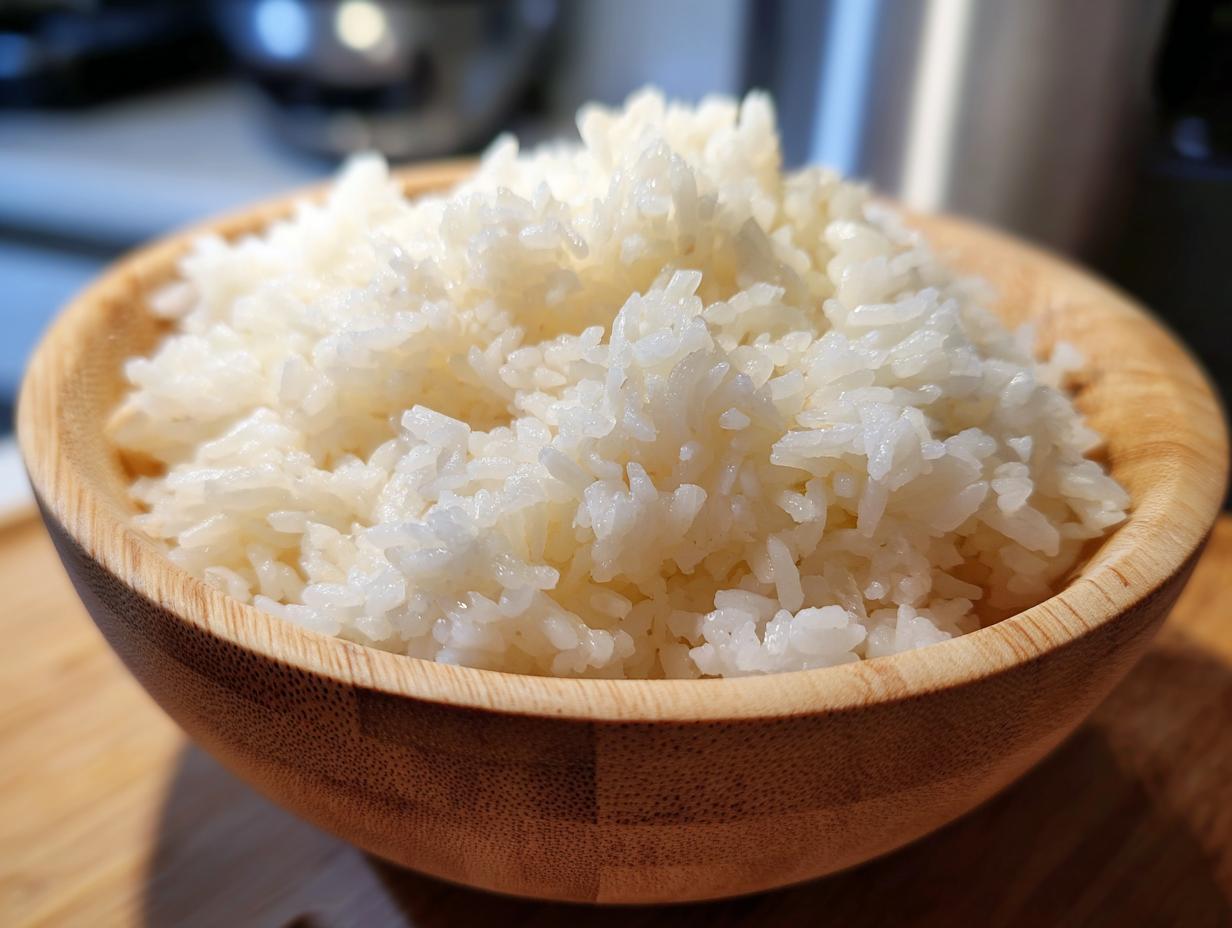
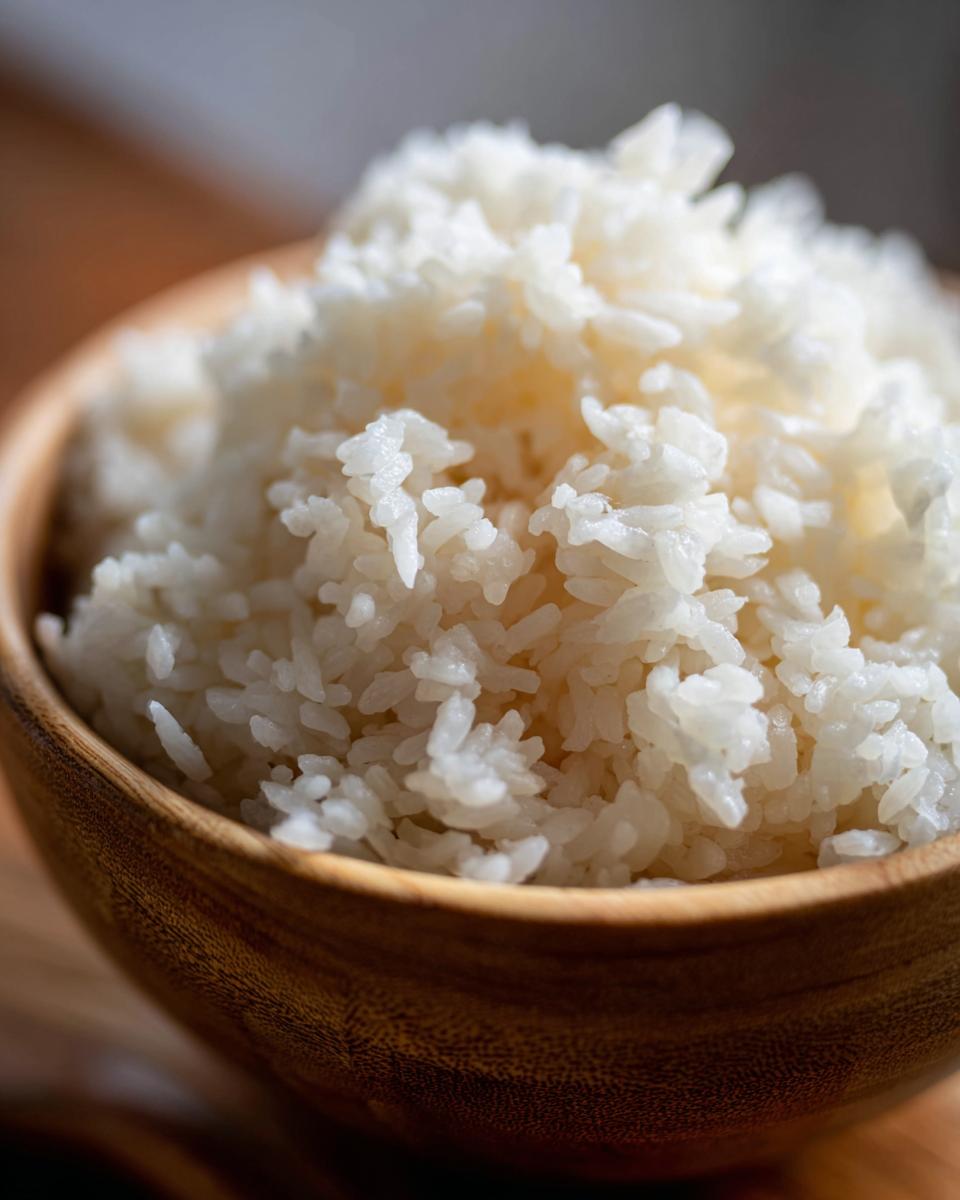
Achieving the Ideal Sticky Rice for Sushi Texture
What’s the difference between great sushi and sushi that just kinda falls apart? It’s the texture of the cooked grains! We are looking for rice that is sticky enough to hold that seaweed wrap tight, but still individual enough that you can taste the seasoning in every bite. This only happens if you start with the best short grain rice for sushi you can find. Those short, plump grains hold the perfect amount of moisture when cooked right, giving you that satisfying chew without tasting gummy or mushy. Trust me, skipping the rinse step is the fastest way to ruin the texture, so don’t skip that part!
Essential Ingredients for Flavorful Sushi Rice
When we talk about getting that high-end flavor, it all comes down to what goes *in* the pot besides the water. For this recipe, we’re keeping things pure because the rice itself needs to shine. You need two cups of the proper grain, cold water, and then our simple seasoning blend of rice vinegar, sugar, and salt. Before you even think about opening that bag, let me talk about that vinegar. I’m particular—I always look for a true Japanese rice vinegar; the flavor is so much softer and less harsh than white vinegar, which is key for that authentic sushi rice seasoning ratio. Seriously, don’t skimp here; it makes the whole difference!
Ingredient Notes and Substitutions for Sushi Rice Seasoning
First up, the rice! If you use long-grain rice, you’re making plain rice, not sushi base. You absolutely must grab the best short grain rice for sushi available—Calrose works wonderfully if you can’t find specific Japanese brands. Those starches are what give us that perfect cling factor.
Now for the seasoning—the mixture of rice vinegar, sugar, and salt is what gives you that signature tangy bite. That little bit of sugar isn’t just for sweetness; it helps balance the acidity of the vinegar and it helps the grains stay plump and bright. Always heat the mixture gently just to dissolve the solids completely. If you boil the vinegar mixture, you cook off all the delicate flavor, and suddenly you have overly sour rice—and nobody wants that! This simple, balanced seasoning is what makes it an authentic Japanese rice staple.
How to Cook Sushi Rice Perfectly: Stovetop Method
Okay, so you chose the classic approach! I totally get it; sometimes the stovetop just feels more hands-on and reliable, especially when you’re learning how to make sushi rice for the very first time. This is my favorite beginner sushi rice tutorial method, but it requires you to commit to the process—your focus needs to stay right on that pot!
First things first: get your rinsed, drained rice into a heavy-bottomed pot. I like heavy bottoms because they distribute heat more evenly, which prevents those terrible scorched spots at the bottom. Add exactly two cups of cold water. Don’t guess on the water amount; a slightly off ratio is what causes gummy rice!
Bring that water up to a strong boil over medium-high heat. You want to see those healthy bubbles breaking the surface. Now, here comes the moment of truth, and I need you to listen closely: The second it hits a full, rolling boil, immediately kill the heat down to the absolute lowest setting your stove dial allows. If you used a standard pot, cover it with a tight-fitting lid. For reference, this technique is super similar to how I make my homemade stovetop naan—low and slow is key once you reach the heat threshold.
Now, here’s the secret that drives me nuts when people mess it up: Do not lift the lid for 15 minutes! I mean it. Not even a peek! Lifting the lid lets out the steam, which is essential for cooking the top layer of the rice evenly. If you peek, you break the structure, and your rice ends up unevenly cooked. Set a timer, walk away, and go prepare your seasoning mixture while you wait.
When the timer goes off, kill the heat completely, but leave the pot right where it is, still covered, for another 10 minutes of resting time. This resting period lets the grains firm up and absorb any last bits of moisture. Only then can you carefully lift that lid and transfer the hot, perfect rice to your seasoning bowl. See? Foolproof if you just trust the timing!
Sushi Rice Instant Pot Recipe: A Hands-Off Approach
If you own an Instant Pot, you know it’s a game changer! For those days when you need the absolute best sushi rice but just don’t have time to monitor a simmering pot, the pressure cooker is your new best friend. It totally delivers that restaurant-quality texture with barely any effort on your part. This is truly my favorite sushi rice instant pot recipe for busy days when I still want amazing homemade sushi!
First, make sure you’ve rinsed your two cups of short-grain rice until that water runs crystal clear—no mushy insides allowed! Put the rinsed rice right into the Instant Pot liner along with exactly two cups of cold water. Don’t add any salt or vinegar yet, or you risk corroding the pot lining; we only cook the plain grain here.
Seal up that lid and make sure the vent is set firmly to the sealing position. This part is crucial for that perfectly cooked, fluffy-yet-sticky result. You need to cook on High Pressure for exactly 10 minutes. Ten minutes! Can you believe it? It’s so much faster than the stovetop sometimes, though I do love the meditative quality of monitoring the lasagna soup process.
Once the 10 minutes are up, resist the urge to open the vent immediately. That step gets all the credit for achieving that superior texture. You need to let the pressure release naturally, or NPR, for a full 10 minutes. After the clock hits zero on the NPR timer, then you can carefully flip the vent to manually release any remaining steam.
Lift the lid and marvel at your perfectly cooked rice. Just like with the stovetop method, let it stand, still covered, for 10 minutes right off the heat. This final rest lets the grains settle and firm up before we hit them with that delicious seasoning mixture that makes it true sushi rice. If you want to see another amazing, hands-off meal, check out this review on great ways to cook grains. Seriously, once you nail this method, you’ll never look back!
Preparing the Rice Vinegar Mixture for Sushi Rice
Now that the grain is cooked, we move onto the essential part that transforms plain sticky rice into glorious, *authentic* sushi rice—the seasoning! This is where the magic happens, and honestly, it’s so simple, you’ll wonder why you ever bought that overpriced pre-made stuff. We need to create the perfect rice vinegar mixture for sushi, which is made up of rice vinegar, sugar, and salt.
Grab a small saucepan—nothing too big, we just need enough surface area to dissolve these ingredients. Measure out your 1/2 cup of rice vinegar, two tablespoons of sugar, and one teaspoon of salt. You can adjust this slightly based on your taste preference, but this ratio is tried and true for giving you that perfect flavor balance.
Place the saucepan over low heat. I cannot stress this enough: We are only heating this mixture gently. We are looking to dissolve the sugar and the salt completely so they integrate smoothly into the vinegar. They need to melt into the liquid beautifully. If you let this mixture boil—and I mean *boil*—you’ll cook off the subtle, tangy notes of the vinegar. Boiling creates steam, and steam means flavor loss! I learned this the hard way trying to rush things years ago.
Stir this constantly until the sugar and salt vanish. You’ll know it’s done when the liquid looks completely clear again, not gritty when you swirl it around. Take it off the heat immediately. We want this seasoning blend slightly warm, not scorching hot, when it meets the cooked rice. Let it sit for just a minute or two while you grab your fanning tool!
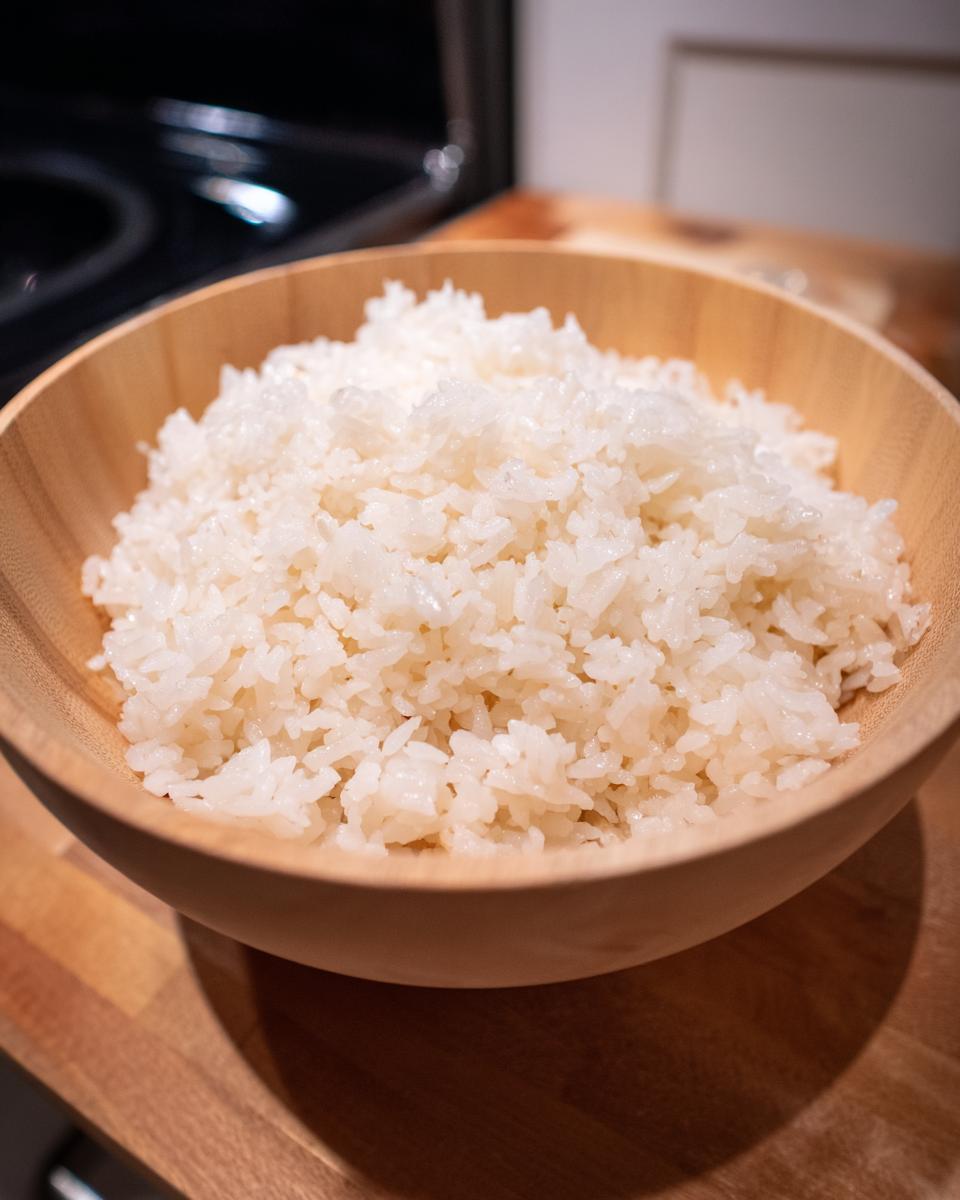
The Critical Step: Seasoning and Cooling Your Sushi Rice
Okay, deep breath—this is the moment where you turn perfectly cooked starch into the most amazing, glossy, restaurant-worthy sushi rice! I know you’ve got your hot rice ready in that big wooden or glass bowl (remember, no metal bowls here, they react with the vinegar!), and your vinegar mixture is just slightly warm. This step separates the beginners from the pros, but trust me, it is so easy to master.
First, you have to season evenly. Slowly drizzle that beautiful, slightly sweet vinegar blend all over the surface of the hot rice. Pouring it in one spot will just make one corner too salty and mushy, so try to spread it out over the whole surface area. Now, put down that spatula; we are not stirring!
We use a technique called “cutting.” You want to use a flat wooden paddle or a large wooden spoon and slice through the rice vertically and then horizontally, like you are lightly chopping it in the bowl. You are folding the seasoning in, not mixing it like cake batter. Stirring or mashing will smash those beautiful, fluffy grains we worked so hard to cook perfectly, turning your rice into glue. Keep using that gentle cutting motion until you see the seasoning distributed beautifully throughout the grains.
But wait! We still need that signature shine, that perfect look you see at the top sushi bars. This requires air! As you are folding, you need to simultaneously fan the rice—and I mean vigorously fan it! If you don’t have a traditional rice paddle or fan, a piece of cardboard or even a flat magazine works in a pinch. Fanning cools the rice down quickly, which stops the cooking process dead in its tracks and helps the vinegar absorb evenly. This process is essential for making a true homemade sushi staple.
Keep cutting and fanning until the rice cools down to roughly body temperature. It should feel only slightly warm to the touch. Once it hits that sweet spot, stop immediately. If you let it get cold in the bowl without covering it, it will dry out, and you’ll lose all that amazing texture we worked for. Cover the bowl loosely with a damp cloth or plastic wrap and let it rest for about 15 minutes before you start rolling or building your scampi rice bowls. The resulting sushi rice will be everything you ever dreamed of! For more tips on getting those grains right, check out this great guide on achieving perfect rice texture!
Tips for Success When Making Homemade Sushi Staple
I know we’ve covered the ‘how-to,’ but honestly, getting that *perfect* result every single time—that’s where the expert little nuggets of advice come in. If you want this to be a true no fail sushi rice situation moving forward, pay attention to these finishing touches. These are the small details that stop me, Isabella, from throwing my rice paddle across the room when things go wrong!
First up: The Rinse. I mentioned it, but let me shout it from the rooftops: You must rinse the rice before you even think about turning the heat on. I use a fine-mesh sieve and run cold water over the rice. You keep rinsing and gently agitating it with your hand until the water coming off the bottom runs completely clear. Seriously, if there is any cloudiness left, that starch is going to turn your beautiful sushi rice into a solid block. This step is non-negotiable for achieving that authentic texture!
Second point: Think Non-Metallic. When you mix that warm vinegar seasoning into the hot rice, you need to use a large wooden bowl, sometimes called a *hangiri*, or at least a sturdy glass bowl. Metal bowls react poorly with the vinegar mixture. It sounds dramatic, but it can actually change the flavor of your rice, making it taste slightly metallic or off. We don’t want to ruin the delicate balance of our rice vinegar mixture for sushi!
Third—and this is for leftovers or if you are meal prepping—always let the rice cool completely to room temperature before you cover it tightly and put it in the fridge. Rice always tastes best the day it’s made, but if you are prepping for tomorrow’s lunch, make sure it’s room temp before it goes into any cold storage. If you’re reheating later, give it a quick splash of water and microwave it in short bursts, maybe folded with some cheesy stovetop rice for flavor boost, but usually just moisture is enough to revive it. For more amazing techniques on cooking Japanese grains, check out this fantastic resource at Masala Herb!
If you follow those three things—rinse until clear, use wood/glass for seasoning, and rest properly—you will nail this every time. You’re officially moving beyond basic cooking and mastering the foundational building block for amazing homemade rolls!
Storage and Reheating Instructions for Leftover Sushi Rice
So, you did it! You made the most amazing, restaurant-quality sushi rice, and guess what? You had leftovers! Don’t panic about throwing it out, because while this rice is absolutely best when made fresh, we can revive the texture if you need to save some for tomorrow’s lunch or an impromptu sushi bowl.
First things first: temperature matters. If you plan on using the leftover rice within just a few hours, leaving it covered loosely at room temperature is actually fine. Yes, I know some food safety experts might gasp, but because we seasoned this rice with vinegar, which is slightly acidic, it actually inhibits bacterial growth better than plain cooked white rice. Keep it covered loosely with plastic wrap or a damp cloth so it doesn’t dry out, and try to use it within four hours.
If you absolutely need to keep it longer than that, storage in the fridge is necessary, but it requires a small resurrection effort afterward. Transfer the rice from your wooden bowl into an airtight container. I usually recommend seasoning the rice, letting it cool *completely* to room temperature first—never put hot, freshly seasoned rice straight into the cold fridge—and then sealing it. It will keep for about 24 to 48 hours, max.
Now, the reheating, which is the tricky part! Cold, refrigerated rice grains feel hard and stiff. You can’t just microwave it plain; it will turn hard as little stones! To bring that wonderful stickiness back, you need moisture. Before reheating, transfer the amount you want to use into a microwave-safe bowl and sprinkle just a teaspoon or two of cold water over the top. Cover that bowl tightly with plastic wrap, leaving a tiny corner vented so steam can escape.
Microwave this in short bursts—15 to 20 seconds at a time—gently fluffing it with a fork in between. The trapped steam will rehydrate those stiff grains beautifully, bringing back that fluffy-yet-sticky texture we love so much. It might not be *quite* as glossy as freshly seasoned rice, but it certainly beats throwing it away! I always plan on making just enough for one day, but these revival tips ensure nothing goes to waste.
Frequently Asked Questions About Perfect Sushi Rice at Home
I get so many questions about this recipe! It’s wonderful to see so many of you diving into making your own sushi. Here are my go-to answers for the most common snags people hit when aiming for that perfect sushi rice at home. Don’t worry if these things trip you up at first; that’s what this guide is for!
Can I use a regular rice cooker for sushi rice?
Oh, absolutely! While I detailed the Instant Pot and stovetop methods here because they give you total control over the resting period, your standard rice cooker definitely works! The key is adjusting the water ratio slightly, as cookers vary. Generally, for the two cups of rice we use in this easy sushi rice recipe, start with 2 cups of water for cooking, just like the stovetop method. Just toss the rinsed rice and water in, hit the ‘Cook’ button, and when it switches to ‘Warm,’ let it rest, covered, for a full 15 minutes before you uncover it. That resting time is what seals the deal! It’s fantastic for prepping a huge batch for a big sushi bowl base recipe later in the week.
How long does homemade sushi rice last?
This is vital information! If you have leftovers from making your homemade sushi staple, you need to handle them correctly. As I mentioned before, the seasoning vinegar actually helps preserve it a little, but cooked rice is best fresh. If you store it properly—cooled down to room temperature first, then sealed in an airtight container—it’s safe to eat within 1 to 2 days max. After that, the texture really starts to degrade, and reheating it gets trickier. Avoid keeping it past 48 hours in the fridge for the best results!
What is the ideal rice to water ratio for sushi rice?
This ratio is absolutely central to getting the right texture—we need it sticky, but not soupy! For the two cups of short-grain rice used in this guide, we stick to a 1:1 ratio for cooking: 2 cups of rinsed rice to 2 cups of cold water. That’s it! This ratio ensures the rice absorbs exactly what it needs during the pressurized cooking or simmering phase. If you see people suggesting 1.25 cups of water for 1 cup of rice, that’s usually for plain table rice, not the dense, perfectly seasoned sushi rice we are making here. Stick to 1:1, and you nail the texture every time!
If you’re using this rice as the base for something amazing like a salmon poke bowl—which you can check out how to build with my buffalo chicken bowl template—you want that rice perfectly seasoned and ready to go!
PrintThe Ultimate Guide to Perfect Sushi Rice: Stovetop and Instant Pot Methods for Restaurant Quality Results
Learn how to make restaurant quality sushi rice at home using short-grain rice. This guide provides clear steps for achieving the ideal sticky yet fluffy texture using either the stovetop or Instant Pot method, perfect for homemade sushi rolls or bowls.
- Prep Time: 15 min
- Cook Time: 25 min
- Total Time: 50 min
- Yield: 4 servings 1x
- Category: Side Dish
- Method: Stovetop/Pressure Cooking
- Cuisine: Japanese
- Diet: Vegetarian
Ingredients
- 2 cups short-grain Japanese rice (Calrose or similar)
- 2 cups cold water (for cooking)
- 1/2 cup rice vinegar
- 2 tablespoons white sugar
- 1 teaspoon salt
Instructions
- Rinse the rice: Place the short-grain rice in a fine-mesh sieve. Rinse under cold running water, agitating gently with your hand until the water runs clear. Drain well.
- Cook the rice (Stovetop Method): Combine the rinsed rice and 2 cups of cold water in a heavy-bottomed pot with a tight-fitting lid. Bring the water to a boil over medium-high heat. Once boiling, immediately reduce the heat to the lowest setting, cover, and simmer for 15 minutes. Do not lift the lid during this time.
- Cook the rice (Instant Pot Method): Combine the rinsed rice and 2 cups of cold water in the Instant Pot liner. Secure the lid, set the vent to sealing, and cook on High Pressure for 10 minutes. Allow the pressure to naturally release for 10 minutes before manually releasing any remaining pressure.
- Rest the rice: After cooking by either method, let the rice stand, covered, for an additional 10 minutes off the heat.
- Prepare the seasoning: While the rice rests, combine the rice vinegar, sugar, and salt in a small saucepan. Heat gently over low heat, stirring until the sugar and salt fully dissolve. Do not boil the mixture. Remove from heat and let cool slightly.
- Season the rice: Transfer the hot cooked rice to a large, non-metallic bowl (wood or glass is ideal). Pour the seasoning mixture evenly over the rice.
- Mix and cool: Using a cutting motion with a rice paddle or wooden spoon, gently fold the seasoning into the rice. Avoid stirring or mashing the grains. Fan the rice as you mix to help it cool quickly and achieve a glossy finish.
- Use the sushi rice: Allow the rice to cool to room temperature before using it for your homemade sushi rolls, nigiri, or sushi bowls.
Notes
- Use the best short grain rice for sushi you can find for the right sticky texture.
- Do not skip rinsing the rice; this removes excess starch that prevents proper stickiness.
- When mixing the seasoning, use a cutting motion rather than stirring to keep the rice grains intact.
- Cooling the rice quickly with a fan helps the vinegar mixture absorb properly and gives the rice its characteristic sheen.
Nutrition
- Serving Size: 1/2 cup cooked
- Calories: 200
- Sugar: 6
- Sodium: 250
- Fat: 0.5
- Saturated Fat: 0
- Unsaturated Fat: 0.5
- Trans Fat: 0
- Carbohydrates: 44
- Fiber: 1
- Protein: 4
- Cholesterol: 0