
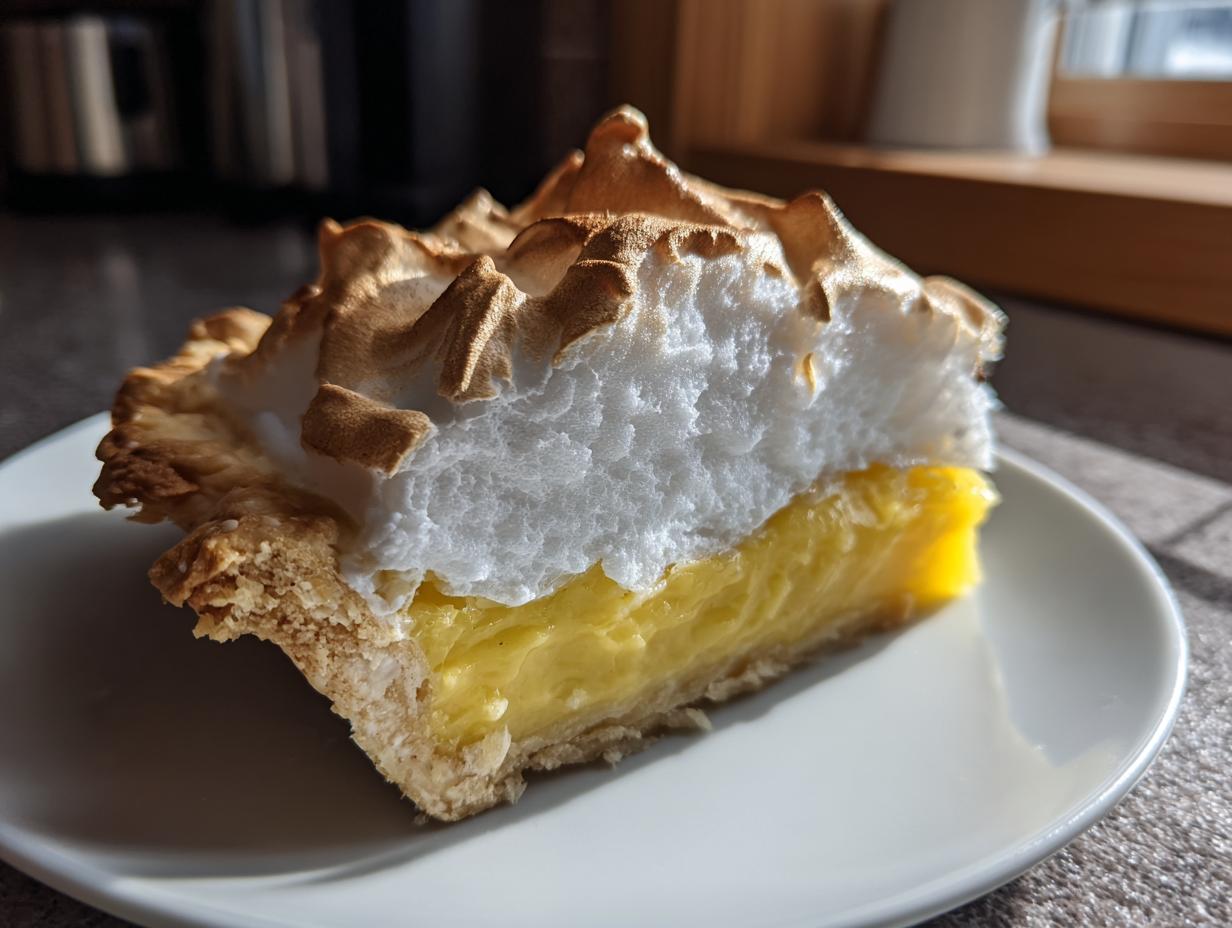
Oh, there is just nothing that screams ‘showstopper’ quite like a tall, towering slice of something bright and beautiful, right? When I first decided to conquer the classics, the lemon meringue pie was my Everest. So many home cooks give up because they end up with a soupy mess or a meringue that’s weeping sad little tears by lunchtime. Trust me, I’ve been there! But after diving deep into my culinary training and mastering old-school techniques—the kind my friends tease me about always researching—I finally cracked the code. This dessert recipe guarantees a vibrant, zesty lemon filling and, most importantly, a stiff, fluffy meringue topping that stays perfectly pretty until the very last bite. Forget the box mix; this is the real, from-scratch deal!
- Why This Homemade lemon meringue Pie Recipe Works
- Ingredients for the Ultimate lemon meringue
- How to Prepare the Perfect lemon meringue Pie from Scratch
- Tips for a No Weep lemon meringue
- Ingredient Notes and Substitutions for your lemon meringue
- Serving Suggestions for this Zesty Lemon Dessert
- Storage and Reheating Instructions for lemon meringue
- Frequently Asked Questions About Classic Lemon Pie
- Estimated Nutritional Data for lemon meringue
- Share Your Spring Baking Recipes Success
Why This Homemade lemon meringue Pie Recipe Works
Honestly, making a truly great lemon meringue pie from scratch feels like winning a prize in the kitchen. I spent so much time figuring out the tricky parts so you don’t have to! This isn’t just *a* recipe; it’s the one I landed on after hours of practice, channeling that confidence I gained mastering my culinary approach. I wanted something that balanced that incredible, zesty lemon flavor perfectly against a sweet cloud of meringue.
Here’s why this version is going to be your new go-to:
- It is 100% homemade—no powders or shortcuts allowed!
- The filling hits that perfect sweet and tart note every single time.
- We address the meringue stability head-on so there’s no weeping or shrinking.
- It includes notes on the buttery pie crust tutorial you need to start with a solid base.
It really is an easy lemon meringue recipe once you understand the key points, and the results are pure, showstopping magic!
Ingredients for the Ultimate lemon meringue
Okay, getting the right stuff is half the battle, especially when you’re committed to making this lemon meringue pie completely from scratch. I always lay everything out before I start; it saves so much panic later! Remember, precision matters here, but measuring is simple, I promise.
The secret to the final, tall meringue is definitely the temperature of the whites, so make sure those egg whites have had time to warm up before you even think about beating them!
For the Buttery Pie Crust (Pre-Baked)
For this filling, you need a single 9-inch pie crust. Importantly, this crust must be completely blind-baked and cooled down—I mean, stone cold—before we even look at the filling. If it’s warm, it’ll melt the custard, and we certainly don’t want that soggy bottom mess!
For the Zesty lemon curd Recipe Filling
This is where all that bright, zesty flavor comes from. Don’t skimp on the lemon here; fresh is *always* best for a truly vibrant lemon curd recipe.
- 1 1/2 cups granulated sugar
- 1/4 cup cornstarch (this is your thickening magic!)
- 1/4 teaspoon salt
- 1 1/2 cups cold water
- 3 large egg yolks, lightly beaten (save those whites for the roof!)
- 1/2 cup fresh lemon juice
- 1 tablespoon lemon zest
- 2 tablespoons unsalted butter
For the Fluffy Meringue Topping
This section needs clean equipment, remember? No grease allowed! This combination helps us get that amazing fluffy meringue topping that stands up tall.
- 4 large egg whites, room temperature (absolutely crucial!)
- 1/4 teaspoon cream of tartar
- 6 tablespoons granulated sugar (this goes in slowly, folks!)
How to Prepare the Perfect lemon meringue Pie from Scratch
Alright, let’s get down to business! Making this lemon meringue pie is a process with a few moving parts, but if you follow the order, it flows together beautifully. Think of it like a relay race—you have to hand off the baton perfectly between the crust, the filling, and the meringue!
Baking the Buttery Pie Crust Tutorial
First things first: your base has to be rock solid. That means your buttery pie crust tutorial preparation must include a full blind bake. Once it’s out of the oven, let it sit and cool down completely on a wire rack. Seriously, I mean totally cool. If that crust is even remotely warm when the hot filling goes in, you’re asking for trouble with that soggy bottom.
Cooking the Tart and Sweet Pie Filling
In a saucepan, whisk your sugar, cornstarch, and salt, then slowly add the cold water until it looks smooth—no lumps! Put it on medium heat and stir constantly until it boils, letting it cook for a full minute after it starts bubbling. Now for the tricky bit: tempering. Take about a cup of that hot goo and whisk it *slowly* into your beaten egg yolks. Don’t rush this, or you’ll scramble them! Once tempered, pour that yolk mixture back into the main saucepan. Return it to the heat and stir until it boils again. Pull it off the heat, whisk in your lemon zest, juice, and butter until glossy. Pour this tart and sweet pie filling right into that cool crust immediately.
Achieving the How to Make Perfect Meringue
While the filling is setting up slightly, whip up your roof! Get those room-temperature egg whites and cream of tartar going in a clean bowl until soft peaks form. This is the secret to a stable how to make perfect meringue! Add your measured sugar slowly, a tablespoon at a time, beating well after each addition. You want stiff, incredibly glossy peaks that don’t flop over when you lift the whisk. Aim for that cloud-like texture!
Assembly and Final Bake for a Showstopper Dessert
Spoon that gorgeous meringue over the hot filling. Are you wondering why hot on cold? It helps seal the meringue to the filling so it won’t slide off! Make sure that meringue actually touches the crust all the way around the edge—this seals it in!This guarantees a showstopper dessert. Pop it into a 350°F oven for about 12 to 15 minutes, just until those beautiful peaks turn golden brown. Then, resist the urge to eat it for at least four hours while it cools slowly!
Tips for a No Weep lemon meringue
Okay, I know the weeping meringue is the number one reason people call me in a panic. It’s heartbreaking! Seeing those little beads of sugary syrup form on your beautiful, fluffy topping ruins the whole look of our perfect lemon meringue. But don’t you worry, we’ve got actionable no weep lemon meringue tips ready to go!
First, remember what I stressed earlier: your bowl and attachments for whipping the egg whites must be surgically clean—absolutely zero grease, no yolk residue, nothing! Even a tiny bit of fat prevents the proteins from building that necessary structure. Second, make sure you use that little bit of cream of tartar; it’s like a stabilizer insurance policy for your whites.

The biggest tip for preventing the weep is how you cool the pie down. Never rush it into the fridge! Let it cool slowly on the counter for at least four hours. This gradual cooling lets that hot filling and meringue settle down nicely together. If the filling contracts too fast when chilled, that air gap forms underneath, and guess what leaks in? Tears!
Ingredient Notes and Substitutions for your lemon meringue
I often get asked about swaps, especially when folks are eyeing up this lemon meringue recipe but don’t have everything on hand. Let’s talk about the essentials here, because changing things up in the filling can be risky business!
For the lemon flavor, please, please use fresh juice and zest. Bottled juice just doesn’t have that bright, zesty punch we are looking for in a summer citrus dessert. It makes all the difference, trust me!
Now, about thickening: Cornstarch is non-negotiable here. If you try to use flour instead of cornstarch in this lemon curd recipe, it won’t set up with the same clarity or texture, and it might taste a bit doughy. Stick to the cornstarch for that perfect, thick custard. If you want to see how I use citrus in other ways, check out my thoughts on creamy lemon pasta—different dish, same principle: fresh ingredients shine!
Serving Suggestions for this Zesty Lemon Dessert
This gorgeous lemon meringue pie is such a showstopper; it really doesn’t need much help standing out, does it? Because it’s so intensely tart and sweet, I love pairing it with something simple on the side. Since this is the ultimate summer citrus dessert, a couple of fresh raspberries or a tiny dusting of finely chopped pistachios around the plate really makes the colors pop.
When it comes to slicing, here’s my trick for keeping those lovely meringue peaks intact: use a knife dipped in hot water and wiped dry between every single cut. That way, you get those clean, beautiful wedges for serving! Don’t forget, this needs to sit for hours before slicing, so plan your timing!
Storage and Reheating Instructions for lemon meringue
This is the final test for our gorgeous lemon meringue pie—storage! Because that fluffy meringue topping is so delicate, you can’t just throw this whole thing into the fridge the second it comes out of the oven. Don’t even think about it!
You must let the pie cool completely at room temperature for at least four hours; remember our chat about preventing weeping? Putting it in the cold too fast sets up that dreaded separation. Once it’s fully cooled, you can cover it loosely—very loosely, so the plastic doesn’t stick to the meringue—and refrigerate it. It’s best eaten within two days, although the filling holds up wonderfully. Honestly, reheating isn’t really a thing for this pie; it’s meant to be served cool or room temperature!
Frequently Asked Questions About Classic Lemon Pie
It’s natural to have questions when tackling a showstopper like this! Making a classic lemon pie is satisfying, but I get why folks worry about the logistics. I pulled together a few of the things people always ask me about, especially when they want to achieve that flawless finish.
Can I make the lemon filling ahead of time for my lemon meringue pie recipe?
You absolutely can make the lemon filling ahead of time! Once the custard is cooked, poured into the crust, and cooled slightly, you can cover it with plastic wrap—make sure the wrap touches the surface of the filling to prevent a skin from forming. Then, you can pop it in the fridge for up to 24 hours. But here’s the key for your lemon meringue pie recipe: once you’re ready to serve, you *must* top it with the meringue and bake it immediately. Don’t let a filled, un-meringued pie sit for too long!
Is this recipe similar to a traditional Grandma’s Lemon Meringue Pie?
Oh, it sure is! This recipe is built on those old-school, from-scratch methods. We are avoiding any shortcuts, focusing instead on that vibrant flavor you get from fresh citrus and using techniques that ensure everything sets up correctly. It mirrors the spirit of a Grandma’s Lemon Meringue Pie—making sure every component is handled with care to create that perfect tart and sweet pie.
What is the best way to cut a clean slice of lemon meringue pie?
This is where technique saves the day again! To get those beautiful, clean wedges that look as good as they taste, you need a long, thin knife—a carving knife works great. Before you slice, dip the knife into a tall glass of very hot water, then wipe the blade completely dry with a clean kitchen towel. Slice down firmly, and then wipe the knife clean and re-heat it before the next cut. It melts through the filling just perfectly!
Estimated Nutritional Data for lemon meringue
Now, I know some of us count macros and others just count smiles, but I always like to give you a ballpark idea of what’s in a slice of this incredible lemon meringue. Please know these are just estimates based on the ingredients listed above; your crust recipe or how thick you pile that meringue on can definitely change things!
- Serving Size: 1 slice
- Calories: 380
- Sugar: 45g
- Fat: 18g
- Protein: 6g
If you’re tracking things closely, just remember that the sugar content comes mostly from the filling and the meringue stabilization process we went through. Enjoy responsibly!
Share Your Spring Baking Recipes Success
Whew! You made it! Now that you’ve conquered the lemon meringue and created that stunning spring baking recipe, I truly want to hear about it! This pie deserves to be celebrated.
Did you nail those stiff, glossy peaks? Did you find the tartness just right? Please, hop down to the comments below and give this recipe a star rating. It helps everyone know that this classic method really delivers results!
And if you shared a picture on social media—tag me! I absolutely love seeing your beautiful, shiny lemon meringue creations sitting on your tables. Happy baking, friends!
PrintClassic Homemade Lemon Meringue Pie

This recipe delivers a classic lemon meringue pie with a buttery crust, a zesty lemon custard filling, and a tall, fluffy meringue topping. It balances tart and sweet flavors for a showstopping dessert.
- Prep Time: 30 min
- Cook Time: 30 min
- Total Time: 3 hours 0 minutes
- Yield: 8 servings 1x
- Category: Dessert
- Method: Baking
- Cuisine: American
- Diet: Vegetarian
Ingredients
- 1 recipe for a 9-inch single pie crust (blind baked)
- 1 1/2 cups granulated sugar
- 1/4 cup cornstarch
- 1/4 teaspoon salt
- 1 1/2 cups cold water
- 3 large egg yolks, lightly beaten
- 1/2 cup fresh lemon juice
- 1 tablespoon lemon zest
- 2 tablespoons unsalted butter
- 4 large egg whites, at room temperature
- 1/4 teaspoon cream of tartar
- 6 tablespoons granulated sugar (for meringue)
Instructions
- Prepare your 9-inch pie crust and bake it according to your preferred method until golden brown. Let it cool completely.
- For the lemon filling, whisk together 1 1/2 cups sugar, cornstarch, and salt in a medium saucepan. Gradually whisk in the cold water until smooth.
- Place the saucepan over medium heat. Cook, stirring constantly, until the mixture thickens and boils. Boil for one minute, stirring constantly. Remove from heat.
- In a separate bowl, whisk the egg yolks lightly. Slowly temper the hot sugar mixture into the yolks by whisking about one cup of the hot mixture into the yolks, then pour the yolk mixture back into the saucepan.
- Return the saucepan to medium heat. Cook, stirring constantly, until the filling comes to a boil again. Remove from heat immediately.
- Stir in the lemon juice, lemon zest, and butter until the butter melts completely. Pour the hot lemon filling into the cooled, pre-baked pie crust.
- To make the meringue, place the 4 room-temperature egg whites and cream of tartar in a clean, grease-free bowl of a stand mixer. Beat on medium speed until soft peaks form.
- Gradually add the 6 tablespoons of sugar, one tablespoon at a time, while beating continuously. Increase the speed to high and beat until stiff, glossy peaks form. This prevents weeping.
- Spread the meringue evenly over the hot lemon filling, making sure the meringue touches the edge of the crust all around to seal it.
- Bake the pie at 350°F (175°C) for 12 to 15 minutes, or until the meringue peaks are lightly golden brown.
- Cool the pie completely on a wire rack at room temperature for at least 4 hours before slicing. Avoid placing it in the refrigerator immediately to prevent meringue weeping.
Notes
- To prevent the meringue from weeping (beading liquid), make sure your mixing bowl and beaters are completely free of any grease or fat.
- For a stable, fluffy meringue, use room temperature egg whites and add the sugar slowly once soft peaks form.
- Cool the pie slowly at room temperature before chilling. Rapid temperature changes cause the filling to contract and the meringue to separate.
Nutrition
- Serving Size: 1 slice
- Calories: 380
- Sugar: 45g
- Sodium: 180mg
- Fat: 18g
- Saturated Fat: 5g
- Unsaturated Fat: 13g
- Trans Fat: 0g
- Carbohydrates: 52g
- Fiber: 1g
- Protein: 6g
- Cholesterol: 110mg