
You know those moments? When a craving hits, maybe the holidays are rushing toward you, or you just need a sweet fix without turning on that oven? Honestly, that’s when I head straight for my simplest recipes. This is Isabella Rossi, and if there is one thing I learned growing up, it’s that joy in the kitchen doesn’t come from complication, it comes from connection. That’s why I’m thrilled to share the absolute easiest recipe for avalanche cookies you will ever see. We’re talking melted goodness, crunch, and zero baking time. These are ready faster than you can browse a dessert recipe board!
- Why You Need These Easy No-Bake avalanche cookies Today
- Essential Ingredients for Perfect avalanche cookies
- Step-by-Step Guide to Making No Bake avalanche cookies
- Tips for Success with Your avalanche cookies Recipe
- Fun Variations for Chocolate avalanche cookies and More
- Storage and Make Ahead Desserts for avalanche cookies
- Frequently Asked Questions about No Bake Cookies
- Estimated Nutritional Data for avalanche cookies
- Share Your Favorite Simple Candy Clusters
- Estimated Nutritional Data for avalanche cookies
- Share Your Favorite Simple Candy Clusters
Why You Need These Easy No-Bake avalanche cookies Today
Seriously, if you haven’t made these yet, you are missing out on one of life’s great simple pleasures. These no bake cookies are pure magic because they solve the problem of needing a fantastic dessert *right now*. Forget waiting for the oven to preheat! When I need something fast after making a big meal—like after a crazy night perfecting those easy weeknight dinners—I turn here.
- Lightning Fast Prep: We’re talking true 15 minute recipes here—well before most cookies even start baking! You melt the base, stir in the good stuff, and you’re done with active time.
- The Ultimate Crowd Pleasing Desserts: These clusters disappear every single time. They hit every texture note: creamy, crunchy, gooey, and sweet. They are instant hits at any gathering.
- Perfect for Busy Seasons: Whether it’s layering them beautifully in your Holiday Cookie Trays or needing last-minute Bake Sale Treats No Oven options, these are your go-to helpers.
- Kid-Friendly Fun: Since there’s no heat involved past the microwave melt, these are fantastic Kid Friendly Recipes No Bake activities. My little ones love dropping the spoonfuls onto the trays!
- Flexible Flavor Swaps: They are so easy to adapt. If you’re looking for next-level Sweet and Salty Snacks, just toss in some crushed pretzels with the cereal. Trust me on this one!
Honestly, ditch the complicated recipes for a week and give yourself the gift of instant dessert gratification. You deserve easy, delicious results!
Essential Ingredients for Perfect avalanche cookies
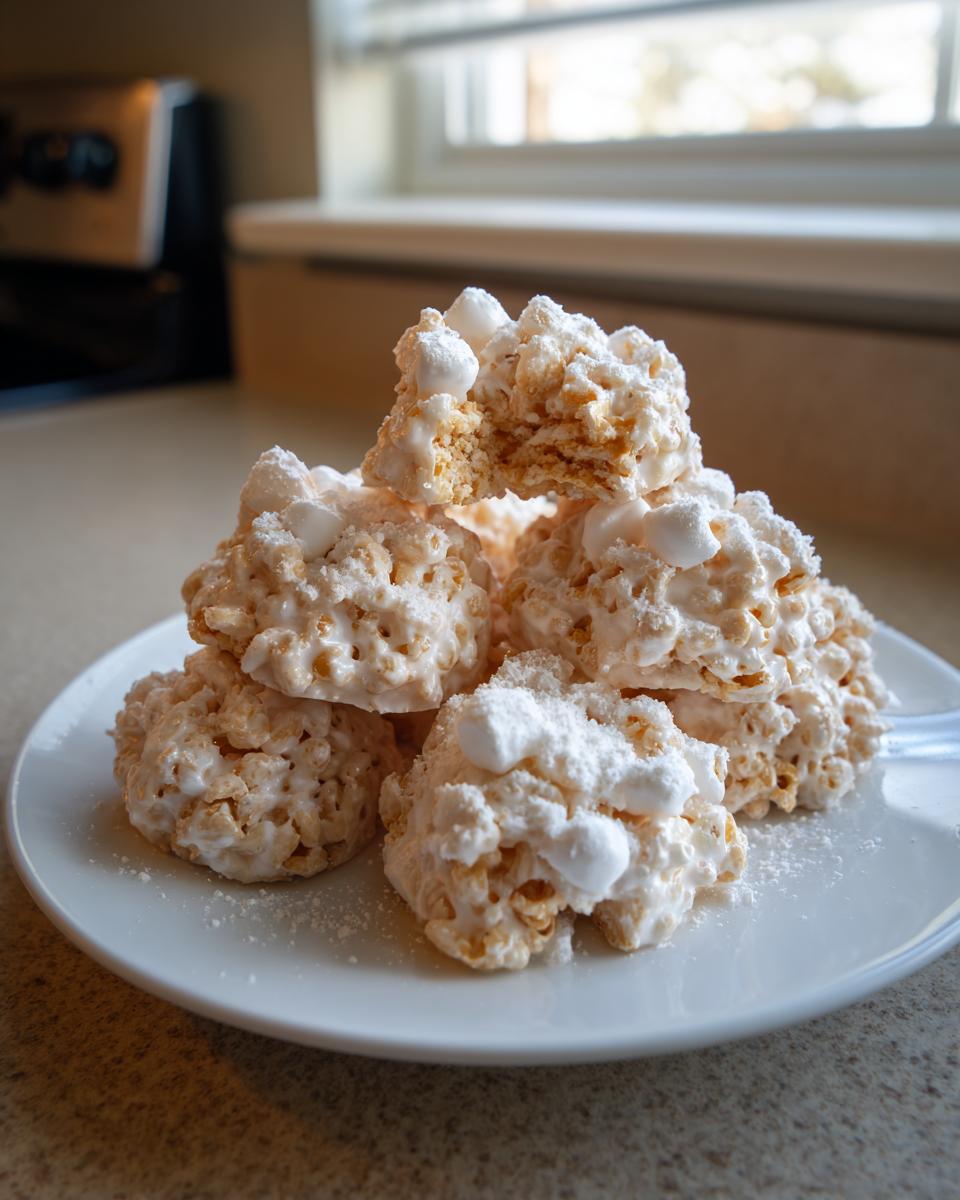
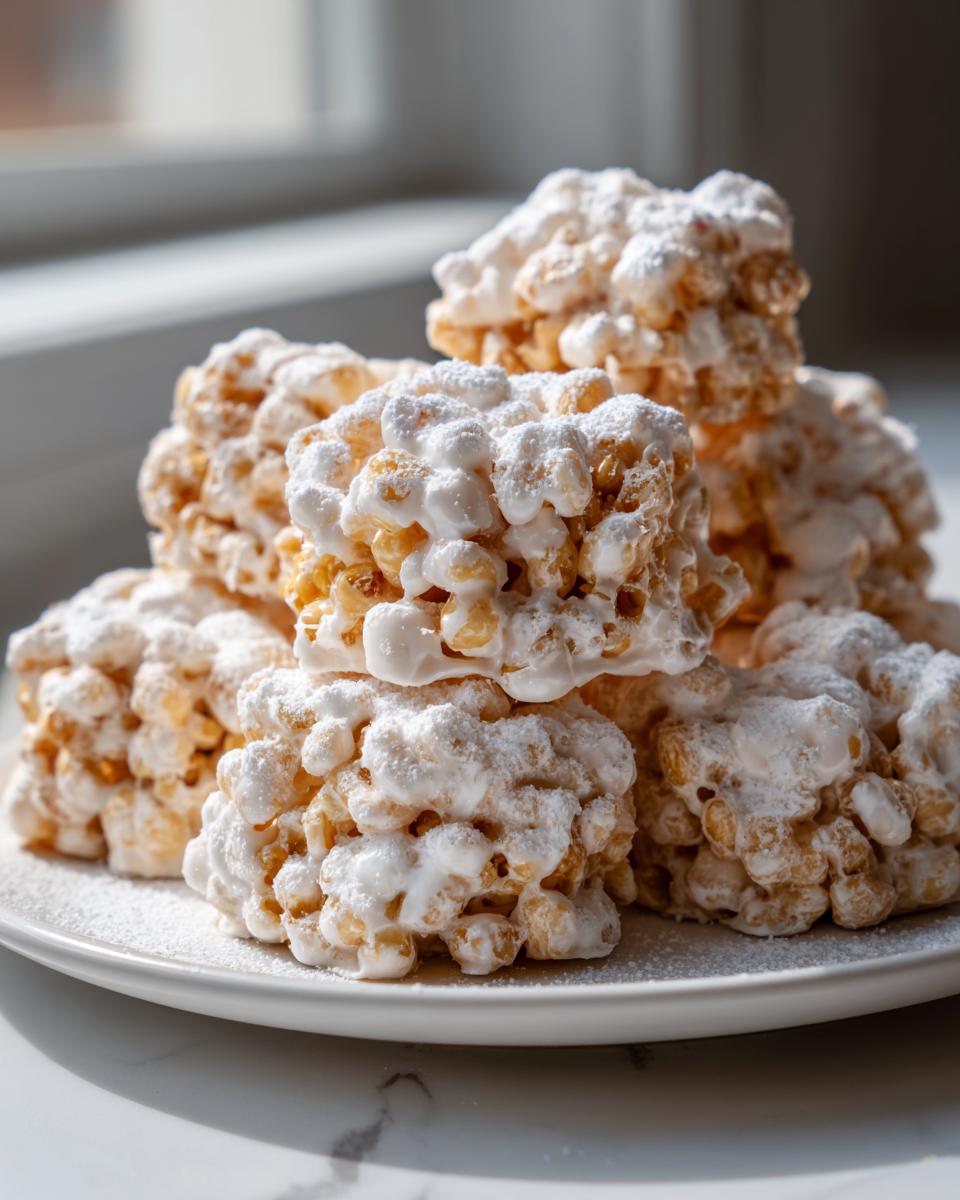
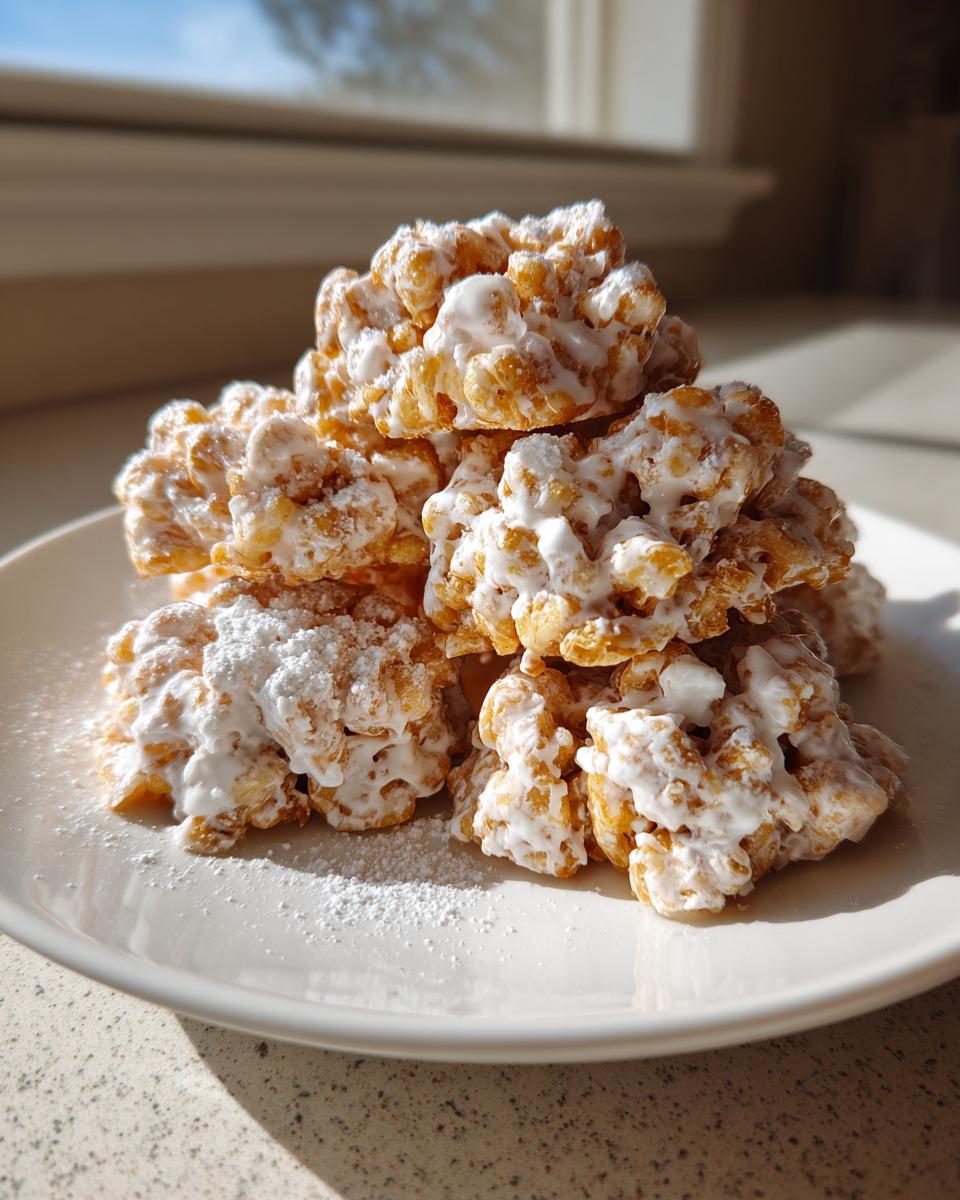
To nail these, you can’t skimp on the core elements. These aren’t fancy confections; they are simple, glorious clusters, so we focus on getting the texture right with what we put in. You absolutely need quality white chocolate chips because that’s the glue holding this beautiful mess together—it melts down into the most stunning white chocolate candy base. Then we mix in that creamy peanut butter, which adds richness and helps keep things soft. Speaking of soft, make sure you grab the mini marshmallows; those little pillows are essential for that signature look!
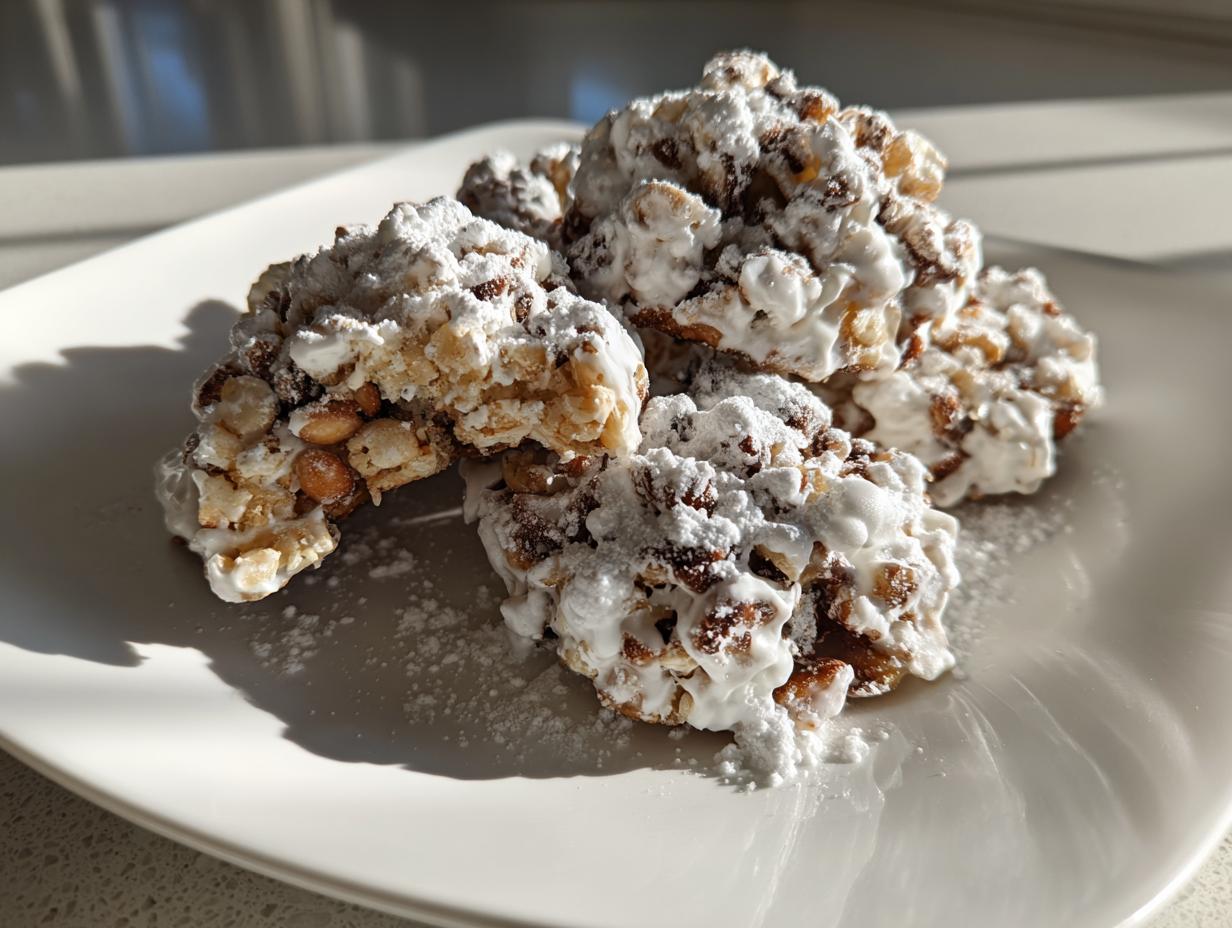
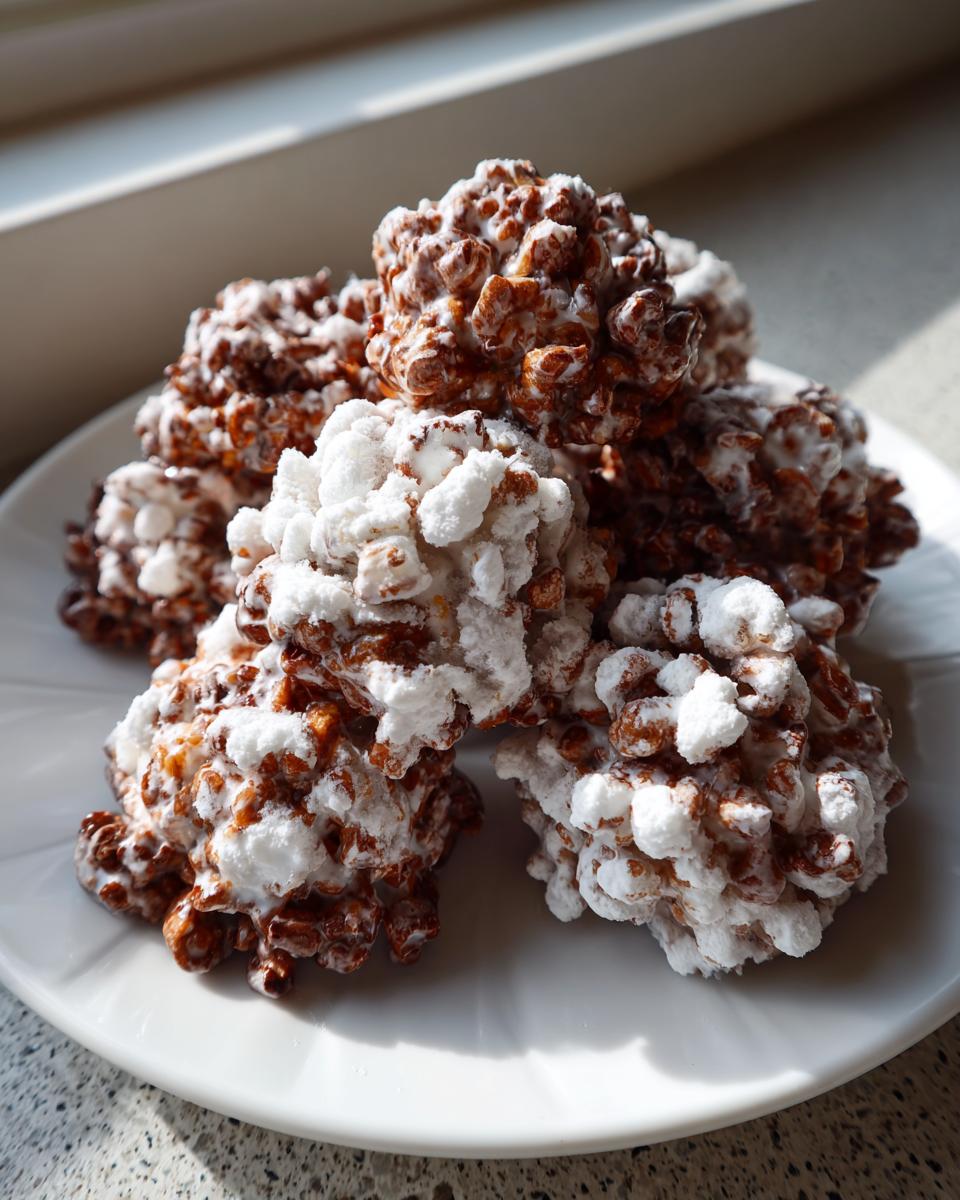
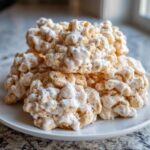
We also need plenty of crispy rice cereal to give us the necessary crunch. I know sometimes people look for peanut butter cookies no bake that skip the cereal, but here, the crunch is non-negotiable. Don’t forget the final dusting of powdered sugar later; that’s what gives them that fun, snowy, avalanche look!
Ingredient Notes and Simple Substitutions
Now, let’s talk swaps, because my kitchen is always about flexibility, just like my philosophy on family cooking encourages. If you happen to have a jar of Biscoff or another favorite spread handy, you can absolutely use that in place of peanut butter. It creates amazing cookie butter recipes variations! It’s a little different, but still heavenly.
As for the cereal, while crispy rice is traditional, I’ve seen people use Cheerios or even cornflakes mixed in for extra texture. If you’re exploring other fantastic peanut butter recipes that use different grains, you can follow those same principles here. Just make sure whatever you choose is dry and ready to soak up that white chocolate mixture!
Step-by-Step Guide to Making No Bake avalanche cookies
Okay, here is where the magic happens, and trust me when I say this is the easiest part! The best thing about these avalanche cookies is that we skip the oven entirely. I love this method because it sets up so fast; you’ll have these ready for the fridge in under 15 minutes of active time. We start by lining a sheet, just to be prepared, because once that chocolate melts, you have to move!
Melting the Base for Your avalanche cookies
This is the only spot where you need to pay real attention, especially if you haven’t melted white chocolate in a microwave before. Grab a big, sturdy bowl—you’ll need room for everything later! Combine your white chocolate chips and the peanut butter. We microwave this mix in short bursts—30 seconds at a time. This is critical! White chocolate scorches so easily. After every 30 seconds, pull it out and stir it vigorously, even if it doesn’t look totally melted yet. Keep going until it’s silky smooth. You’re looking for a perfectly creamy, pourable sauce. If you want to see a few great examples of how to handle this melt, check out some classic white chocolate recipes online.
Forming and Setting the Simple Candy Clusters
Once that chocolate-peanut butter mixture is gorgeous and smooth, you’ve got to hustle! Gently fold in your cereal and marshmallows right into that warm base. Make sure everything is coated evenly, but don’t overmix once the cereal is in, or you’ll crush those beautiful little marshmallows!
Next, drop rounded spoonfuls onto that parchment-lined sheet. If you want them all neat and tidy, use two spoons to shape them into nice little spheres, but honestly, a rustic, bumpy look is part of their charm—they’re called avalanche cookies for a reason! If you want that lovely snowy finish, now is the time to lightly dust those tops with powdered sugar. Then, they just need a quick chill in the fridge for about 30 minutes to set up firm enough to handle. For more fun mixing ideas, this guide on no-bake avalanche cookies shows how other folks handle the clusters!
Tips for Success with Your avalanche cookies Recipe
These avalanche cookies are so forgiving, which is why they are one of my favorites to keep on hand! But even with a simple recipe, a few little tweaks can transform them from good to absolutely unforgettable. When you are working with melted chocolate and sticky things, preparation is everything, just like when I’m making a tricky fruit crumble like my brown sugar cinnamon pear crisp.
My number one tip is to have everything measured out *before* you start melting the chocolate. That white chocolate mixture sets up surprisingly fast once it cools down even a little bit. If you stop to measure the cereal or marshmallows when the peanut butter is already looking stiff, you’re going to have a heck of a time folding everything in smoothly.
When you add that powdered sugar dusting, aim for a very light hand. Too much, and it turns into a sticky paste instead of a pretty, snowy look. I like to use a fine-mesh sieve and just tap it gently over the cooling cookies. It gives them that perfect, slightly frosty appearance that really lives up to the name!
Setting time is important too. If you try to move these too soon, they’ll just smear everywhere, and you lose that distinct cluster shape. Thirty minutes in the fridge is usually enough to get them firm enough to grab, but if your kitchen is warm, give them a full 45 minutes. Patience here means you get perfect, sturdy no bake cookies you can actually transport!
Fun Variations for Chocolate avalanche cookies and More
While the classic white chocolate version is just stellar, sometimes you want to shake things up a bit, right? My favorite way to do this is by diving into Chocolate avalanche cookies. If you want to go that route, just swap out your white chocolate chips for milk chocolate chips or even semi-sweet chocolate chips. You get a completely different, richer flavor profile! If you’re making a big batch for a party, I highly recommend mixing in about half a cup of crushed pretzels along with your cereal. That salty snap against the sweetness makes these officially one of the best sweet and salty snacks out there. Who can resist that combo?
For another fun texture bomb, I also love adding a handful of mini peanut butter chips right alongside the marshmallows. They melt just a tiny bit during the mixing phase and give you little pockets of concentrated peanut butter flavor. It’s a wonderful twist on the peanut butter cookies no bake profile we already love. If you’re curious about other ways chocolate melts down, you should definitely peek at how I make my fudgy chocolate crinkle cookies!
And remember how I talked about using different cereals? If you have Honey Nut Cheerios lying around, don’t be afraid to use those instead of or mixed with the Rice Krispies. They bring a unique, slightly toasted flavor that works exceptionally well in these quick treats. I even experimented once using some crushed waffle cones—wow! For even more chocolate ideas, check out how others build their chocolate avalanche cookies online. Keep playing around with your mix-ins; that’s how we innovate in the home kitchen without needing a recipe book!
Storage and Make Ahead Desserts for avalanche cookies
The sheer joy of these avalanche cookies is that once you spend those 15 minutes making them, you’re set! They are truly built to be fantastic make ahead desserts. Since we aren’t dealing with any eggs or traditional flour, these clusters last a really long time if you treat them right. This makes them the absolute champions of planning ahead, especially when you need bake sale treats no oven options ready to go days in advance.
Here is my rule: always store them in an airtight container. They don’t like getting exposed to too much air, which can make the marshmallows start to get a little sticky or, conversely, the cereal lose some of its wonderful crunch. I usually layer mine—a sheet of parchment paper between layers of cookies—just to make sure they don’t stick together in one giant delicious blob.
Where should you keep them? The refrigerator is your best friend here. While they are fine at cool room temperature for a day or so, keeping them chilled keeps that peanut butter-white chocolate coating perfectly firm, which is essential for easy handling and transporting. I’ve made batches a full week ahead and kept them tucked away in the fridge, and they were perfect when I pulled them out for my book club meeting. They taste just as amazing cold as they do slightly softened at room temperature.
I’ve found that leftovers are rarely an issue, but if you are making a huge batch and need to keep them longer than a week, you can totally freeze them! Just make sure you wrap that airtight container securely with plastic wrap before popping it in the freezer. When you need them, pull them out and let them thaw on the counter for about 20 minutes. It’s almost like having a secret stash of quick treats ready whenever you need them. If you’re looking for more recipes that are great for prepping early, you should check out how I handle my 7-layer salad—same make-ahead principles apply!
Frequently Asked Questions about No Bake Cookies
I get asked about these no bake cookies all the time, especially right before holidays when everyone is scrambling for fast additions! Below I tackled the most common concerns folks have when making their first batch of avalanche cookies, focusing on getting that perfect texture every single time.
Can I use natural peanut butter instead of creamy processed peanut butter?
This is a smart question! Natural peanut butter (the kind that separates and needs stirring) has a lot more oil. While it tastes great, it doesn’t bind as well as the standard creamy stuff because it doesn’t contain the stabilizers. If you try to use natural peanut butter, you might find your melted chocolate mixture becomes too watery, and your final clusters won’t hold their shape—you’ll end up with more of a puddle than a cookie. If you absolutely must use it, drain off some of that excess oil first. For these peanut butter cookies no bake recipes, I always stick to the standard creamy kind for reliable results.
What do I do if my white chocolate seizes up in the microwave?
Oh, the dreaded seizing! It’s usually caused by just a tiny drop of water or steam getting into the chocolate, or if you overheat it too much. If your white chocolate mixture suddenly looks grainy, clumpy, and dry—like wet sand—don’t panic! It’s salvageable, but you have to move fast. Take it out of the microwave and stir in about a tablespoon of neutral oil or shortening (like Crisco). Stir vigorously! This extra fat can sometimes smooth out the broken emulsion and bring it back to life so you can finish coating those marshmallows and cereal. If you’re making these as simple candy clusters for a party, this little rescue trick is a lifesaver!
Is the powdered sugar dusting necessary for the avalanche cookies?
Functionally? No, you can skip it! The cookies will set up just fine without it. Aesthetically? Yes, I think it’s totally necessary! That light dusting of powdered sugar is what gives them their signature “avalanche” look—it looks like snow on top of the cluster. Plus, it adds zero noticeable sweetness, so it’s mostly for looks. If you’re making them for a big presentation or want them to look really professional on your holiday cookie trays, take the extra minute to sift a little sugar over them once they cool slightly.
Can I make these without marshmallows? I’m not a huge fan.
You can certainly change things up! If you skip the marshmallows, you will need to increase the amount of crispy cereal slightly to maintain the volume so the melted base isn’t too overwhelming. You’ll lose that delightful chewiness, though, which is a big part of what makes these marshmallow treats so beloved. If you want to substitute, try replacing the marshmallows with extra pretzels or even some chopped peanut butter cups for a different kind of texture. Just remember, you’re shifting away from the classic recipe, but as I always say, home cooking is about making it yours!
Estimated Nutritional Data for avalanche cookies
Since these glorious clusters are primarily white chocolate, peanut butter, and cereal, they definitely fall into the “treat” category! Remember, these numbers are just estimates based on standard ingredients used in the recipe—your actual brand choices and serving size might shift this a little. When you’re planning out your full holiday menu, give these general values a look:
- Serving Size: 1 cookie
- Calories: Approximately 210
- Fat: About 12g
- Carbohydrates: Around 25g
- Sugar: Roughly 18g (Yes, they are sweet!)
- Protein: About 4g
Overall, they pack a big, satisfying punch for minimal effort! Being a no bake dessert recipe, they aren’t adding any extra cooking oils or fats we usually account for in baked goods. Don’t forget to check out my tips on homemade naan bread if you’re looking for something savory to balance out all this sweetness!
Share Your Favorite Simple Candy Clusters
I truly hope you give this recipe a try. Because these avalanche cookies require no oven and practically zero thinking, they bring the most joy for the least effort—that’s my favorite kind of cooking! If you whip up a batch this week, please come back and let me know how they turned out. Did you stick to the classic version, or did you try adding salty pretzels or using cookie butter?
I always love hearing about your experiments in the kitchen. You can leave a star rating below—give it 5 stars if it totally saved your dessert planning this week! Also, if you have any other quick-fix questions that aren’t answered here, feel free to reach out via my contact page. Happy clustering!
PrintEasy No-Bake Avalanche Cookies
Make these simple, crowd-pleasing avalanche cookies without turning on your oven. This quick treat combines creamy peanut butter, crunchy cereal, and melted white chocolate for a satisfying cluster dessert perfect for holidays or fast snacks.
- Prep Time: 15 min
- Cook Time: 0 min
- Total Time: 45 min
- Yield: About 24 cookies 1x
- Category: Dessert
- Method: No Bake
- Cuisine: American
- Diet: Vegetarian
Ingredients
- 12 ounces white chocolate chips
- 1 cup creamy peanut butter
- 6 cups crispy rice cereal (like Rice Krispies)
- 2 cups mini marshmallows
- 1 cup powdered sugar (for dusting)
Instructions
- Line a baking sheet with parchment paper. Set aside.
- In a large microwave-safe bowl, combine the white chocolate chips and peanut butter. Microwave in 30-second intervals, stirring well after each, until the mixture is completely smooth and melted. This usually takes 1 to 1.5 minutes total.
- Gently fold in the crispy rice cereal and mini marshmallows until all dry ingredients are evenly coated with the chocolate mixture. Work quickly before the chocolate sets.
- Drop rounded tablespoons of the mixture onto the prepared baking sheet, forming small clusters.
- If desired, lightly dust the tops of the clusters with powdered sugar for a snowy effect.
- Refrigerate the avalanche cookies for at least 30 minutes, or until firm.
- Store the finished cookies in an airtight container.
Notes
- For a sweeter, richer flavor, substitute half of the white chocolate chips with milk chocolate chips or semi-sweet chocolate chips for a variation on chocolate avalanche cookies.
- If you prefer a salty contrast, add 1/2 cup of crushed pretzels to the cereal mixture.
- To make these a make ahead dessert, store them in the refrigerator for up to one week.
Nutrition
- Serving Size: 1 cookie
- Calories: 210
- Sugar: 18g
- Sodium: 110mg
- Fat: 12g
- Saturated Fat: 6g
- Unsaturated Fat: 6g
- Trans Fat: 0g
- Carbohydrates: 25g
- Fiber: 1g
- Protein: 4g
- Cholesterol: 5mg