
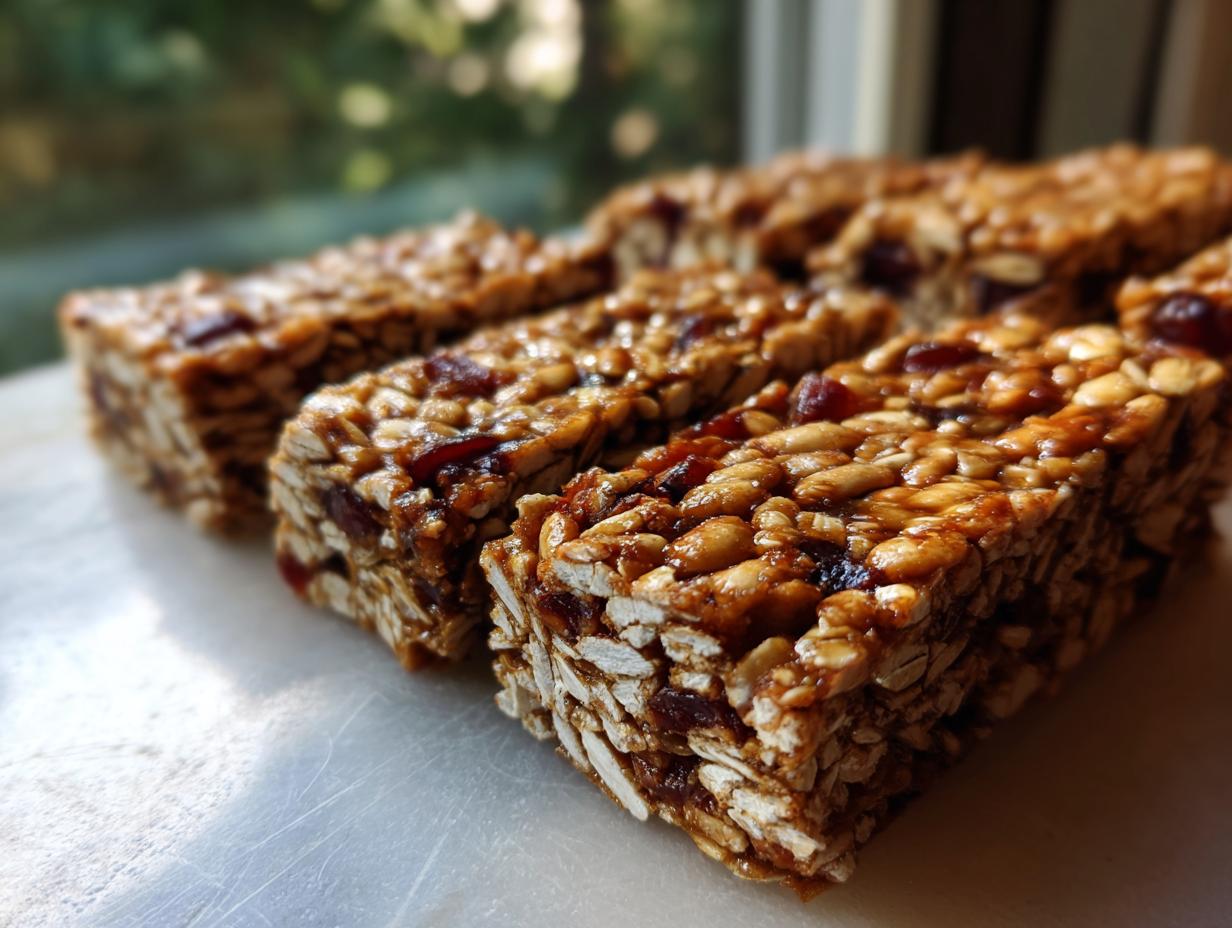
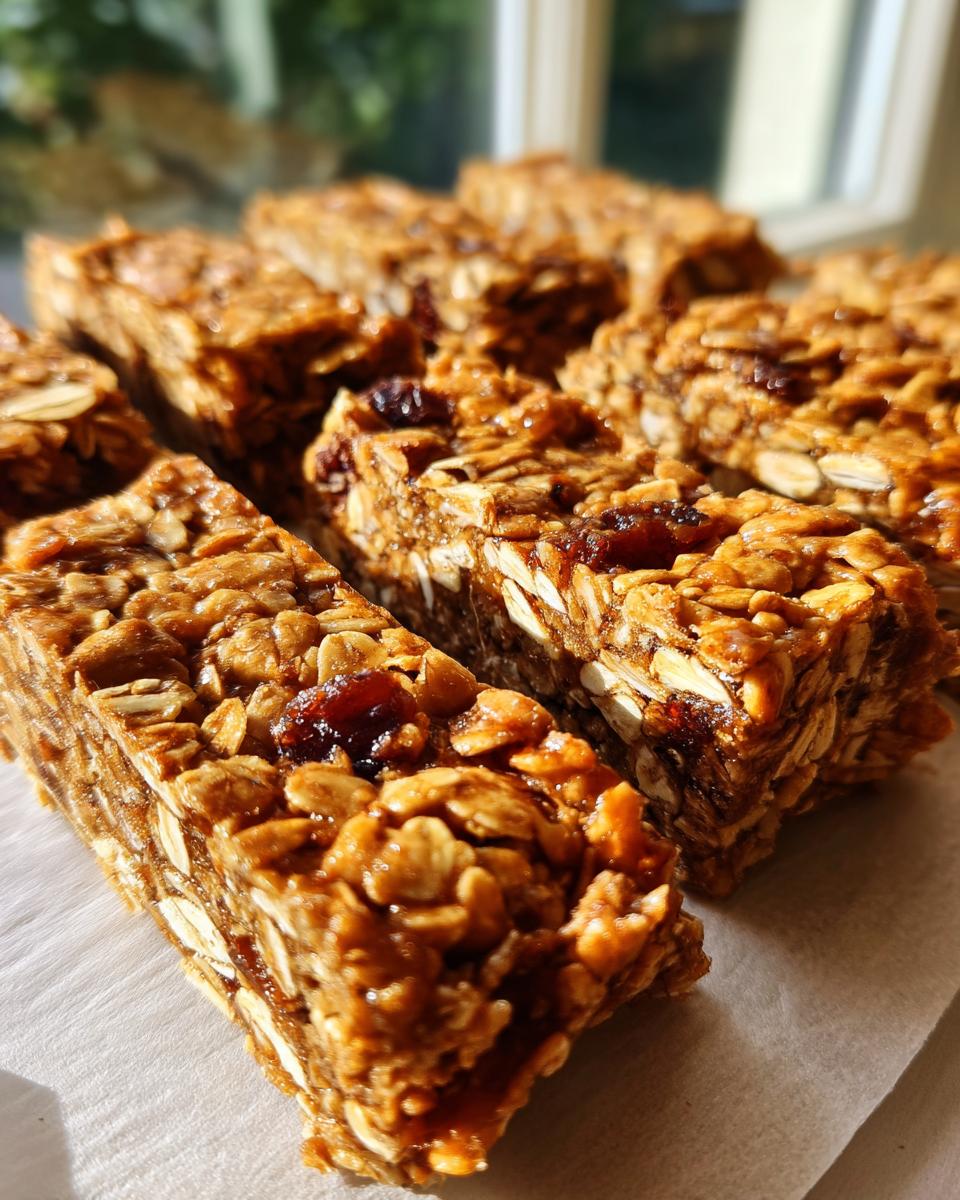
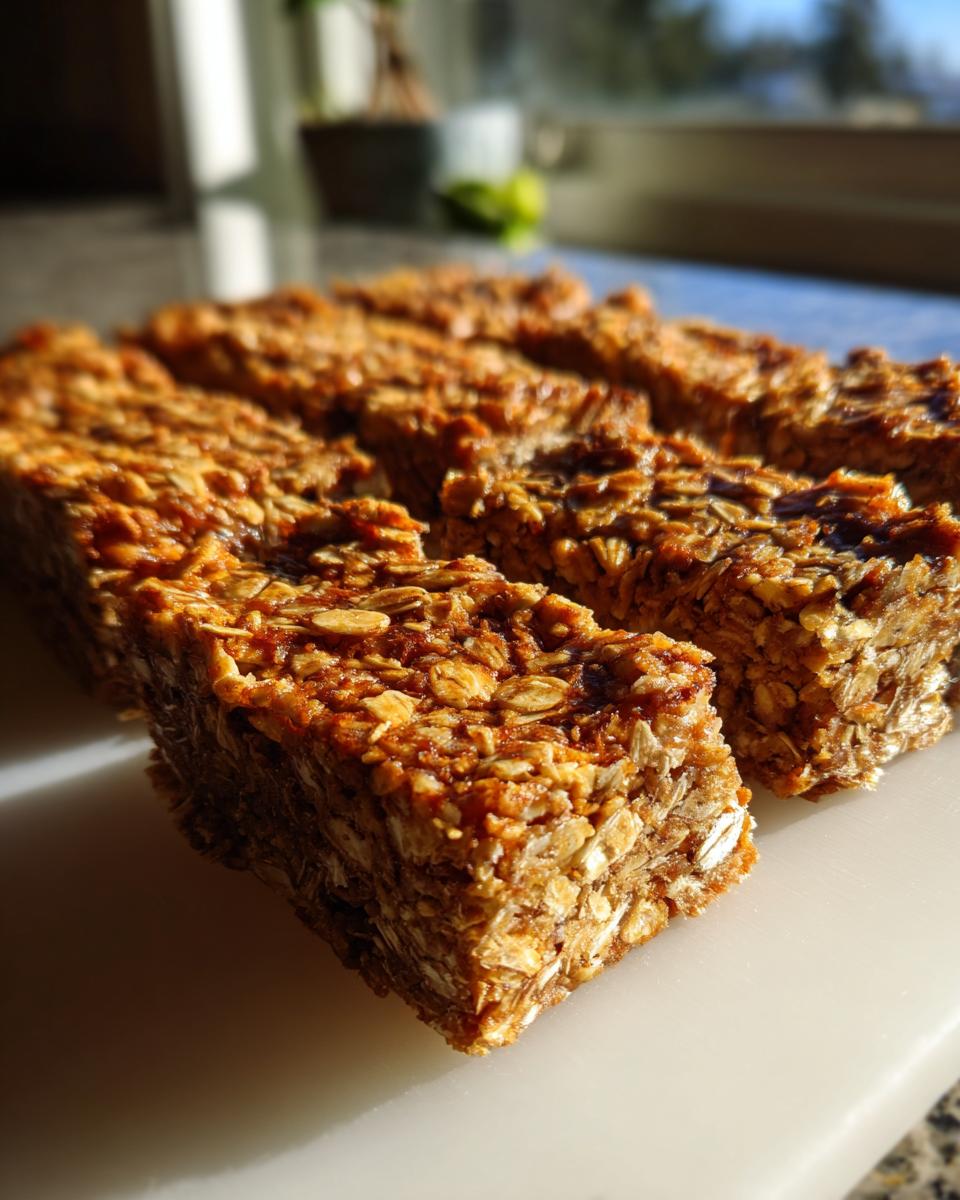
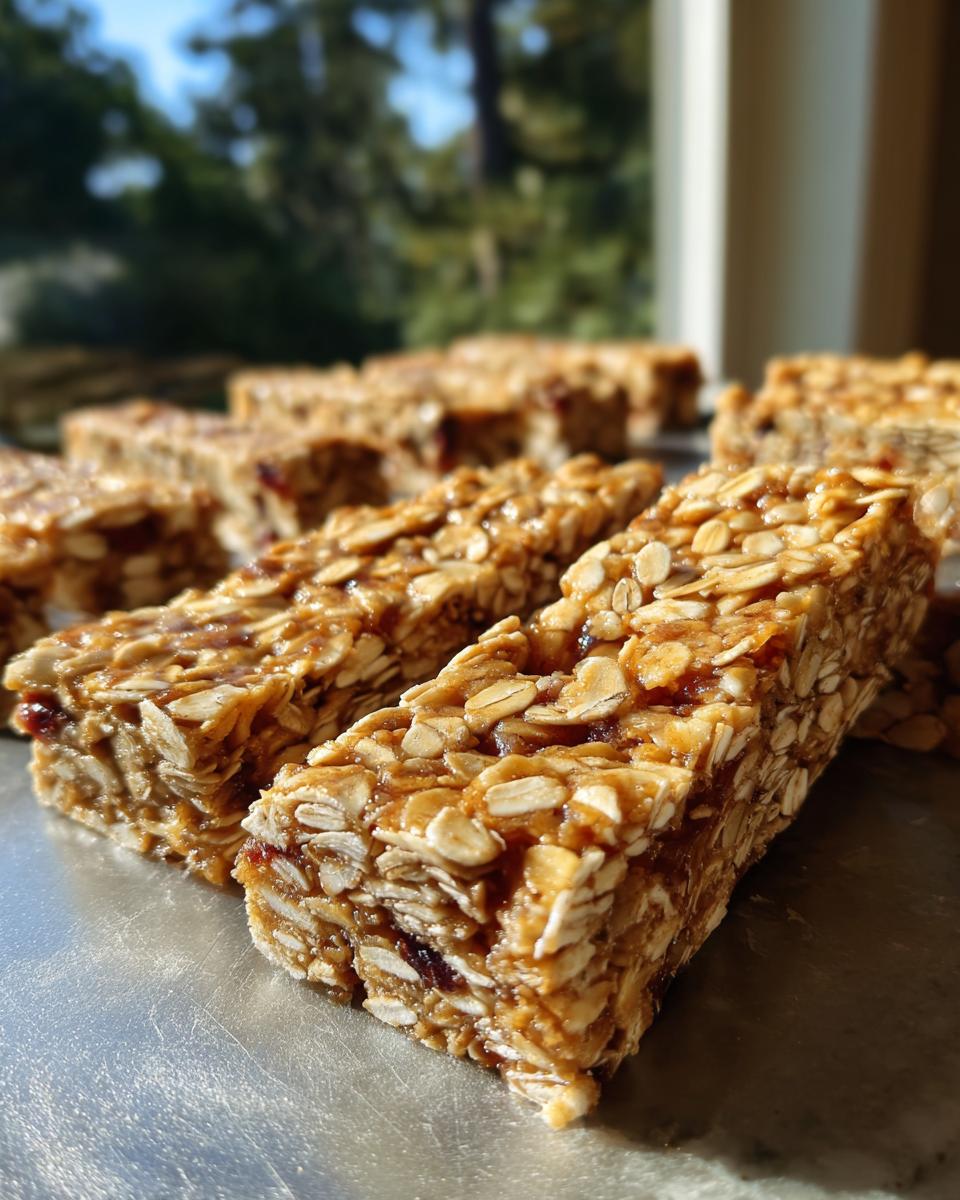
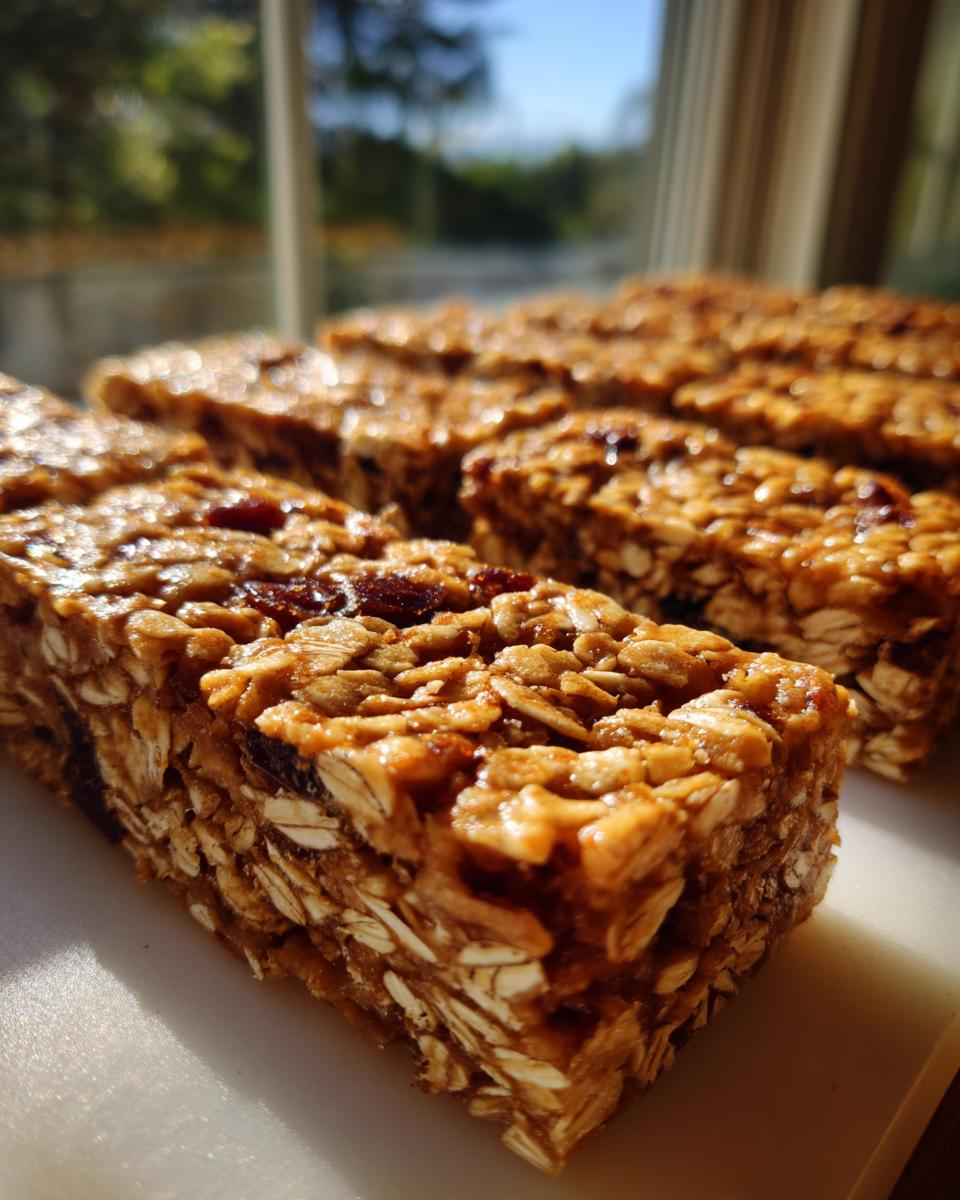
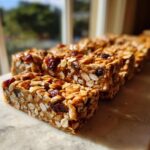
Oh, does your schedule ever feel like it’s running you ragged? I completely get it. When I was trying to juggle launching Chefsily with keeping up with my own family’s need for quick fuel—especially on those mornings when five extra minutes feels like a luxury—I knew I needed something better than sugary cereal. That’s why I perfected these **no bake granola bars**. Trust me, they solve the grab-and-go crisis brilliantly. They come together in about 15 minutes of active work, there’s zero oven involved, and they create those perfectly chewy centers everyone searches for. These are the wholesome, energy-boosting snacks you’ll want to keep stocked in your pantry for yourself and the kids. For more ideas on fast fuel, you should check out my favorite healthy breakfast ideas, too!
- Why You Will Make These Chewy No Bake Granola Bars Again and Again
- Gathering Ingredients for Your No Bake Granola Bars
- Expert Tips for Perfect No Bake Granola Bars Texture
- Step-by-Step Instructions for Making No Bake Granola Bars
- Making These No Bake Granola Bars Kid Friendly Snacks
- Storage and Meal Prep for Your Homemade Granola Bars
- Frequently Asked Questions About No Bake Granola Bars
- Estimating Nutrition for These Easy Snack Recipes
- Share Your Ultimate 15-Minute Chewy No Bake Granola Bars
Why You Will Make These Chewy No Bake Granola Bars Again and Again
Honestly, convenience is king when it comes to snacks, and these **no bake granola bars** deliver big time. I keep reaching for this recipe year-round because it ticks every box a busy home cook needs. It’s low effort, high reward!
- Prep time is only 15 minutes—we’re talking just a quick mix!
- Zero heat required! No oven means less mess and no added stove heating up the kitchen.
- They set up perfectly chewy; that satisfying texture lasts all week.
- This is your ultimate solution for easy weeknight dinners when you just need a quick grab-and-go option later.
Gathering Ingredients for Your No Bake Granola Bars
The real beauty of these **homemade granola bars** is that they use standard pantry staples. When you gather your items, make sure your oats are rolled oats—not instant! For the binder, we need creamy peanut butter and a good, liquid sweetener like honey or maple syrup. Remember, customization is the secret sauce here. You get 1/2 cup for all your favorite add-ins!
Here is exactly what you need gathered before you start mixing:
- 2 cups rolled oats
- 1 cup creamy peanut butter (or other nut butter)
- 1/2 cup honey or maple syrup
- 1/2 cup mix-ins (think dried fruit, nuts, seeds, chocolate chips—whatever makes you happy!)
- 1 teaspoon vanilla extract
- 1/4 teaspoon salt
Don’t forget to have all your toppings measured out before you start warming the binder. You’ll be moving fast once that sticky goodness hits the bowl! If you need more ideas for quick meals besides snacks, check out my tips for simple lunch recipes.
—
Expert Tips for Perfect No Bake Granola Bars Texture
Getting that ideal, slightly sticky, perfectly **chewy snack bars** texture is all about the binder. You don’t want them hard as a rock, and definitely not falling apart when you grab them! The key, aside from getting the ratio right, is forcing that warm, gooey mixture into tight contact with the oats. You have to press down really, really firmly in the pan. Seriously, use the bottom of a flat measuring cup or a sturdy spatula and push until your arms get tired. That compressing action is what makes them set up sturdy and chewy instead of crumbly.
We’re skipping the oven, so all the binding magic happens when we chill them, and that requires serious packing!
Ingredient Notes and Simple Substitutions for No Bake Granola Bars
Listen, I know not everyone can do peanuts, and some folks need to skip gluten, so we have options! If you need certified gluten-free, just make sure your oats say so on the package; it’s an easy step. For nut allergies, sunflower seed butter works surprisingly well as a direct swap for peanut butter—it keeps that necessary creaminess. If your mixture feels a little too loose right out of the gate, don’t panic. Just stir in an extra tablespoon of water or milk. This helps everything get moving toward a cohesive, delicious bar. For more baking success stories, check out my favorite delicious dessert recipes.
Step-by-Step Instructions for Making No Bake Granola Bars
Okay, let’s get these **oatmeal bars no oven** put together! Since we aren’t using heat for baking, attention to detail in the mixing and pressing stages is what gives us those amazing, sliceable bars. Don’t rush the chilling; that’s where the magic really happens and they go from sticky goo to perfect snack. You’ll be shocked how fast this whole process moves. For more inspiration on simple baking projects, take a peek at my go-to oatmeal muffins banana one bowl recipe!
Preparing the Pan and Mixing Dry Ingredients for No Bake Granola Bars
First things first, grab an 8×8 inch pan and line it with parchment paper. Make sure you leave an overhang on the sides; this is my favorite trick for lifting the whole block out later! In your big bowl, just toss in the oats, salt, and all those fantastic mix-ins you chose. Give those dry bits a quick stir so they are waiting patiently.
Creating the Binding Mixture for Your No Bake Granola Bars
Now for the sticky stuff. In a small saucepan, gently warm up your peanut butter and your honey or maple syrup over very low heat. We just want it smooth and runny enough to pour easily—do not let it boil or get too hot, or it’ll mess with the texture! Once it’s perfectly smooth, take it off the heat right away and stir in that vanilla extract.
Combining, Pressing, and Chilling Your No Bake Granola Bars
Pour that warm binder right over your dry ingredients and mix like crazy until everything is coated evenly. Now comes the crucial part for chewy results: dump it all into the lined pan and press down HARD. Use the bottom of a glass or a spatula to pack it down as firmly as you possibly can. Pop that pan in the fridge for at least one full hour so they can fully set up. Once chilled, use those parchment overhangs to lift the block out, slice into treats, and enjoy!
Making These No Bake Granola Bars Kid Friendly Snacks
One reason I keep coming back to these **no bake granola bars** is how simple they are to turn into amazing **kid friendly snacks**. If your little ones are anti-anything-crunchy, don’t stress! Instead of large nuts, use finely chopped pecans or skip them entirely. This is where you can sneak in extra vitamins, too. Try using dried cranberries, which are softer and sweeter than raisins, or grab some mini chocolate chips—kids absolutely love those surprises throughout their energy bar.
We always have to hide a little extra goodness, right? I blend in extra flax seeds when they aren’t looking, and they never notice. If you’ve got picky eaters, make sure you check out my soft and chewy peanut butter blossoms; they always win over the crowd when I’m making peanut butter blossom recipe soft chewy!
Storage and Meal Prep for Your Homemade Granola Bars
This is the part of the recipe that makes life so much easier! Because these **no bake granola bars** set up so nicely in the fridge, they become the ultimate **meal prep snacks**. I usually make a double batch on Sunday and tuck them away. Make sure you cut them completely before storing them, then layer them tightly in an airtight container. I always put a piece of wax paper or parchment between the layers just so they don’t stick together overnight.
Stored correctly in the refrigerator, these beauties stay perfectly fresh and chewy for up to a full week! Honestly, having these ready means no more frantic searching for something healthy when I need a quick boost after running errands. If you’re planning out your week, you definitely want to see my tips for a make-ahead meal like my cheeseburger bowl recipe low-carb meal prep!
Frequently Asked Questions About No Bake Granola Bars
I always get a few questions when people try my straightforward recipes for the first time, especially since we’re avoiding the oven. These **oatmeal bars no oven** are so versatile, but a couple of things trip people up. Hopefully, I can clear those up right here so your first batch is absolutely perfect!
Can I use different nut butters in these no bake granola bars?
Yes, absolutely! Peanut butter is my go-to for binding power, but almond butter works wonderfully if you want a slightly different flavor profile. For a truly nut-free option, sunflower seed butter is my trusted go-to substitute. Just make sure it’s creamy!
How do I ensure my no bake granola bars are chewy and not hard?
Chewiness comes down to two things: the binder ratio and your packing technique. You need enough honey/syrup to coat everything, and then you need to press that mixture into the pan with real elbow grease. Pressing firmly is what gives you those tight, **chewy snack bars** instead of something that falls apart in your hand.
If you’re looking for more kitchen wisdom while these are chilling, you might enjoy my recipe for a comforting easy creamy white chicken chili recipe!
Estimating Nutrition for These Easy Snack Recipes
Now, I always tell people that since these are **homemade granola bars** and you’re customizing the mix-ins—did you use dark chocolate or milk chocolate chips? Almonds or peanuts?—the numbers are just a snapshot. But based on the standard ingredients listed, you can expect about 220 calories per bar. That includes around 7 grams of protein and 3 grams of fiber, which makes them fantastic **energy bars homemade**! Remember, these are estimates for 12 bars, so your final count might shift a little based on your personal choices. For other light and refreshing options, you’ve got to check out my veggie lentil salad recipe!
Share Your Ultimate 15-Minute Chewy No Bake Granola Bars
I truly hope these **no bake granola bars** become a staple in your busy life just like they are in mine! Once you’ve cut them and tried one—go ahead, I won’t tell if you taste-test while they are still warm—I’d love to hear about it. Did you ditch the peanut butter for almond? Did you go heavy on the chocolate chips? Leave a rating below and tell me about your favorite custom mix-ins! You can also always reach out via my contact page.
If you tried this recipe and loved the easy, chewy results, let someone else know by sharing it! You can find some inspiration on great snack ideas over at Foody Homie, too, while you’re at it!
PrintThe Ultimate 15-Minute Chewy No-Bake Granola Bars (Healthy & Customizable)
Make these easy, chewy no-bake granola bars in just 15 minutes. They are a healthy, quick grab and go snack perfect for meal prep and satisfying both adults and children.
- Prep Time: 15 min
- Cook Time: 0 min
- Total Time: 1 hour 15 min
- Yield: 12 bars 1x
- Category: Snack
- Method: No Bake
- Cuisine: American
- Diet: Vegetarian
Ingredients
- 2 cups rolled oats
- 1 cup creamy peanut butter (or other nut butter)
- 1/2 cup honey or maple syrup
- 1/2 cup mix-ins (e.g., dried fruit, nuts, seeds, chocolate chips)
- 1 teaspoon vanilla extract
- 1/4 teaspoon salt
Instructions
- Line an 8×8 inch baking pan with parchment paper, leaving an overhang on the sides for easy removal.
- In a large bowl, combine the rolled oats, salt, and your chosen mix-ins.
- In a small saucepan over low heat, warm the peanut butter and honey (or maple syrup) until smooth and easily pourable. Do not boil.
- Remove the saucepan from the heat and stir in the vanilla extract.
- Pour the warm peanut butter mixture over the dry ingredients in the large bowl. Mix well until everything is evenly coated.
- Transfer the mixture to the prepared baking pan. Press the mixture down firmly and evenly using the back of a spatula or another piece of parchment paper. Pressing firmly helps the bars hold their shape.
- Refrigerate the pan for at least 1 hour, or until the bars are completely set.
- Use the parchment paper overhang to lift the block of granola out of the pan. Place it on a cutting board.
- Cut the block into 12 or 16 bars. Store the homemade granola bars in an airtight container in the refrigerator.
Notes
- For gluten free no bake options, use certified gluten free rolled oats.
- You can substitute the peanut butter with sunflower seed butter for a nut-free version.
- If the mixture seems too dry, add one tablespoon of water or milk until it holds together when squeezed.
- These bars are excellent for meal prep snacks and last up to one week refrigerated.
Nutrition
- Serving Size: 1 bar
- Calories: 220
- Sugar: 10g
- Sodium: 110mg
- Fat: 12g
- Saturated Fat: 2g
- Unsaturated Fat: 10g
- Trans Fat: 0g
- Carbohydrates: 26g
- Fiber: 3g
- Protein: 7g
- Cholesterol: 0mg