
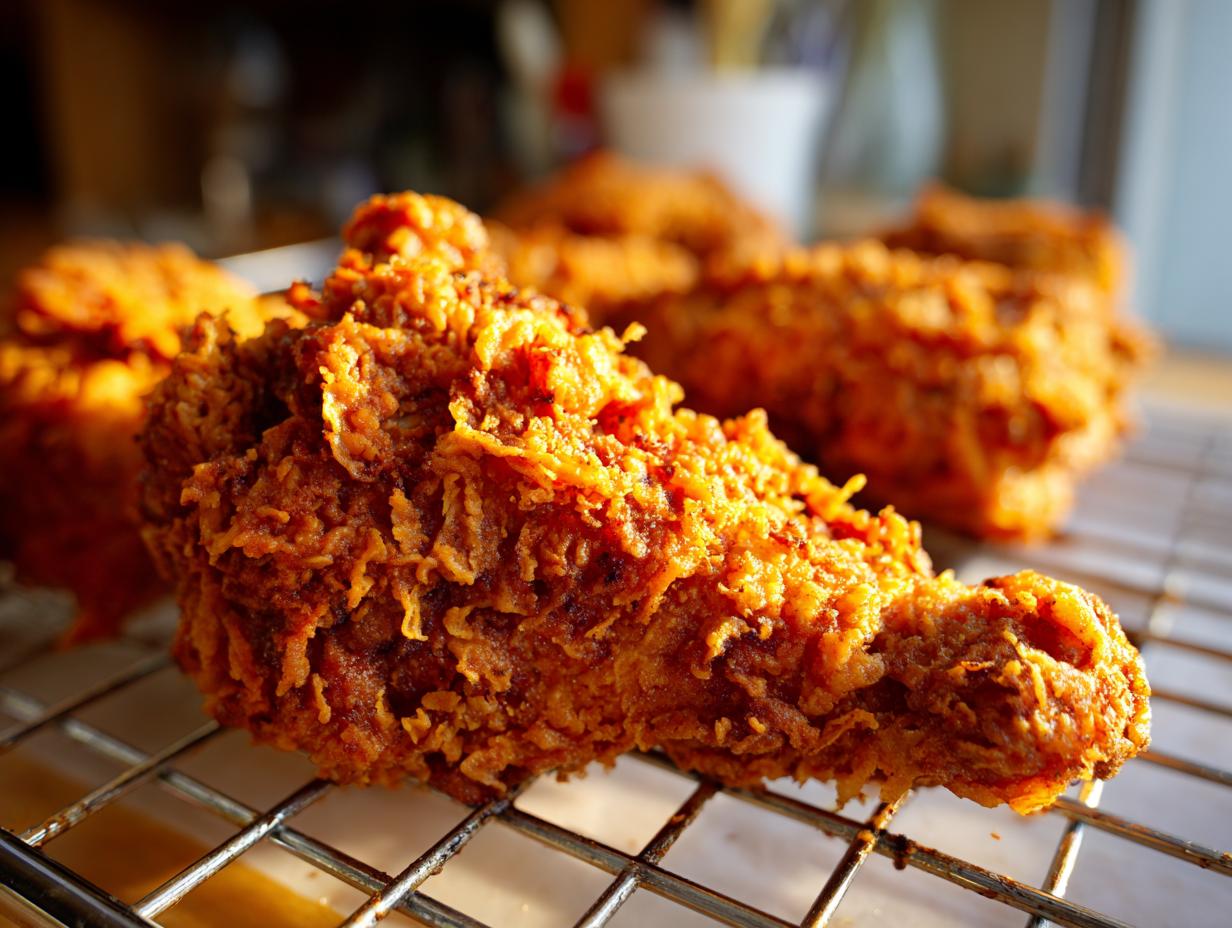
There is absolutely nothing that screams pure, unadulterated comfort like a plate piled high with perfectly golden fried chicken. Forget those pale, soggy attempts you might have made before! We’re here to talk about the best homemade fried chicken—the kind that shatters satisfyingly when you bite into it, while keeping the meat inside impossibly juicy. As someone who dove deep into mastering classic Southern comfort food over the years, I guarantee this fried chicken recipe, built around a long buttermilk brine, is the technique you need.
Making this truly remarkable, crispy, and flavorful bird is all about respecting the process, which is what I learned from my family tradition. You’ll end up with that beautiful, craggy crust everyone dreams about. If you are looking for more easy meals that hit that exact spot after a long day, make sure you check out my collection of easy weeknight dinners next!
- Why This Buttermilk Southern Fried Chicken Recipe Works
- Ingredients for Ultra-Crispy Fried Chicken
- How To Make Fried Chicken: Step-by-Step Instructions
- Tips for Foolproof Fried Chicken Success
- Variations on Classic Fried Chicken
- Serving Suggestions for Your Easy Fried Chicken Dinner
- Storage and Reheating Savory Chicken Dinner Ideas
- Frequently Asked Questions About Buttermilk Fried Chicken
- Nutritional Estimates for This Comfort Food Chicken Recipe
- Share Your Crispy Fried Chicken Creations
Why This Buttermilk Southern Fried Chicken Recipe Works
When I started trying to replicate the absolute fried chicken from my favorite gatherings, I realized it wasn’t just about dumping flour on top. It’s about chemistry, people! This recipe works because we focus on two main things that guarantee success—the buttermilk marinade and the coating technique. It stops the frustration of dry meat and ensures you get that perfect golden finish every single time.
Here’s what makes this method stand apart and why you can trust it:
- It uses a true, long brine for deep, savory flavor penetration.
- The ratio of ingredients in the dredge is specifically balanced to create structure.
- We use temperature control, which is key to getting that crispy shell without burning the outside.
The Secret to Juicy and Crispy Chicken Texture
The buttermilk brine is doing some serious work here! The acid in the buttermilk works gently to break down some of the tougher proteins in the chicken, which is how we guarantee Juicy and Crispy Chicken. It tenderizes the meat way better than just water or milk ever could. Then, when it comes to the coating, we aren’t messing around.
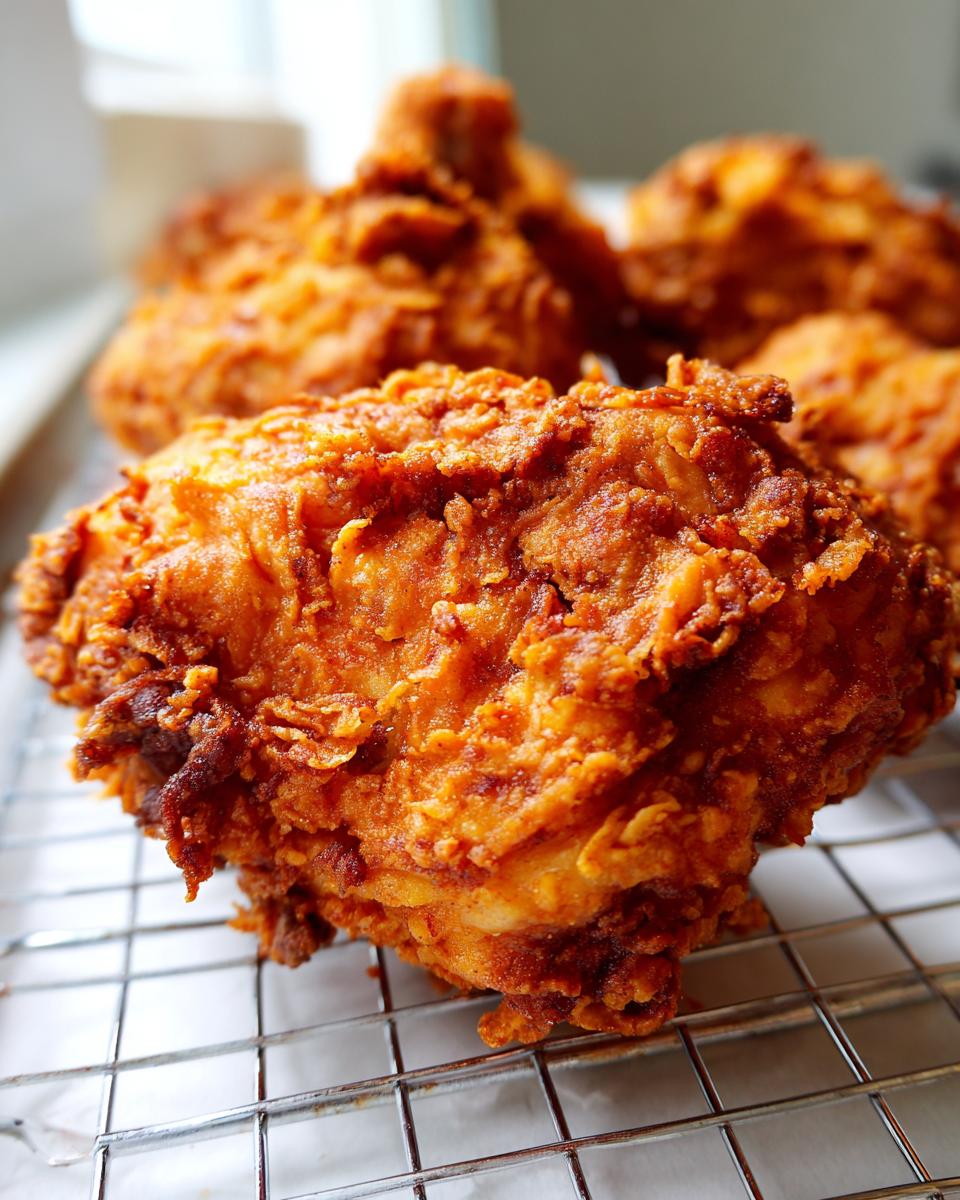
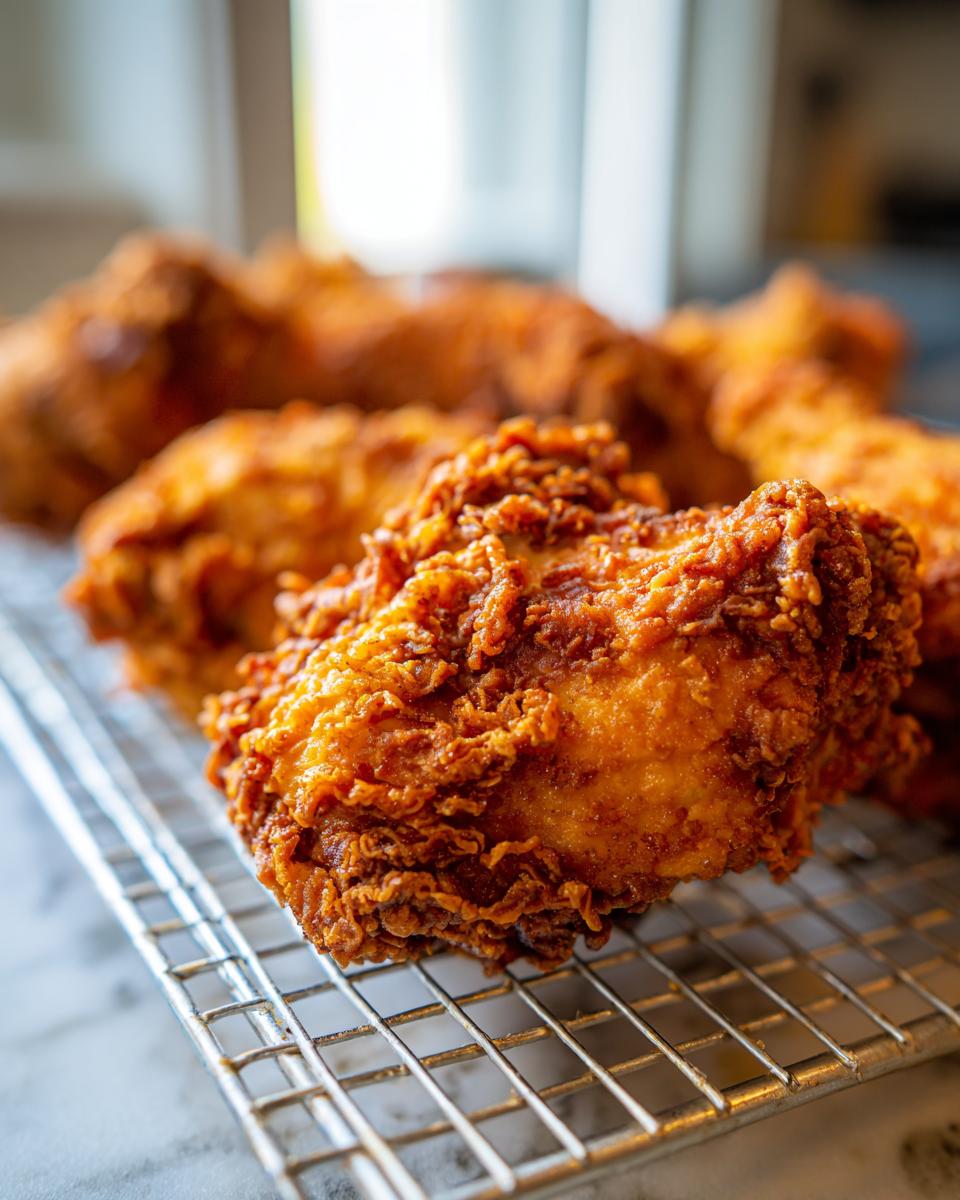
We use a double dip—flour, quick dip back into the wet, then back into the flour again. That second toss is what locks everything in place and creates those wonderful, jagged edges. Those peaks and valleys are what make the crunchy chicken coating you’re looking for. Press that flour on firmly, don’t just dust it!
Ingredients for Ultra-Crispy Fried Chicken
Okay, let’s get organized! You can’t have magnificent fried chicken without starting with the right components. For the greatest success, please use bone-in, skin-on pieces. That skin is your best friend because it gets so wonderfully crisp when it hits the hot oil alongside that rich buttermilk marinade.
We are breaking the ingredients into two distinct teams: the wet marinade and the dry dredging mix.
Essential Components for the Buttermilk Brine
This is where the tenderness begins! You need:
- 4 cups of good, full-fat buttermilk. Don’t skimp here!
- 2 generous tablespoons of kosher salt.
- 1 tablespoon black pepper.
- 1 teaspoon cayenne pepper for just a touch of background heat.
Pop that chicken in the fridge for at least four hours, but seriously, overnight is *chef’s kiss*. The longer that chicken marinates, the more flavor and tenderness you lock in.
The Golden Brown Chicken Dredge Mix
This dry mixture is what builds that incredible texture. For a truly Golden Brown Chicken crust, you need:
- 4 cups all-purpose flour.
- A half cup of cornstarch—this is our secret weapon for extra light crispiness!
- 2 tablespoons paprika for color.
- 1 tablespoon garlic powder and 1 tablespoon onion powder for savory depth.
Whisk this all up really well. We want everything evenly distributed across every single piece of chicken!
How To Make Fried Chicken: Step-by-Step Instructions
Alright, this is the part where we go from raw ingredients to the most spectacular fried chicken you’ve ever made at home. I try to keep the actual cooking process quick, but prepping is where the magic happens. Timing is everything here, so maybe put on some good music and get your station ready before you pull the chicken from the fridge!
Preparing the Buttermilk Brined Chicken
First things first, you need to rescue your chicken from the fridge. Remember how we mixed that potent buttermilk brine earlier? Take those pieces out and let the excess drip off naturally back into the bowl. Don’t wipe them dry! We need that wet surface clinging to the flour later. My little trick, which I picked up watching Nonna, is to gently tip the bowl to make sure every nook and cranny of every piece has been touched by that buttermilk. That long soak means we don’t have to worry about dry spots.
Achieving the Crunchy Chicken Coating
Now for the fun part: the double dredge. You want your flour mixture wide and shallow so you can press down hard. Slather a piece in the flour, pressing hard to get that thick texture. Then, plunge it quickly back into the leftover buttermilk—just a quick dunk, seriously! Back into the flour it goes for the final, heavy coating. This double-layering is how we get that wonderful, jagged, crunchy chicken coating.
This next step is non-negotiable, so don’t skip it! Once fully coated, lay the pieces on a wire rack and let them sit untouched for a solid 15 minutes. This resting time lets the coating adhere properly. Trust me, if you try to toss them straight into the oil, the crust will just slide right off.
Deep Fried Chicken Frying Technique
Heat up your oil to exactly 325 degrees Fahrenheit—you absolutely need a thermometer for this, folks. If the oil smells like it’s burning, it’s too hot! If it’s barely bubbling, it’s too cold, and you’ll get greasy chicken. When adding the pieces, work in small batches—maybe three or four pieces maximum—so you don’t drop that precious oil temperature. Fry them for about 6 to 8 minutes per side until they hit an internal temperature of 165°F. This attention to heat ensures you get that perfect, deep golden color and cooked-through center for wonderful deep fried chicken. Don’t forget to check out this amazing chicken bacon ranch casserole when you need an oven fix!
Tips for Foolproof Fried Chicken Success
I know, achieving that picture-perfect, shatteringly crisp piece of fried chicken can feel intimidating, but trust me, once you nail the technique, it becomes so easy! These little tips are what took me from anxious beginner to someone who doesn’t sweat making this dish for company. We are aiming for Foolproof Fried Chicken here, so listen closely!
These aren’t just suggestions; they are the rules I live by when I’m making this comforting dish for my family.
Oil Selection and Temperature Management
Remember in the ingredients, I mentioned the mix? For the absolute best crust, you want to use a combination of half vegetable oil and half vegetable shortening. That combination gives you the high smoke point of the oil, but the shortening adds that classic richness and helps the crust brown beautifully. The biggest thing, though? Temperature control! You need a thermometer, honestly. If the oil drops below 300°F because you crowded the pot, that beautiful coating just soaks up grease and gets flabby. Keep that temperature steady right around 325°F between batches, or you’ll have sad, oily chicken.
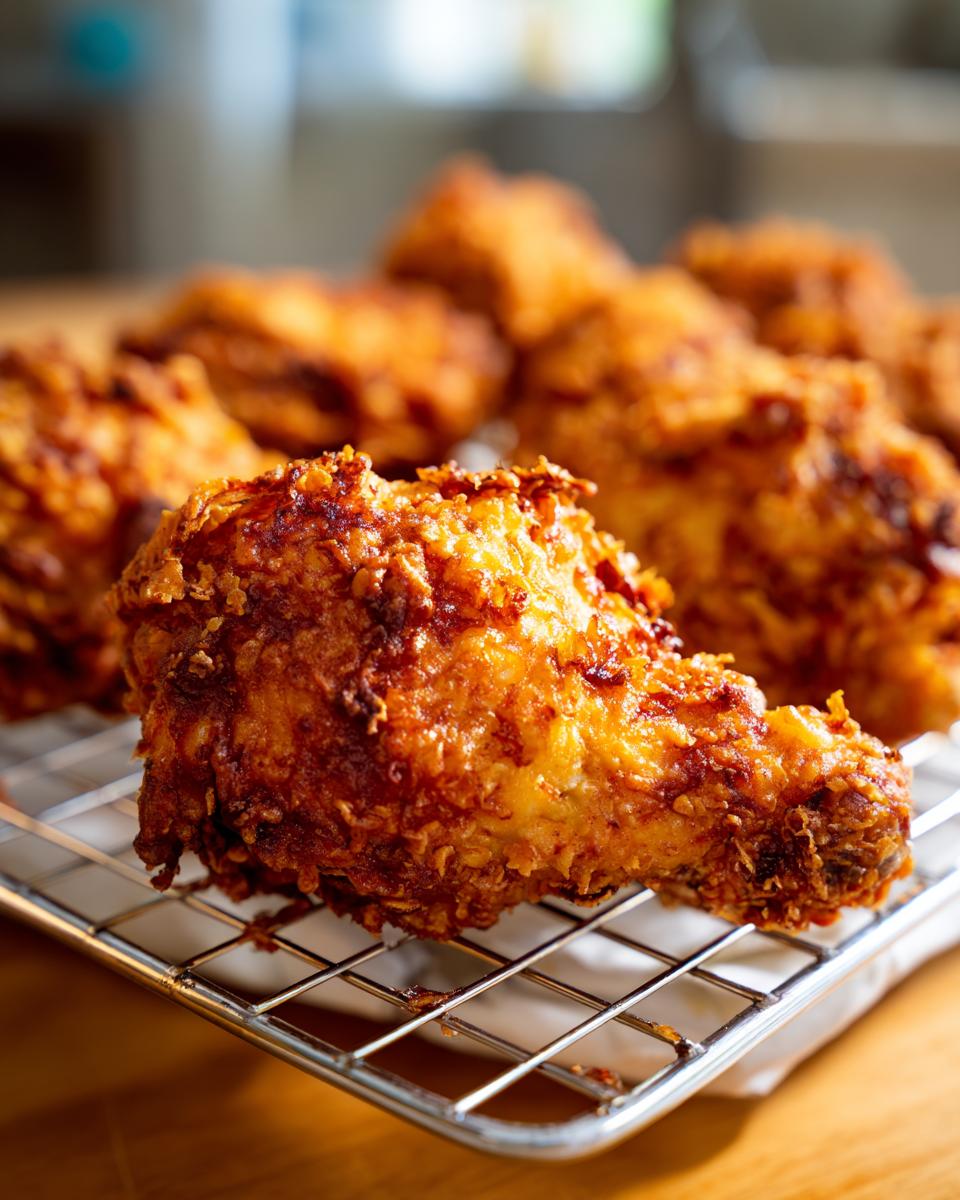
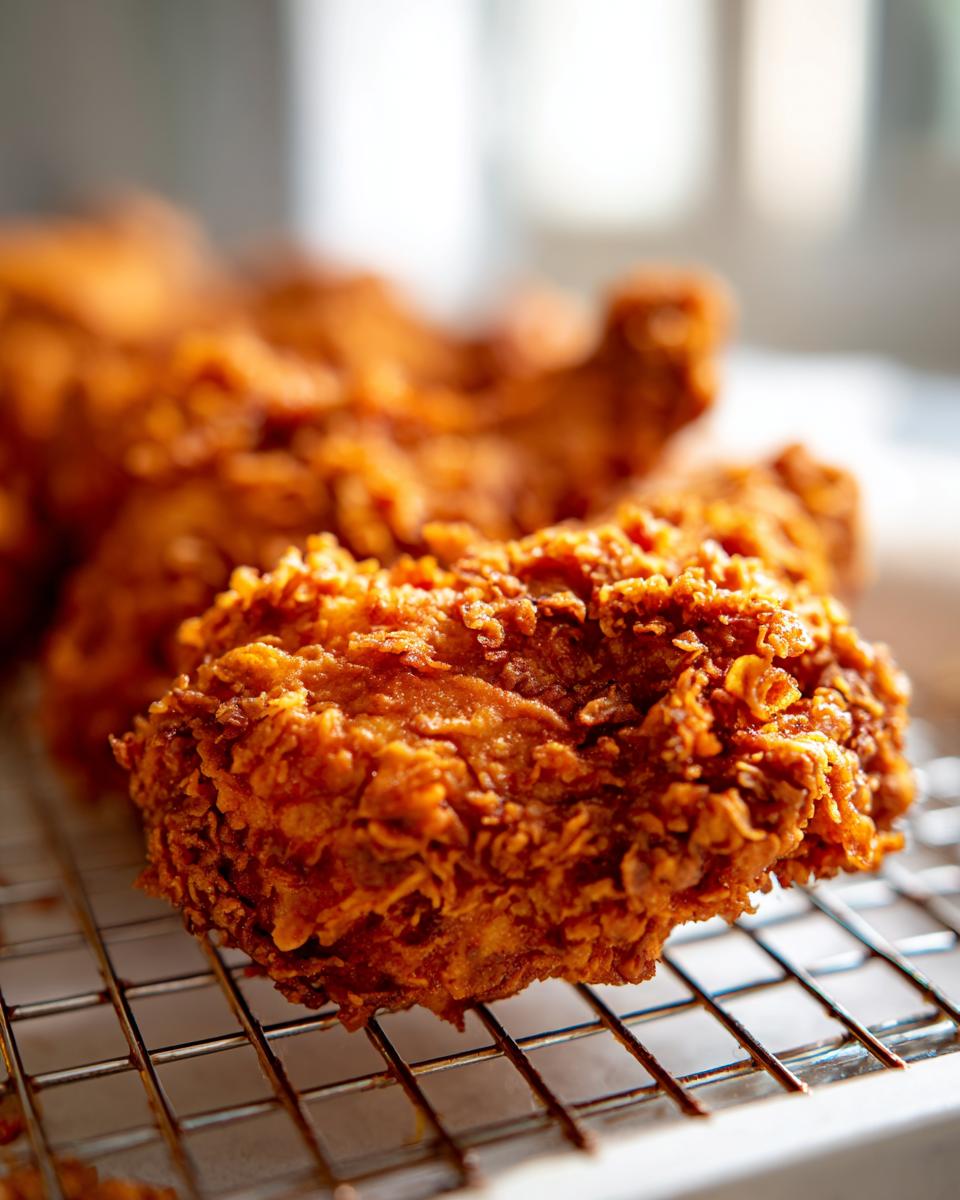
Draining the Golden Brown Chicken Properly
This might sound minor, but it’s huge for texture! Once that chicken comes out perfectly Golden Brown Chicken, your instinct might be to set it on a stack of paper towels, right? Don’t do it! Paper towels trap the steam created by the super-hot chicken underneath the crust. That steam melts your glorious crispiness right away!
Instead, always use a wire cooling rack set over a baking sheet. This lets the excess oil drip away freely, and the air circulates all around the chicken, keeping the bottom just as crunchy as the top. While you wait for it to drain just a touch, you might want to look up my recipe for the easy honey BBQ sauce—it’s amazing for dipping!
Variations on Classic Fried Chicken
While this recipe delivers phenomenal fried chicken flavor right out of the gate, sometimes you just want to shake things up a bit! Maybe you want less heat, or maybe you only bought drumsticks. That’s totally cool! I love that you can take this base recipe and twist it slightly to fit exactly what you’re craving for dinner. These are easy tweaks that honor the Southern tradition but make it feel new again.
Making Southern Fried Chicken Spicier
If you’re like me and you like that little tiny kick that makes you reach for your water, you can easily amp up the heat in this Southern Fried Chicken. The brine already gets a teaspoon of cayenne, but if you want it hotter, double that amount right in the buttermilk soak! That infuses the meat with heat before it even hits the flour.
For a more immediate punch on the outside crust, try boosting the spice level right in the dredge. In addition to the paprika, throw in an extra teaspoon of cayenne or even a teaspoon of smoked paprika for color and smoky flavor. You could even dust the freshly fried pieces with a tiny bit of chili powder once they come out of the oil. Just be careful not to burn those spices!
Alternative Cuts: Chicken Thighs Fried Recipe Focus
I usually use a mix of pieces, but if you see a killer deal on one cut, you can totally switch it up. When you are focusing on a Chicken Thighs Fried Recipe, thighs are naturally fattier, which means they stay unbelievably moist, even if you cook them a little past done. They typically take about the same time as breasts, maybe four or five minutes longer per side, because they are usually thicker.
If you’re using smaller cuts like wings or drumsticks, keep a close eye on them! They cook faster. You might only need 5 or 6 minutes per side to get that beautiful golden color. Always default back to checking that internal temperature, especially with smaller cuts.
If you’ve got air fryers sitting on your counter, I show you how I handle wings differently in my guide to air fryer chicken wings, but for this classic deep-fried version, stick to the thermometer!
Serving Suggestions for Your Easy Fried Chicken Dinner
Once you’ve pulled that incredible, crispy poultry out of the fryer, you need the right partners to make this an official Easy Fried Chicken Dinner! Seriously, don’t serve this masterpiece with a sad side salad; aim for maximum comfort. My go-to classic pairing is always mashed potatoes—you need something creamy underneath to soak up any gorgeous, savory juices that might escape the crunchy coating.
Of course, you need greens, but make ’em down-home style! Creamed spinach or maybe some slightly tangy coleslaw works wonders to cut through the richness. And since we are already committed to comfort, you absolutely have to try my recipe for garlic parmesan mashed potatoes. It’s just unbelievably good with this chicken!
Storage and Reheating Savory Chicken Dinner Ideas
You made the best batch of fried chicken ever, and now you have leftovers—a delicious problem, right? Don’t sweat it! Nobody wants soggy chicken the next day. The key here is avoiding moisture. Once the chicken has cooled completely, store it in an airtight container in the fridge. I often slip a paper towel in there, but only to absorb condensation, not directly touching the crust.
To bring back that unbelievable crunch, you have to skip the microwave completely. That’s a recipe for rubbery disappointment! Grab your oven or an air fryer if you have one. Set your oven to about 375°F and place the pieces directly on a wire rack over a baking sheet. Let it heat for about 10 to 15 minutes. The circulating dry heat is what crisps up that amazing coating again. You’ll have near-fresh savory chicken dinner ideas ready to go!
Frequently Asked Questions About Buttermilk Fried Chicken
I get so many great questions popping into my inbox after folks try this recipe, and honestly, that’s the best part about sharing food! Getting the answers right is what helps everyone achieve that amazing, crispy result we are aiming for. Whether you’re looking for the best homemade fried chicken or just trying to keep it juicy, I’ve got you covered right here.
Can I use chicken breasts instead of bone-in pieces for this fried chicken recipe?
You absolutely can, but you need to be mindful! Chicken breasts are much leaner than thighs or drumsticks. If you use them, they cook much faster, and you run a higher risk of ending up with dry meat, even with that great buttermilk soak. If you switch to breasts, I highly recommend cutting them into smaller, uniform pieces—like cutlets—and reducing the frying time significantly. Keep that thermometer handy because they are done closer to the 10-minute mark!
What oil temperature is best for achieving Golden Brown Chicken?
This is critical for that Golden Brown Chicken look without tasting greasy! You must shoot for between 325°F and 335°F. If your oil is too cool, below 310°F, the crust soaks up the oil like a sponge before it has a chance to set, and you get the dreaded soggy texture. If it’s too hot, say 375°F or above, the outside burns to a dark color in literally two minutes, but the inside is still raw. A reliable thermometer is your best friend for this easy fried chicken dinner!
Is the overnight brine necessary for the best results?
It’s not strictly required, but honestly, I wouldn’t skip it if you can manage it! The buttermilk brine is what ensures your fried chicken is tender all the way to the bone. A four-hour minimum is great, but overnight—or even up to 24 hours—allows the lactic acid in the buttermilk to work its magic, tenderizing the proteins deeply. If you skip the long brine, yes, you’ll still have tasty, crispy fried chicken recipe results, but it won’t hit that next-level moisture mark we are going for.
If you ever experiment with making dips for your next batch, you’ve got to check out my guide for the best homemade guacamole party dip—it’s surprisingly good on the side of savory chicken!
Nutritional Estimates for This Comfort Food Chicken Recipe
Look, when you’re making something as wonderfully rustic and satisfying as fried chicken, you know you aren’t making a light salad, right? But knowing the numbers is still important, even when indulging in pure comfort food! I want to be super clear: these estimates are based on the recipe as written—using skin-on pieces, deep-fried in oil, and yielding four servings. These are good ballpark figures, but remember, the exact fat content can change based on how much oil your crust soaks up!
For a standard serving size of one piece, here is what you can generally expect:
- Calories: Around 450
- Fat (Total): About 28 grams
- Saturated Fat: Roughly 8 grams
- Protein: A great 32 grams—it’s a hearty meal!
- Carbohydrates: Around 15 grams
- Sodium: Roughly 750 mg (That’s the salt in the brine and the dredge talking!)
I always suggest balancing this out with a fresh, vinegar-based coleslaw or some lovely steamed green beans. It just makes the whole comfort food chicken recipe feel a bit more complete. If you’re looking for another hearty meal idea that’s great for leftovers, you simply have to try my beef taco casserole sometime this week!
Share Your Crispy Fried Chicken Creations
Now that you’ve gone through the whole process—from the buttermilk bath to pulling that gloriously fried chicken out—I want to hear about it! Honestly, seeing your results is the high point for me.
Did you manage to get that super thick, craggy crust? Did your oil temperature stay steady the whole time? Whether this was your first time making a proper Crispy Fried Chicken Recipe or you’re a seasoned veteran of Southern cooking, please let me know how it went in the comments below. Your feedback helps me know which tips worked best for you!
If you snapped a photo of your perfectly golden brown chicken resting on the cooling rack, please share it over on social media and tag me! It genuinely makes my day to see my recipes coming to life in your kitchen. Knowing that this recipe is now part of your family’s comfort food rotation means the world.
And hey, when you’re done frying and need something sweet that requires zero deep-frying effort, check out my recipe for the classic chocolate chip cookies—they’re the perfect follow-up treat!
PrintUltra-Crispy Buttermilk Southern Fried Chicken

Make the best homemade fried chicken with this recipe. The buttermilk brine keeps the chicken juicy while the dredge creates an ultra-crispy, golden-brown crust. This is classic comfort food.
- Prep Time: 30 min
- Cook Time: 35 min
- Total Time: 4 hours 35 min
- Yield: 4 servings 1x
- Category: Dinner
- Method: Deep Frying
- Cuisine: American
- Diet: None
Ingredients
- 3 lbs bone-in, skin-on chicken pieces (thighs, drumsticks, breasts)
- 4 cups buttermilk
- 2 tablespoons kosher salt
- 1 tablespoon black pepper
- 1 teaspoon cayenne pepper
- 4 cups all-purpose flour
- 1/2 cup cornstarch
- 2 tablespoons paprika
- 1 tablespoon garlic powder
- 1 tablespoon onion powder
- Vegetable oil or shortening for frying
Instructions
- Place the chicken pieces in a large bowl or resealable bag. Combine the buttermilk, salt, pepper, and cayenne pepper. Pour the mixture over the chicken, ensuring all pieces are submerged. Cover and refrigerate for at least 4 hours, or preferably overnight, for the best results.
- In a wide, shallow dish, whisk together the flour, cornstarch, paprika, garlic powder, and onion powder. This is your dry dredge.
- Remove the chicken from the buttermilk, letting excess drip off, but do not wipe it dry.
- Dredge each piece of chicken thoroughly in the flour mixture, pressing the flour onto the chicken to create a thick, craggy coating. For extra crispiness, dip the floured chicken back into the remaining buttermilk for a quick second dip, then return it to the flour mixture for a second, heavy coating. Set the coated chicken aside on a wire rack for 15 minutes to allow the coating to set.
- Pour enough oil into a deep, heavy-bottomed pot or Dutch oven to reach a depth of about 2 to 3 inches. Heat the oil to 325 degrees Fahrenheit (160 degrees Celsius). Use a thermometer to monitor the temperature closely.
- Carefully place 3 to 4 pieces of chicken into the hot oil, ensuring you do not overcrowd the pot, which lowers the oil temperature.
- Fry the chicken for about 6 to 8 minutes per side, turning occasionally, until it is deep golden brown and cooked through (internal temperature should reach 165 degrees Fahrenheit or 74 degrees Celsius). Adjust the heat as needed to maintain the oil temperature.
- Remove the cooked chicken from the oil and place it on a clean wire rack set over a baking sheet to drain excess oil. Do not place it on paper towels, as this can steam the crust and make it soggy.
- Repeat with the remaining chicken, allowing the oil temperature to return to 325 degrees Fahrenheit between batches. Serve your crispy fried chicken immediately.
Notes
- For the crispiest coating, use a mixture of half vegetable oil and half shortening for frying.
- If you prefer a spicier coating, increase the cayenne pepper in the dredge to 2 teaspoons.
- This recipe works well for chicken thighs and drumsticks; adjust frying time slightly for thicker breast pieces.
Nutrition
- Serving Size: 1 piece
- Calories: 450
- Sugar: 2
- Sodium: 750
- Fat: 28
- Saturated Fat: 8
- Unsaturated Fat: 20
- Trans Fat: 0
- Carbohydrates: 15
- Fiber: 1
- Protein: 32
- Cholesterol: 110