
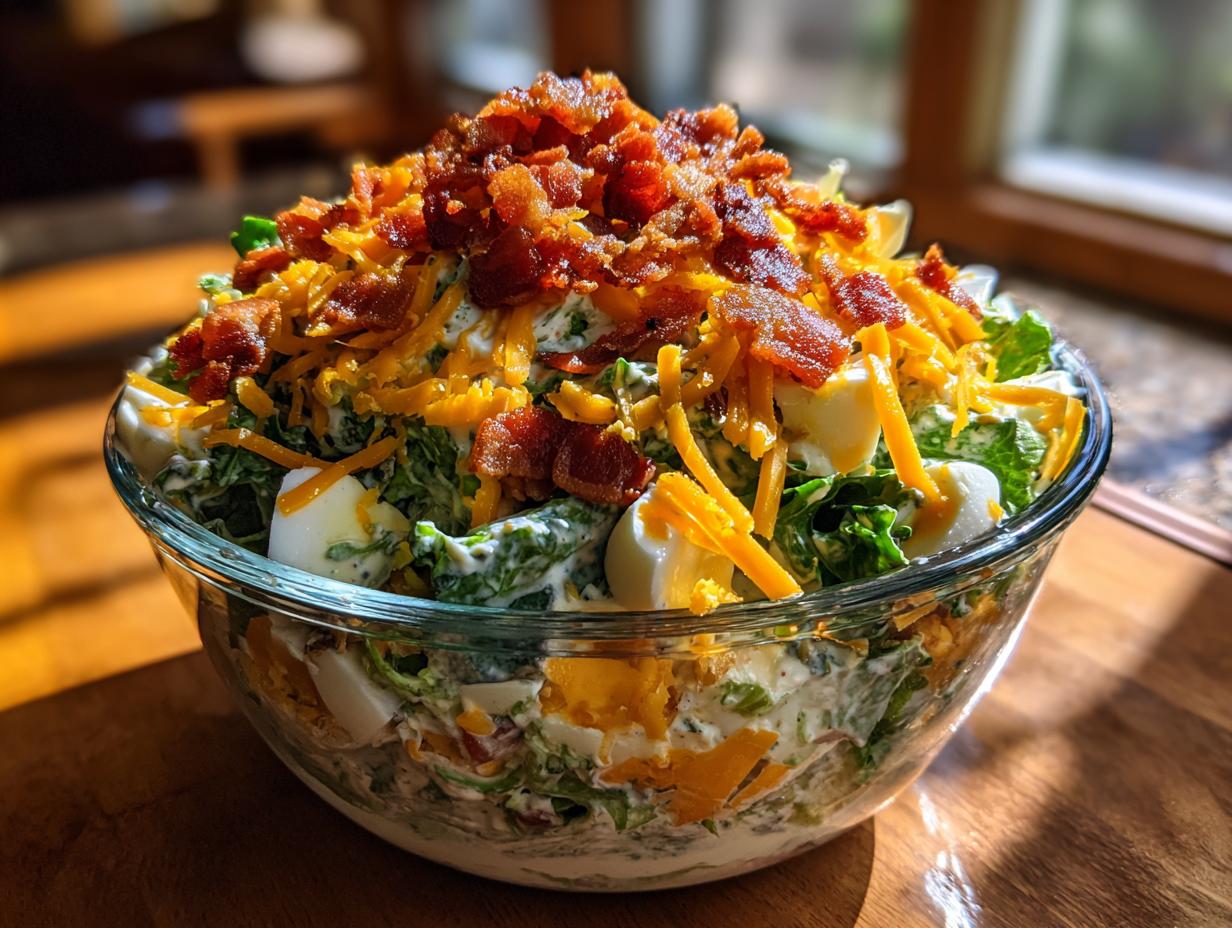
You know those dishes that just scream ‘gathering’? The ones that appear on the table for every major holiday, every summer barbecue, and every time you need to bring something to a party that you *know* everyone will devour? For me, that’s the **7 layer salad**. Thinking about it takes me right back to my grandmother’s house in Chicago; she understood that food should be sturdy, beautiful, and comforting all at once.
This isn’t some fussy, modern creation. This is the true, classic layered salad that does all the heavy lifting for you. The best part? It’s designed to be made ahead! We layer everything up—the crisp veggies, the sharp cheddar, the creamy dressing sealing it all in—and let it chill. It means when the big day comes, all you have to do is top it with that salty, crunchy bacon right before serving. Trust me, this easy-to-assemble version is the one you’ll want on your recipe rotation all year long.
- Why This Classic 7 Layer Salad is a Potluck Favorite
- Ingredients for the Ultimate 7 Layer Salad
- How to Prepare Your 7 Layer Salad Step-by-Step
- Tips for Success with Your Classic Layered Salad
- Ingredient Notes and Substitutions for Your 7 Layer Salad
- Make-Ahead Picnic Food and Storage for the 7 Layer Salad
- Serving Suggestions for this Crowd Pleasing Layered Salad
- Frequently Asked Questions About the 7 Layer Salad
- Sharing Your Experience Making This Seven Layer Vegetable Salad
Why This Classic 7 Layer Salad is a Potluck Favorite
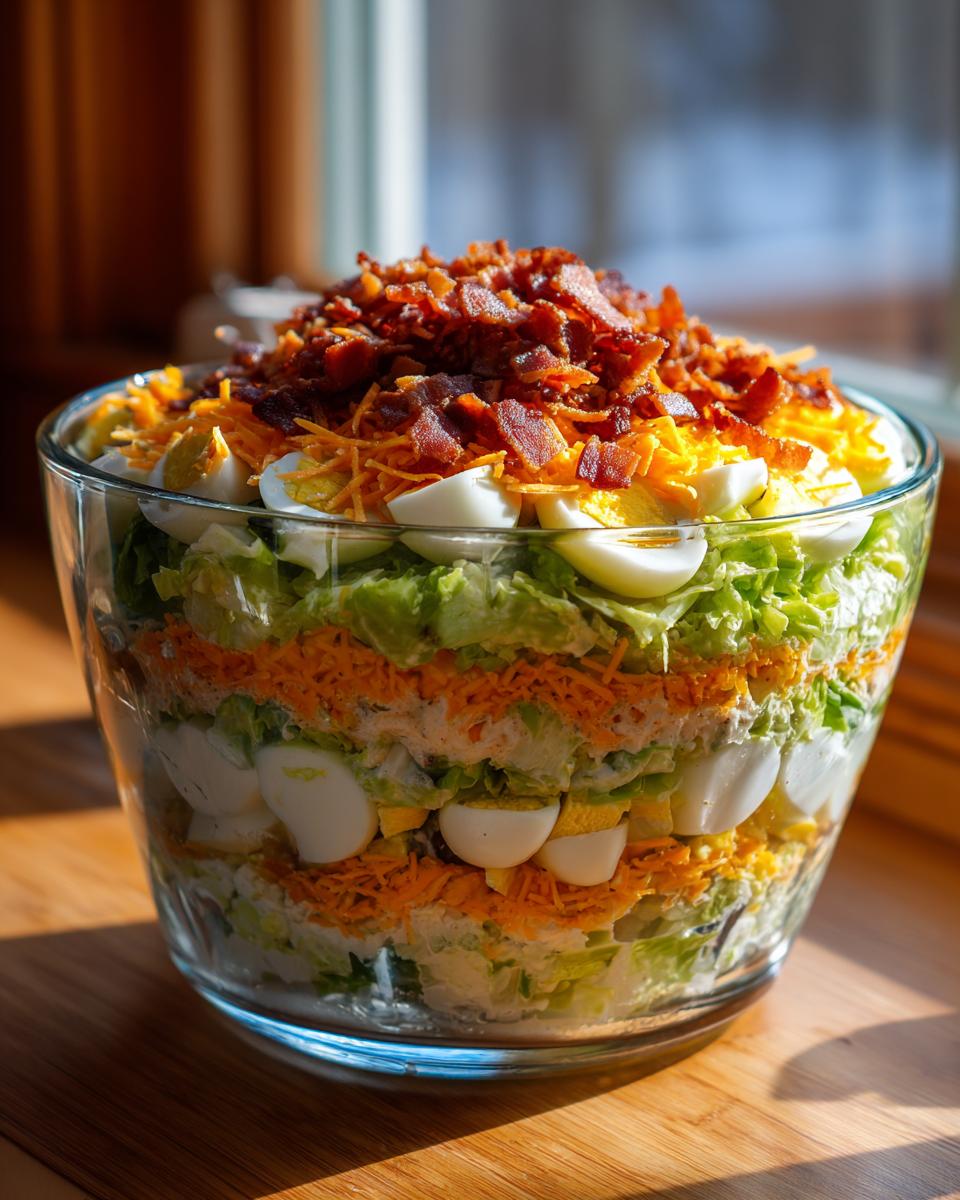
Honestly, if I could only bring one side dish to a party for the rest of my life, it would be this one. It just brings smiles! It looks impressive when you pull that clear glass bowl out of the fridge, but the real secret is how simple it is. You’re basically just stacking things, which is my favorite kind of kitchen magic.
It’s the ultimate crowd pleasing layered salad because it offers everyone something they love—crisp, creamy, salty, and sharp all in one bite. Plus, it completely earns its title as the best make ahead side dish.
- It keeps beautifully overnight, making holiday mornings stress-free.
- The visual appeal is undeniable; who doesn’t love seeing those distinct layers?
- It’s hardy! It holds up well sitting out on a buffet table far longer than a tossed salad would.
Simple Assembly for the Perfect 7 Layer Salad
Forget whisking dozens of ingredients together—that doesn’t happen here! The beauty of the 7 layer salad is that each ingredient gets its moment to shine in its own layer. You just follow the order, and a stunning, vibrant salad appears. That clear structure is exactly what makes this retro salad recipe so iconic. It’s straightforward assembly, not complicated cooking!
Ingredients for the Ultimate 7 Layer Salad
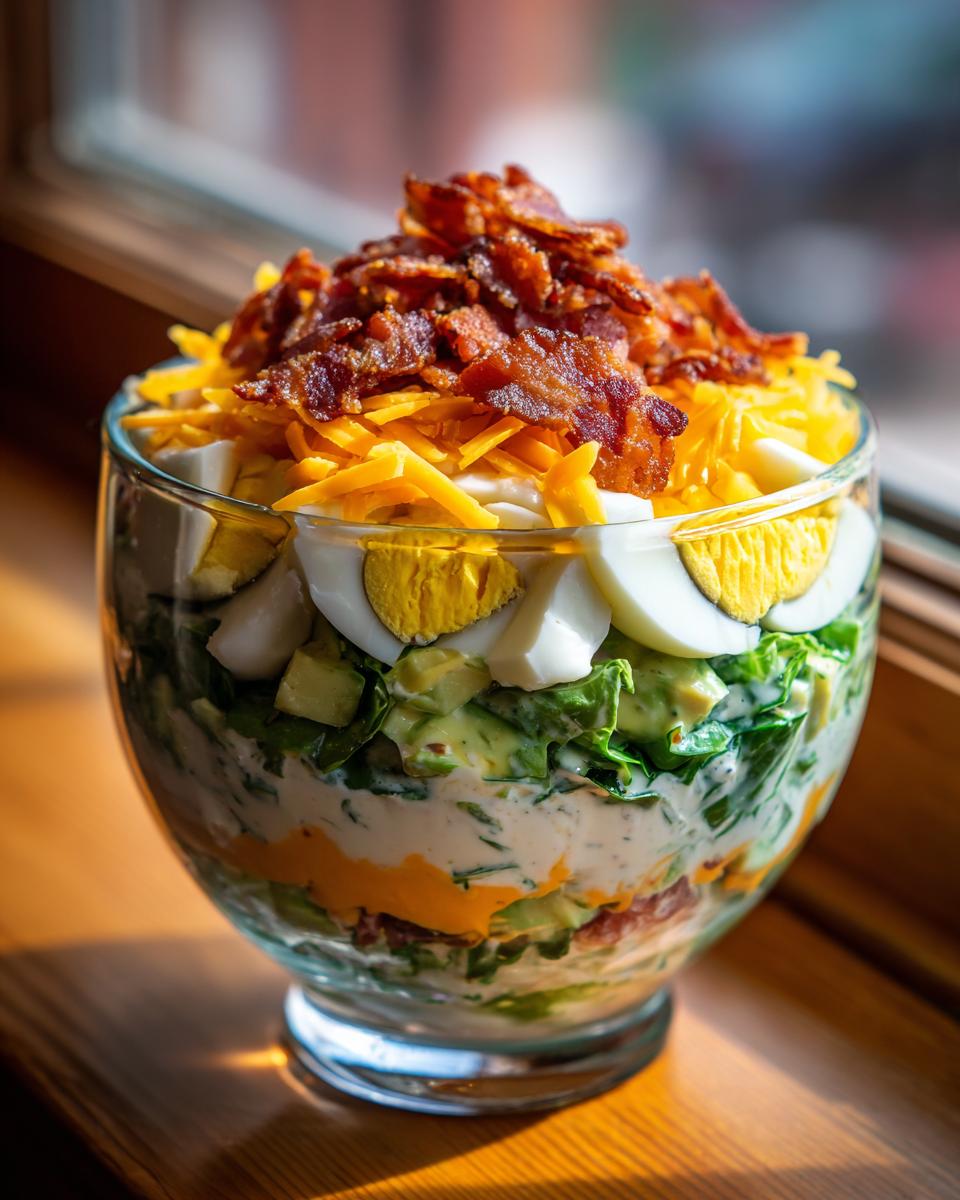
When you look at this ingredient list, you’re going to see exactly why this 7 layer salad is so satisfying. It hits every craving! We have crunchy green things, creamy elements, sharp cheese, and that salty bacon finish. I’ve separated the salad components from the dressing ingredients below, but remember, you need both parts for this magic trick to work.
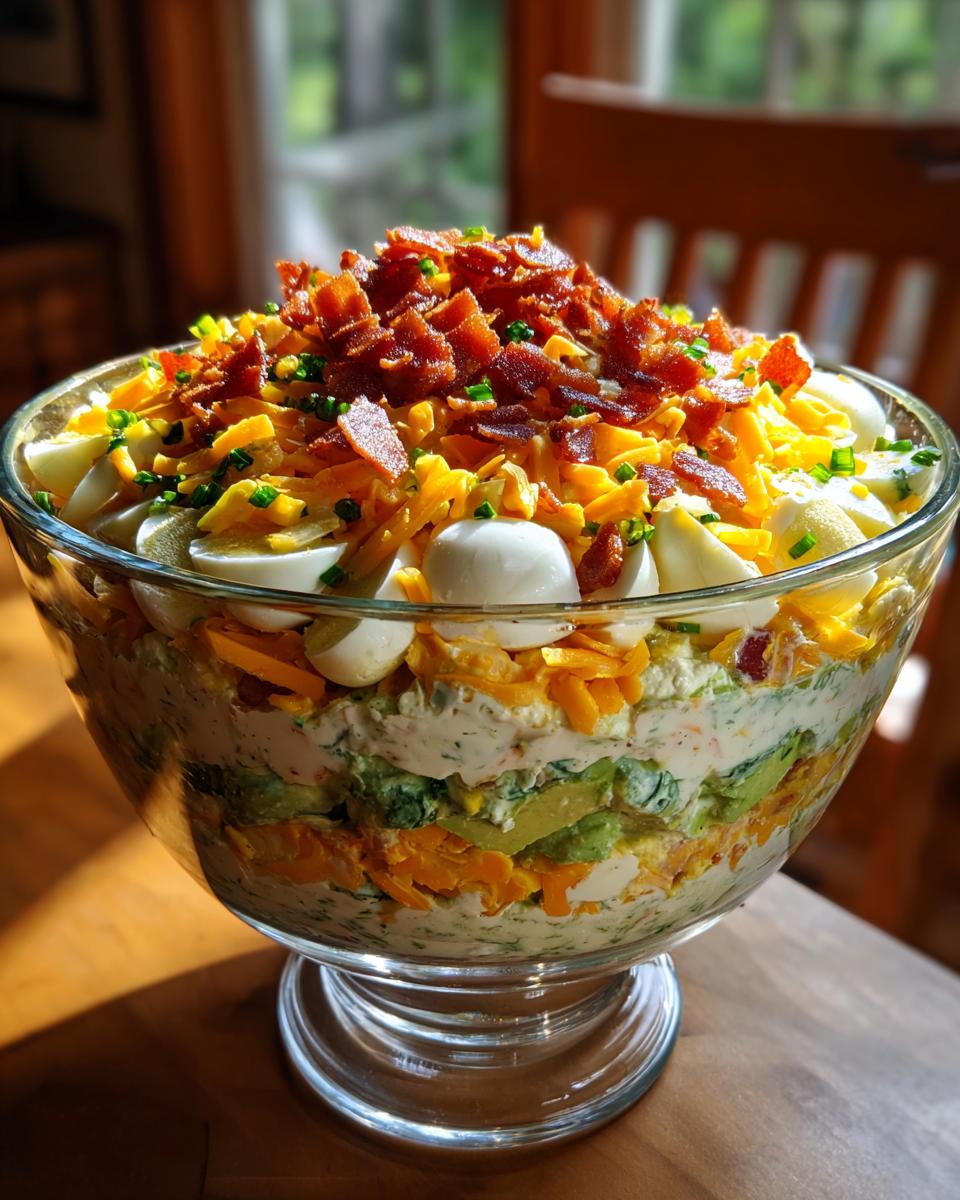
Make sure you have a large, clear glass bowl ready—this is essential so everyone at the party can admire your beautiful work! A beautiful trifle dish works perfectly, too.
- 1 head iceberg lettuce, chopped
- 1 cup frozen peas, thawed
- 1 cup chopped celery
- 1 small red onion, thinly sliced
- 4 hard-boiled eggs, sliced
- 1 cup shredded sharp cheddar cheese
- 8 slices bacon, cooked until crisp and then crumbled (Don’t skip the crisping step!)
For the Creamy Dressing Salad Base
This dressing is what binds the whole dish together and keeps the veggies happy in the fridge overnight. It has a slight tang that cuts through the richness of the cheese and bacon. Whisk everything until it’s completely smooth—that’s the expert tip here—no lumps allowed!
- 1 cup mayonnaise
- 2 tablespoons white vinegar
- 1 tablespoon granulated sugar
- 1 teaspoon salt
- 1/2 teaspoon black pepper
How to Prepare Your 7 Layer Salad Step-by-Step
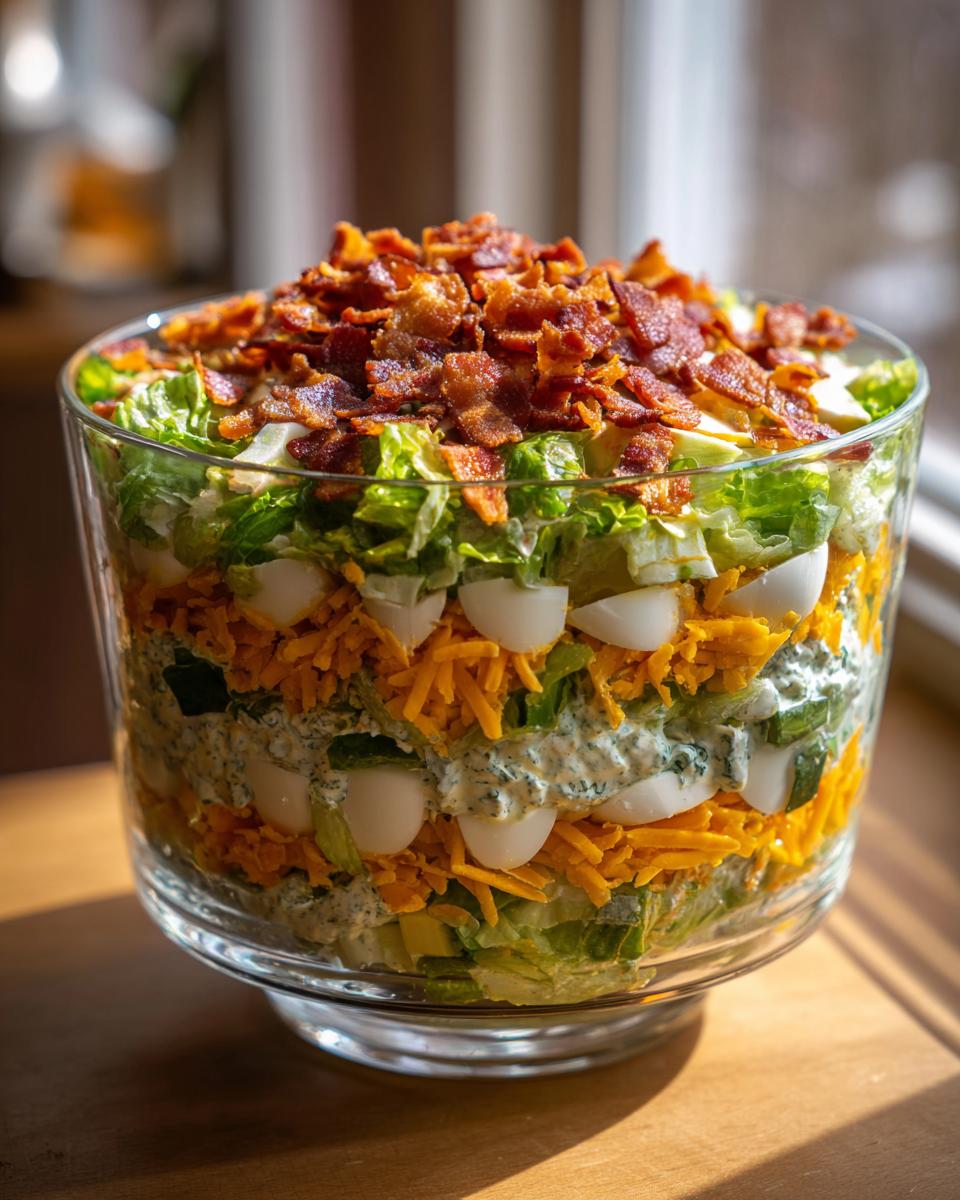
Okay, now for the fun part—building this tower of goodness! I need you to grab that beautiful, clear glass bowl we talked about. We need to see those layers pop! Following the right order is key because you want the dressing to seal in the freshness below it.
First things first, get that creamy dressing salad base whisked up until it’s silky smooth. Set it aside. Now we start stacking our 7 layer salad. Remember, we are using half of our ingredients for the first set of layers!
Assembling the Layers of the Vegetable Layered Salad
- Start with half of your chopped lettuce right on the bottom. Press it down just gently—we want compactness, not mush!
- Next goes half of those thawed peas, spread out evenly.
- Follow that with half of your chopped celery.
- Then, sprinkle on half of your thinly sliced red onion.
- Arrange half of your sliced hard-boiled eggs neatly on top.
- Sprinkle half of the shredded sharp cheddar cheese over the eggs.
- Finally, spread half of that creamy dressing over the cheese. This forms the first seal!
Now, you just repeat that entire sequence! Lettuce, peas, celery, onion, eggs, cheese once more. Top it all off with the remaining dressing. You’re building a fortress of flavor here!
Chilling and Finishing the 7 Layer Salad
This is the absolute most important timing instruction, so listen up! Once the salad is completely layered and covered with that final dressing layer, you must chill it. I mean it—a minimum of four hours, but honestly, overnight is when this seven layer vegetable salad really sings. The flavors have time to marry properly.
Here’s the crucial part for the best texture: Do not add the bacon yet! Keep the crumbled bacon separate in a little container in the fridge. When you are about 15 minutes away from serving—whether it’s going to a potluck or sitting down for dinner—then, and only then, sprinkle that salty, crispy bacon generously over the top. That way, it stays crunchy!
Tips for Success with Your Classic Layered Salad
Look, I’m all about making things easy, but there are a few little secrets I picked up watching my aunts assemble this thing that make the difference between good and *amazing*. We want this to still look perfect three hours into the party, right?
The number one thing for any salad with bacon and cheese twist is texture. You need those peas fully thawed—if they’re still icy, they’ll leak water into your beautiful layers as they thaw on the buffet! Also, dry your lettuce! I know it sounds tedious, but give that chopped iceberg a good spin in the salad spinner or just let it drain in a colander for thirty minutes while you prep everything else. Excess water is the enemy of a well-structured salad.
When you start layering, especially that very first layer of lettuce, use the back of a spoon or your hand to press it down—just lightly! You’re creating a stable base for the layers above it. If you skip that, the whole thing can get a little wonky when people dig in later.
And I can’t stress this enough: keep that bacon separate! That smoky, salty crunch is the final flourish. Adding it too early means you’ll have soggy, chewable bacon bits instead of that satisfying crispness. We’re aiming for perfection here, even in a super simple easy party salad!
Ingredient Notes and Substitutions for Your 7 Layer Salad
One of the reasons this 7 layer salad has lasted so long is because it’s adaptable! It’s sturdy enough to handle a few tweaks without falling apart, which is what we need when we’re planning huge holiday meals. My philosophy is always: if you don’t have an ingredient, figure out what it’s providing and swap it out!
When we look at the dressing, that tablespoon of sugar is really there to balance the vinegar’s sharpness and give the mayonnaise a little backbone. If you’re looking for a keto option, this is where you make a swift change. You can easily swap that granulated sugar for a half teaspoon of powdered stevia or monk fruit sweetener. It gives you the sweetness balance without the carbs. Just taste as you go, because sweeteners are powerful!
Now, let’s talk cheese. The recipe calls for sharp cheddar, and for good reason—it brings a necessary bite against the dressing, making it a wonderful salad with bacon and cheese star. If cheddar isn’t your favorite, no problem! You can use Gruyère for a nuttier flavor, or even Pepper Jack if you want a subtle kick. Some folks substitute Swiss cheese, and it works beautifully because it melts nicely under the dressing when it chills.
What about the vegetables? You *must* use iceberg lettuce if you want that classic crunch, but if you’re aiming for something a bit greener, a mix of romaine and iceberg is often a good compromise. And if you happen to hate celery? Finely chopped bell pepper (green or yellow) can step in for texture, though you lose a little bit of that signature celery flavor.
Make-Ahead Picnic Food and Storage for the 7 Layer Salad
This is where the 7 layer salad truly shines, my friends! If you’re planning a big holiday spread or packing up for a summer picnic, you need food that doesn’t stress you out on the day of the event. That’s why this recipe is brilliant as a true make ahead picnic food option.
You have two main paths here, and they both work wonderfully for **potluck friendly sides**:
- Option 1: Full Assembly (Recommended for Overnight): If you assemble everything—lettuce, peas, celery, onion, eggs, cheese, and the final dressing layer—and keep it tightly covered in the fridge, it’s fantastic for up to 24 hours. The dressing slowly seeps down and slightly “pickles” those bottom layers of lettuce, which actually keeps them crisp longer because the dressing acts as a barrier from the air! Just remember that bacon comes last!
- Option 2: Separated Layers (For Maximum Crunch): If you are doing major food prep two days out, you can layer all the dry ingredients—lettuce, peas, celery, onion, eggs, cheese—and keep them chilled. Keep the dressing separate in an airtight jar. Wait until about 6 to 8 hours before serving to pour the dressing over, then chill again. This guarantees that near-perfect, just-made crunch.
A major thing to remember for this recipe, and for all great make ahead side dishes: Never, ever try to reheat this salad! It’s meant to be served cold—ice cold, in fact. Just pull it straight from the fridge, add that bacon, and watch it disappear. That chilling time isn’t just about convenience; it’s necessary for the dressing to set up properly so you can cut those beautiful wedges.
Serving Suggestions for this Crowd Pleasing Layered Salad
When you bring out that stunning **7 layer salad**, you need something fantastic to serve it alongside, right? Because this salad is so rich, creamy, and loaded with flavor—especially that bacon and cheese combination—it pairs best with simpler main dishes. You don’t want to fight the salad; you want it to shine as the star side dish!
For those big summer gatherings or backyard barbecues, this salad is the cool counterpart to anything hot off the grill. Think about serving thick, juicy hamburgers, pulled pork sandwiches, or maybe even some grilled chicken breasts if you’re keeping the mains lighter. The cold, crisp texture is so refreshing next to something smoky.
Don’t forget about the holidays, either! This is one of my favorite holiday side dishes because it takes up fridge space but frees up oven space—a huge win on Thanksgiving or Christmas. Layer it up the day before, and serve it alongside ham or turkey. It offers that fresh vegetable component without being a standard green salad!
Presentation really sells this dish. Since it’s such a showstopper in a glass bowl, when I take this **easy party salad** somewhere, I always make sure the bacon is scattered right up to the very edge of the dressing layer. You want people to see that salty crunch from across the room! It looks incredible sitting next to a big platter of sandwiches or even beside a simple pasta salad for a true potluck spread.
Frequently Asked Questions About the 7 Layer Salad
I get so many questions whenever I bring this salad out—it’s clearly a favorite! Since this is a classic, people always want reassurance that they are doing it right. I’ve gathered up the most common things people ask me about this amazing easy party salad. Hopefully, this helps you nail your bake-ahead routine!
Can I skip the eggs in this retro salad recipe?
You absolutely can skip the eggs if you need to, though I love the richness they add! Eggs are part of that traditional, comforting flavor profile that makes this a great retro salad recipe, but they aren’t structural, so they won’t ruin the salad if left out. If you leave them out, you might consider adding a bit more of the shredded cheddar cheese or spreading that creamy dressing layer a tiny bit thicker in that section, just to keep the layers feeling substantial.
What is the best way to prevent the lettuce from getting soggy in the 7 layer salad?
This is the question I hear most often regarding the base of the vegetable layered salad. Preventing sogginess comes down to sealing the deal! Iceberg lettuce holds up better than most greens, but you need to ensure your dressing layer acts like a waterproof blanket. After you place your final dressing layer over the cheese, use an offset spatula or the back of a spoon and gently smooth the dressing across the surface right to the edges of the bowl.
That final, smooth layer of dressing seals out the air, which keeps humidity from drying out the lettuce but also stops the lettuce underneath from releasing too much moisture into the upper layers that don’t have dressing contact. Think of that top dressing layer as the lid to a treasure chest!
How long can I make this ahead of time?
For the very best results and flavor marrying, I aim for 8 to 12 hours of chilling time. That gives the small amount of vinegar in the dressing time to tenderize the vegetables nicely. You can push it to 24 hours, which is fantastic for planning, but after that, the quality starts to drop slightly, even though it’s still totally safe to eat. Remember, the crunchiest part—the bacon—must wait until the last possible second!
Is the sweet dressing really necessary for the 7 layer salad?
Yes, the sweetness is vital! If you just mixed mayonnaise, salt, and pepper, it would taste heavy and one-note. That teaspoon of sugar is what balances the acidity of the white vinegar. It turns a heavy mayonnaise glaze into a light, tangy dressing that cuts through the saltiness of the bacon and the sharpness of the cheddar. Trust me on this one; even if you skip the sugar in other recipes, don’t skip it here!
Sharing Your Experience Making This Seven Layer Vegetable Salad
That’s it! You’ve officially made the best, most reliable, make-ahead 7 layer salad out there. Doesn’t that feel good? Creating something that looks so stunning and tastes like pure comfort is exactly what food is supposed to be about—nourishing connection. This recipe is one of my foundational pieces here at Chefsily because it’s so accessible, and it always sparks joy at the table.
I really, really want to hear about it! Once you’ve taken that first beautiful, towering slice out of the glass bowl, come back here and let me know how it went. Did you stick exactly to the classic layers, or did you sneak in a little twist of your own?
Tell me in the comments below: What was your favorite layer to build? Was it the crisp peas, the salty bacon topping, or did you love seeing that creamy dressing seal everything up?
If you snapped a photo of your finished **seven layer vegetable salad**, please share it! Tag me on social media or send it through the contact page—I absolutely love seeing my recipes come to life in your homes. Creating these dishes together, even from afar, is what this whole culinary journey is about. Happy eating!
PrintClassic 7 Layer Salad: Easy Make-Ahead Side Dish

Make the ultimate classic 7 layer salad for any gathering. This recipe features fresh ingredients and distinct layers for an easy, crowd-pleasing side dish perfect for potlucks and holidays.
- Prep Time: 25 min
- Cook Time: 10 min
- Total Time: 35 min
- Yield: 8 servings 1x
- Category: Side Dish
- Method: Layering
- Cuisine: American
- Diet: Vegetarian
Ingredients
- 1 head iceberg lettuce, chopped
- 1 cup frozen peas, thawed
- 1 cup chopped celery
- 1 small red onion, thinly sliced
- 4 hard-boiled eggs, sliced
- 1 cup shredded sharp cheddar cheese
- 8 slices bacon, cooked and crumbled
- 1 cup mayonnaise
- 2 tablespoons white vinegar
- 1 tablespoon granulated sugar
- 1 teaspoon salt
- 1/2 teaspoon black pepper
Instructions
- Prepare the dressing: In a small bowl, whisk together the mayonnaise, white vinegar, sugar, salt, and pepper until smooth. Set aside.
- Prepare the vegetables: Wash and chop the lettuce. Thaw the frozen peas. Chop the celery and slice the red onion thinly. Cook the bacon until crisp, then crumble it. Slice the hard-boiled eggs.
- Assemble the layers in a large, clear glass bowl or trifle dish to show the distinct layers. The order is important for presentation and flavor separation.
- Layer 1: Place half of the chopped lettuce in the bottom of the bowl and press down lightly.
- Layer 2: Add half of the thawed peas evenly over the lettuce.
- Layer 3: Add half of the chopped celery.
- Layer 4: Add half of the sliced red onion.
- Layer 5: Arrange half of the sliced hard-boiled eggs over the vegetables.
- Layer 6: Sprinkle half of the shredded cheddar cheese over the eggs.
- Layer 7: Spread half of the prepared creamy dressing evenly over the cheese layer, sealing the vegetables underneath.
- Repeat the layers: Add the remaining lettuce, peas, celery, red onion, eggs, and cheese.
- Final Layer: Spread the remaining dressing over the top layer of cheese.
- Chill: Cover the bowl tightly with plastic wrap. Refrigerate for at least 4 hours, or preferably overnight, to allow the flavors to meld and the dressing to set. Do not add the bacon until just before serving.
- Serve: Sprinkle the crumbled bacon over the top layer immediately before you take the 7 layer salad to your potluck or table. Cut into wedges and serve cold.
Notes
- You can prepare all the layers, except the bacon, up to 24 hours ahead of time. Keep it tightly covered in the refrigerator.
- For a slightly sweeter dressing, increase the sugar to 1.5 tablespoons.
- If you are making this for a smaller group, you can reduce the recipe by half, but use the same size bowl for better layering visibility.
- This classic layered salad works well as a make ahead side dish for summer picnics or holiday meals.
Nutrition
- Serving Size: 1 serving
- Calories: 320
- Sugar: 5
- Sodium: 450
- Fat: 28
- Saturated Fat: 10
- Unsaturated Fat: 18
- Trans Fat: 0
- Carbohydrates: 10
- Fiber: 3
- Protein: 11
- Cholesterol: 95