
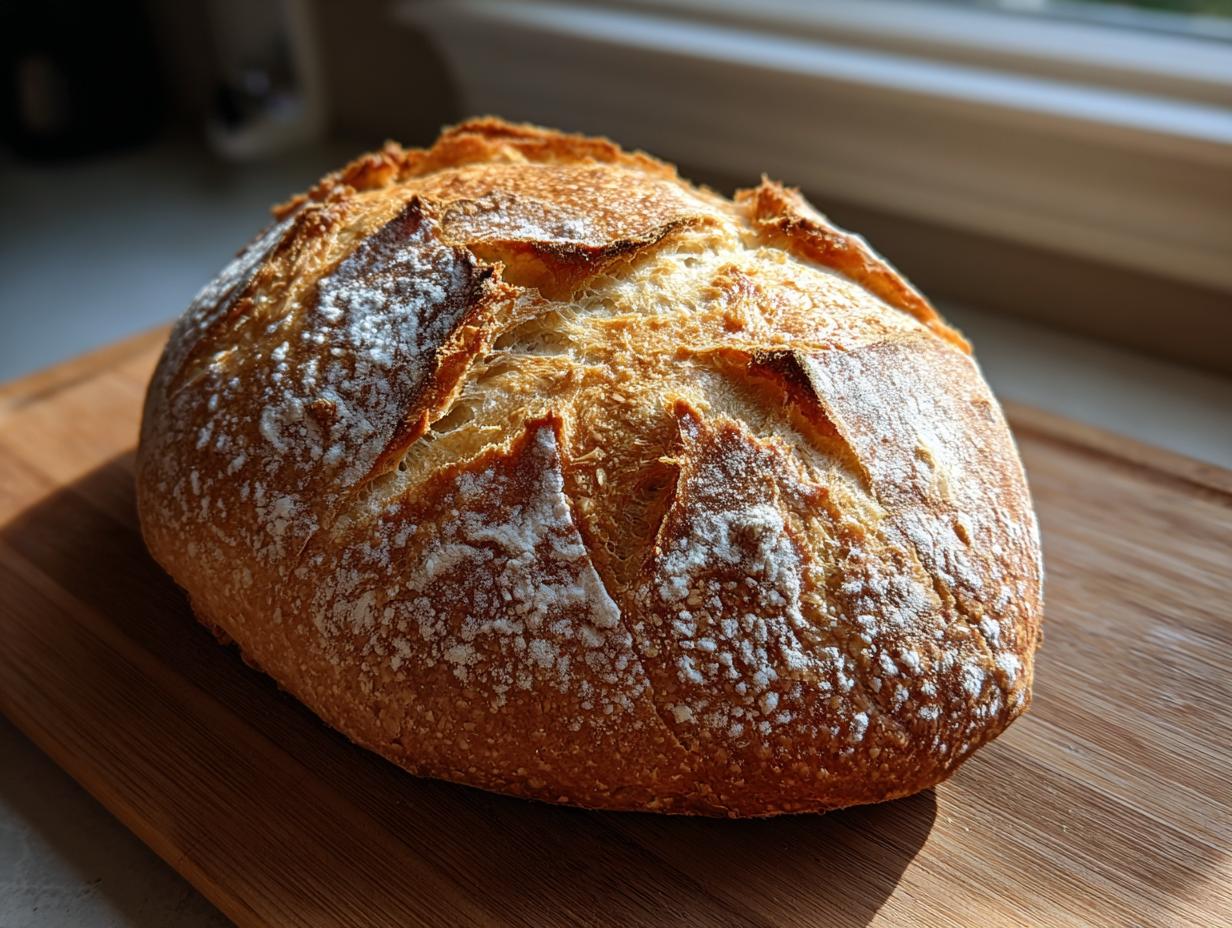
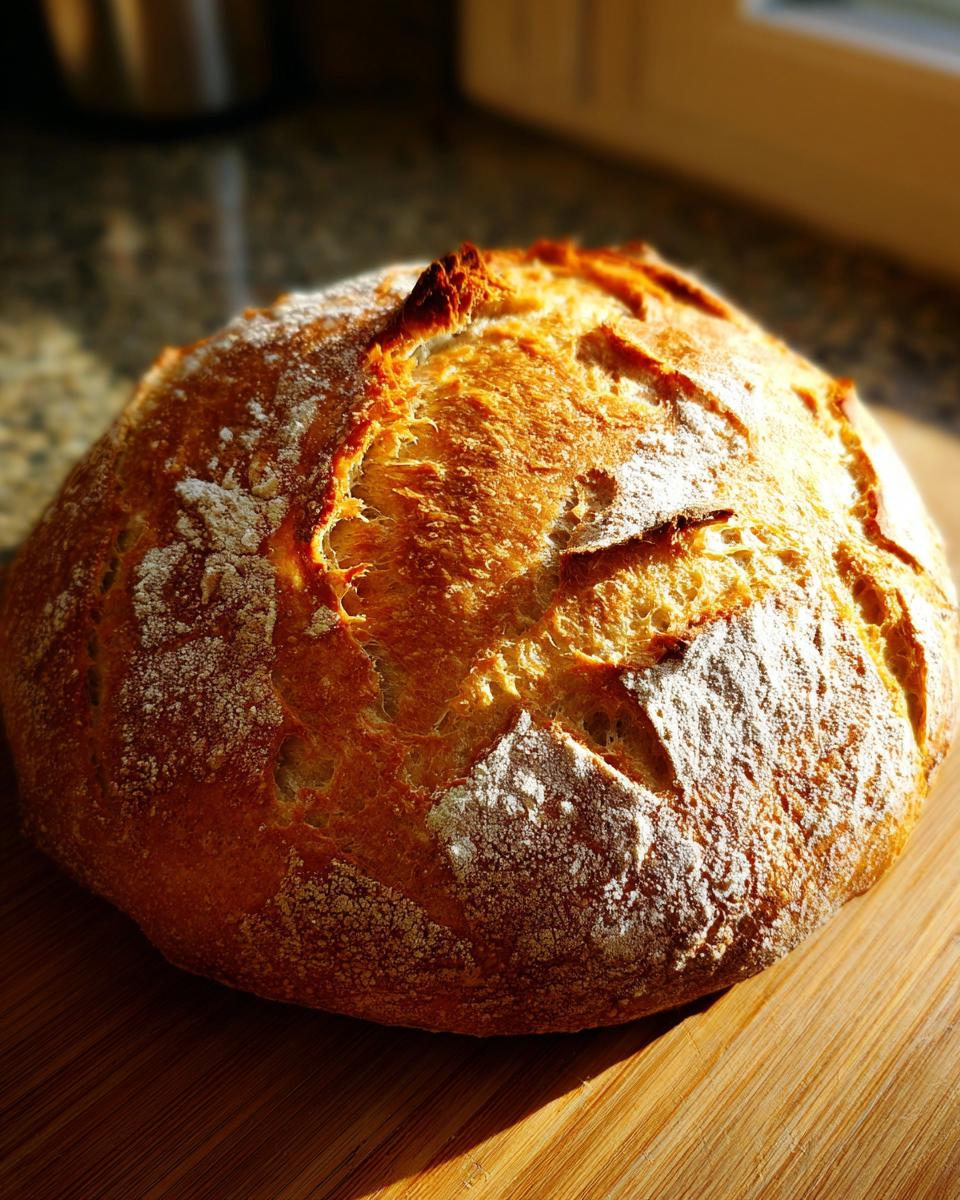
Oh, nothing beats that moment when you pull something truly golden-brown from the oven, right? That warm, yeasty aroma that instantly means “home” – that’s what this Easy Crusty Homemade Italian Bread delivers every single time! I know bread-baking can seem intimidating, but trust me, having grown up watching my Nonna create magic with flour and water, I promise you this is the most reliable italian bread recipe. It delivers that coveted bakery-style crust and a wonderfully soft, chewy interior without any fuss. As a simple rule here at Chefsily, we want results you can count on, and this loaf is truly foolproof for beginner bread making. You can serve it alongside a luscious garlic aioli or dip it in olive oil after checking out tips like those found here for that perfect crust!
- Why This Homemade Italian Bread Recipe Works for Everyone
- Gathering Ingredients for Your Italian Bread
- How to Prepare Your Homemade Italian Bread Recipe
- Tips for Success When Baking Italian Bread
- Serving Suggestions for Your Fresh Baked Bread Aromas
- Storing and Reheating Your Crusty Italian Bread
- Frequently Asked Questions About This Quick Italian Bread Tutorial
- Nutritional Estimates for Classic Italian Baking
- Share Your Crusty Italian Bread Creations
Why This Homemade Italian Bread Recipe Works for Everyone
I hear from so many people who think making bread means hours of strenuous work. Not true! With this recipe, we’re aiming squarely at making sure you walk away feeling like a total pro, even if this is your very first time dealing with yeast. It’s truly built for Beginner Bread Making.
- It requires minimal fuss—no fancy stand mixer needed, just a good old wooden spoon and some elbow grease for kneading!
- The structure is forgiving, meaning you get that beautiful, open crumb texture consistency we love.
- It comes together fast enough for a weeknight dinner side, which is something I always prioritize.
Achieving the Bakery Style Italian Loaf Crust
The crackle you hear when you slice into a fresh loaf? That comes entirely from steam in the oven, which we handle easily later on. It’s the trick to getting that deep, gorgeous color without drying out the inside. This single step elevates this simple dough into something truly special.
Simple Ingredients for Classic Italian Bread
You won’t need to chase down any specialty flours or tricky activators for this loaf. We stick to essentials! Everything you need for authentic italian bread is likely already sitting in your pantry right now. If you want to know more about making your baking easier, check out my tips on honey barbecue sauce—sometimes the easy recipes are the most rewarding, just like this one found over here!
Gathering Ingredients for Your Italian Bread
Okay, before we dive into the fun stuff—the kneading and the smelling the kitchen up beautifully—we need to get organized! Remember how I said this recipe is simple? It really is. You only need six core things, and I’ve listed them out below with exactly what you’re aiming for on each one. Precision here really sets us up for that perfect rise and gorgeous final loaf. I always recommend having a digital thermometer for that water—it makes all the difference!
If you’re looking for other ways to use flour beyond this amazing loaf, you should check out my garlic naan bread recipe later on. But for now, let’s focus on the essentials for this classic.
- All-Purpose Flour: You’ll need 3 1/2 cups. This is the backbone, so use what you normally bake with.
- Salt: 1 1/2 teaspoons. Don’t skip this, it controls the yeast and brings out the flavor!
- Granulated Sugar: Just 1 teaspoon. This is just a tiny snack for our yeast buddies to wake up.
- Active Dry Yeast: 2 1/4 teaspoons, which is usually one full packet. Make sure your yeast isn’t ancient, please!
- Warm Water: 1 1/2 cups. This is critical—it has to be between 105–115°F. Too cold, and the yeast sleeps; too hot, and you kill it dead.
- Olive Oil: We need 2 tablespoons for the dough itself, plus a little extra just to grease the bowl later so our dough doesn’t stick.
How to Prepare Your Homemade Italian Bread Recipe
This is where the real baking magic starts! Don’t feel rushed, though; bread loves patience. We are going to follow these steps exactly so we can nail that Easy Crusty Bread Baking texture you’re dreaming about. It’s all about timing and feel, and once you do this once, you’ll see how easy it really is to make truly wonderful bread. If you want to see how other bakers nail the soft inside/crusty outside result, check out this amazing guide right here.
Activating Yeast and Mixing the Italian Bread Dough
First things first: wake up that yeast! Take your warm water and the teaspoon of sugar and mix them together in your big bowl. Now, sprinkle that packet of yeast right on top. We need to let this sit undisturbed for about 5 to 10 minutes. If you come back and it’s foamy and bubbly on the surface, high five! That means your yeast is alive and ready to work. Once it’s foamy, toss in the salt, the olive oil, and all that flour. Stir it all up with a sturdy wooden spoon until you can’t stir anymore and you have what bakers call a ‘shaggy dough’—it’ll look messy and a little clumpy, and that’s perfect.
Kneading and the First Rise for Chewy Italian Loaf
Dump that shaggy dough right out onto a lightly floured counter. Now, get ready to work those arms! You need to knead this dough for a good 8 to 10 minutes straight. You’re looking for it to transform—it goes from sticky and rough to smooth, soft, and really elastic. When you poke it gently, it should spring back slowly. Once it’s smooth, grab another bowl, rub a little olive oil around the bottom, and place your dough ball inside, turning it once to coat. Cover it with some plastic wrap, and let it hang out in a warm spot for about an hour to an hour and a half until it has doubled way up in size. That’s the first rise!
Shaping and Final Proofing for Golden Brown Crust Bread
Gently punch the air out of your risen dough—it’s satisfying! Now, shape it carefully into a tight little loaf, either oval or round, whatever feels best for your baking sheet. Place it on parchment paper or into a greased loaf pan. Cover it loosely again and let it puff up for a second rise, maybe 30 to 45 minutes. Just before that second rise finishes, get your oven screaming hot to 400°F. And here is the secret for that amazing, crackly crust on your italian bread: put a shallow pan of water on the bottom rack while it heats up! That water creates steam, which keeps the outside soft just long enough to expand before hardening into that perfect golden shell.
Baking and Cooling the Artisan Bread at Home
When that dough looks puffy, you can brush the top lightly with water for color—I skip the egg wash sometimes just to keep the crust purely rustic. Take a very sharp knife and score the top with two or three shallow diagonal slashes; this helps control how the bread expands. Bake it for 30 to 35 minutes. You know it’s done when the crust is deep golden brown, but the ultimate confirmation is checking the temperature inside—aim for 200°F if you have a thermometer. Once it’s out, straight onto a wire rack! You absolutely must let it cool completely before slicing. If you cut into it hot, all that steam trapped inside escapes, and you lose that glorious melt-in-your-mouth texture we worked so hard for. If you want more ideas on easy meals to serve this with, feel free to look through my easy weeknight dinners collection!
Tips for Success When Baking Italian Bread
If you follow the recipe straight up, you’re going to get gorgeous Soft Inside Crusty Outside Bread, promise! But baking is all about preference, so let’s talk about how you can tweak that crust just for your family. The beautiful thing about this starter Homemade Italian Bread Recipe is that it adapts easily to what you like best on your table.
Controlling Crust Texture on Your Italian Bread
Remember that pan of hot water we put in the oven? That’s your secret weapon for that hard, crackly, bakery-style shell. If you are making this loaf specifically for sandwiches—maybe you like a softer crust that won’t tear up the roof of your mouth—you can skip the steam pan entirely during baking. This will give you a slightly softer exterior, which is just as delicious! Conversely, if you want that extra crunch for dipping into zucchini fritters later, you can even put a preheated baking stone or an inverted baking sheet beneath your loaf before it goes in. For more advanced tips on getting that perfect exterior, you should look at the detailed advice found here!
Serving Suggestions for Your Fresh Baked Bread Aromas
Once that beautiful loaf of italian bread cools down just enough—and trust me, waiting is the hardest part!—it’s time to eat! This bread sings when it accompanies a hearty meal. Forget those sad, squishy store-bought slices; this loaf is perfect for soaking up every last drop of sauce from your bruschetta chicken or even dipping into rich sauces you might have leftover from dumplings!
It shines when simply drizzled with good olive oil and a sprinkle of flaky salt, making it the ideal centerpiece for any dinner table. Or, if you’re feeling ambitious, toast a few thick slices and pile them high!
Storing and Reheating Your Crusty Italian Bread
So, the bread is eaten, and you have half a loaf left—what now? You really want to keep that crusty exterior crisp, but bread hates plastic wrap! If you try to store it airtight, that lovely moisture steams the crust right into submission, making it chewy and sad by morning. For up to two days, the absolute best thing you can do is wrap it loosely in a clean, heavy cotton kitchen towel.
Keep that wrapped loaf sitting cut-side down on a wooden cutting board. The wood breathes, and the towel keeps it protected from drying out too fast while letting that surface moisture escape. Don’t put it in the fridge, please! Cold air just makes stale bread feel even worse. If you’re planning on canning your homemade salsa later, save the fridge space for that!
How to Bring Back That Perfect Crust
If day two arrives and your crust has gone soft? No panic! If you want it truly golden brown and crackly again, the oven is your only friend. Wrap the loaf back up loosely in foil first, but leave a tiny gap open for steam to escape. Pop it into a 350°F oven for about 5 to 8 minutes. This steams the interior back to life but allows the exterior heat to dry out and crisp up again. It sounds like a trick, but it works wonders for reviving your crusty Italian bread!
Frequently Asked Questions About This Quick Italian Bread Tutorial
It’s natural to have questions when you’re diving into a new bread recipe, especially since we aimed for something quick! Don’t worry, these are the exact things I worried about when I first translated Nonna’s methods for modern kitchens. Let’s knock out a few common concerns so you can feel totally confident tackling this Quick Italian Bread Tutorial.
Can I make this Italian bread dough ahead of time?
While this recipe is designed to be fast, absolutely! If you want to bake super fresh bread in the morning, mix the dough (Steps 1 through 4), but instead of letting it rise on the counter, tuck the oiled bowl into the fridge overnight. When you wake up, give it a quick fold and let it proof at room temperature for an hour before baking. It’s a great way to fit Artisan Bread at Home into a busy schedule!
What if my dough doesn’t double in size during the first rise?
Oh, the dreaded flat dough! Usually, this just means your water wasn’t warm enough to properly wake up the yeast, or maybe your yeast packet was old. If you waited a full hour and nothing is happening, try gently warming a small amount of extra water (like 1/4 cup) and gently stirring it into the dough, then move the bowl someplace warmer—like on top of your just-turned-off oven. The dough should perk up!
Is this recipe suitable for making Simple Sandwich Bread?
Yes, it makes a fantastic, slightly hearty Simple Sandwich Bread! If your main goal is a soft crust for school lunches or daily use, just skip the steam pan during baking. That steam is what makes the crust super crunchy. Without the steam, you get a loaf that’s beautifully golden on the outside but still wonderfully soft and chewy inside. It’s perfect for dipping in tuna poke bowls or just butter!
Nutritional Estimates for Classic Italian Baking
Now, look, I’m Isabella, not a registered dietitian, so please take these numbers with a grain of salt—maybe even a scoop of olive oil! These figures are just general estimates based on my ingredient list for a typical slice of this italian bread. Since everyone cuts their slice differently, these numbers will fluctuate wildly, but it gives you a nice ballpark idea. If you’re interested in some healthier sweet treats, you might want to check out my protein ice cream recipe later on, but for now, here is the breakdown based on a standard serving:
- Serving Size: 1 slice (approximate)
- Calories: 150
- Fat: 2 grams (mostly heart-healthy monounsaturated fats from the olive oil!)
- Saturated Fat: 0.3 grams
- Carbohydrates: 30 grams
- Fiber: 1.5 grams
- Protein: 5 grams
- Sugar: 0.5 grams (That’s why you need a good sauce!)
- Sodium: 250 mg
This is rustic, comforting bread, not a low-carb specialty item, and that’s okay! It tastes amazing, and we know exactly what went into making it, which is a victory in itself.
Share Your Crusty Italian Bread Creations
Now that you’ve filled your kitchen with the best smells known to humankind, the mission is complete! However, my door is always open here at Chefsily. I absolutely *live* for hearing how your loaf turned out. Did you stick with the steam pan for that ultra-crispy shell, or did you let it stay softer for easy slicing?
Don’t be shy! Head down to the comments section right now and tell me everything. Rating this italian bread recipe helps other nervous bakers see how achievable this truly is. Did you manage that deep golden brown crust bread we talked about? If you snapped a picture of your beautiful, fresh-from-the-oven masterpiece—especially if you dunked it into some great bruschetta chicken—please share it with me! We are all about building confidence in the kitchen together, and seeing your success fuels my passion for sharing these family favorites.
If you ever need to get in touch about a recipe or want to share a simple change you made, you can always reach out through my contact page. Now go enjoy that chewy loaf, and remember to check out how others achieved their crust perfection here!
PrintEasy Crusty Homemade Italian Bread
Bake bakery-style Italian bread at home. This recipe yields a loaf with a golden, crunchy crust and a soft, chewy interior using simple pantry ingredients.
- Prep Time: 20 min
- Cook Time: 35 min
- Total Time: 2 hours 5 minutes
- Yield: 1 large loaf 1x
- Category: Bread
- Method: Baking
- Cuisine: Italian
- Diet: Vegetarian
Ingredients
- 3 1/2 cups all-purpose flour
- 1 1/2 teaspoons salt
- 1 teaspoon granulated sugar
- 2 1/4 teaspoons active dry yeast (1 packet)
- 1 1/2 cups warm water (about 105-115°F)
- 2 tablespoons olive oil, plus more for the bowl
Instructions
- In a large bowl, mix the warm water, sugar, and yeast. Let this stand for 5 to 10 minutes until the mixture becomes foamy.
- Add the flour, salt, and 2 tablespoons of olive oil to the yeast mixture. Mix with a wooden spoon until a shaggy dough forms.
- Turn the dough out onto a lightly floured surface. Knead the dough for 8 to 10 minutes until it is smooth and elastic.
- Lightly oil a clean large bowl with olive oil. Place the dough in the bowl, turning to coat. Cover the bowl with plastic wrap or a clean kitchen towel.
- Let the dough rise in a warm place for 1 to 1.5 hours, or until it has doubled in size. This is your first rise.
- Gently punch down the dough to release the air. Shape the dough into a tight loaf shape (oval or round).
- Place the shaped loaf on a baking sheet lined with parchment paper or in a prepared loaf pan. Cover loosely.
- Let the dough rise again for 30 to 45 minutes, or until it looks puffy. This is your second rise. Preheat your oven to 400°F (200°C) during the last 15 minutes of the second rise. For extra crust, place a shallow pan of water on the bottom rack to create steam.
- Lightly brush the top of the loaf with water or an egg wash for color. Score the top of the loaf with a sharp knife (two or three shallow diagonal cuts).
- Bake for 30 to 35 minutes, or until the crust is deep golden brown and the internal temperature reaches 200°F (93°C).
- Remove the bread from the oven and transfer it to a wire rack to cool completely before slicing.
Notes
- For a crispier crust, place a baking stone or inverted baking sheet in the oven while preheating.
- If you prefer a softer crust, skip adding the water pan for steam during baking.
- This bread is excellent for dipping in olive oil or serving with pasta meals.
Nutrition
- Serving Size: 1 slice
- Calories: 150
- Sugar: 0.5
- Sodium: 250
- Fat: 2
- Saturated Fat: 0.3
- Unsaturated Fat: 1.7
- Trans Fat: 0
- Carbohydrates: 30
- Fiber: 1.5
- Protein: 5
- Cholesterol: 0